Map of Rancho Coronado in Santo Domingo District for Cyberpunk 2077
Rancho Coronado Map in Santo Domingo District - Cyberpunk 2077

Detailed and revealed Map for Rancho Coronado Subdistrict located in Santo Domingo District for Cyberpunk 2077 Maps & Walkthrough (CP77).
Rancho Coronado Map in Santo Domingo District - Cyberpunk 2077

Fast Travel terminals

Main Jobs

Side Jobs

Gigs

Gun for Hire

Search and Recover

Thievery

Agent Saboteur

SOS: Merc Needed

Convoy

Reported Crime Clues

Reported Crime Location

Assault in Progress

Organized Crime

Cyberpsycho Sighting

Tarot Card

Vehicles

Drop Point

Clothing

Ripperdoc

Netrunner

Weapon Shop

Melee Vendor

Medpoint

Food

Bar

Joytoy

Junk Shop

Fixer

Apartment
Rancho Coronado is an game zone for players with 18-32 experience levels.
Some insist that Rancho Coronado is not a district of Night City, but in fact a little town situated at its edge. It could seem that way at first sight, with its identical townhouses reminiscent of the classic 20th century inner-city suburb, quaint stores, bars, a park, school and subway station. Sounds like the American dream, right? Well, that's exactly what the land and factory owners of Arroyo thought when they designed the neighborhood. Every building was intended for workers living near their respective plants. Corporations even made sure that Rancho Coronado had its own law enforcement, since the NCPD couldn't be relied on. Rancho Coronado now mostly houses middle and higher-ranking corporate employees from nearby factories and offices who wanted to get away from the city. Residents from other districts like to joke that it resembles more of a hamster cage – everyone in Rancho Coronado has everything they need in one place. You've got your wheel, your water, your food – what more could you ask for?
Main Jobs in Cyberpunk 2077 are quests related to the main plot of the game. You can check the order in which they appear on the diagram Main Jobs.
Side Jobs will appear with the completion of specific storyline Main Jobs or other Side Jobs. Some of the Side Jobs are closed episodes, others open up more Side Jobs. There are also important Side Jobs influencing the game endings called Major Side Job.
Do not reject any calls to Side Jobs so as not to close the storyline variants. You can check all Side Jobs and their availability on the Side Job List
Tune Up
Never been a fan of Rancho Coronado, personally. If you really gotta find a cab out there, just do it quick and get back into the city, OK?
The cab runs the streets in a circles in the middle of the district. Cab will not stop in one place, you have to follow it closely and talk to Cab. Cab has a flamingo problem. You have to destroy 8 flamingos on the roadways to the houses and talk to Cab again.
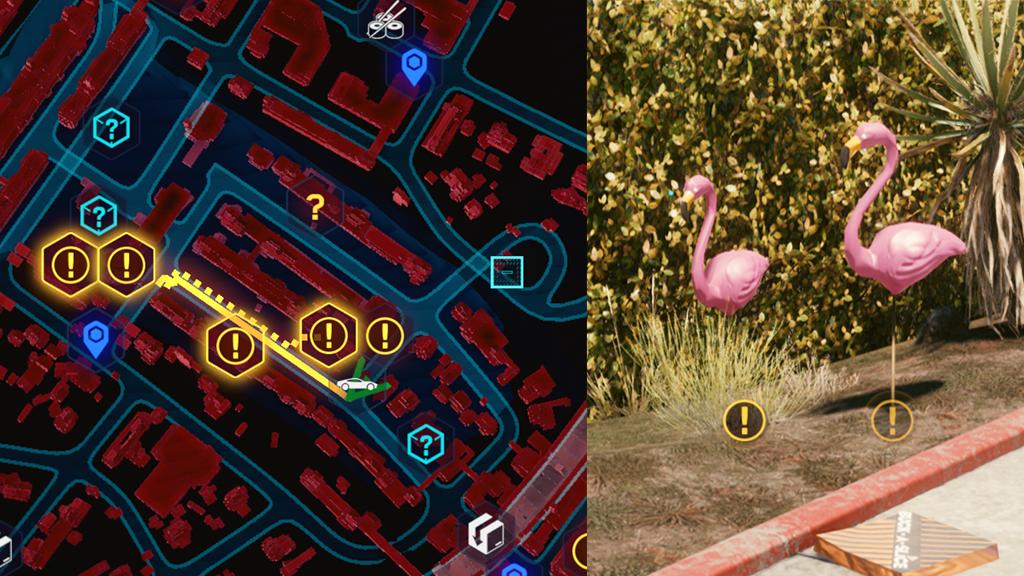
Flamingos Location for Epistrophy: Rancho Coronado
Playing for Time
Hey, if you wanna crash that party, I can respect that. Sometimes those parties kick the most ass. Just watch yourself – this ain't your uncle's birthday barbecue. One wrong word, one false step… there could be blood.
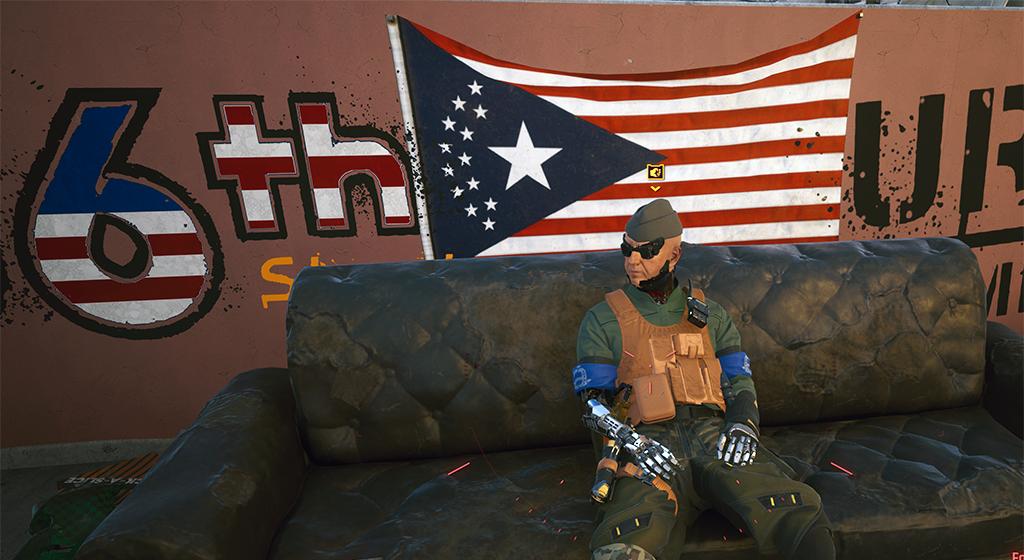
6th Street Leader for Stadium Love
Stadium Love is quite a difficult Side Job to do it 100% successfully. You must enter the shooting competition and win to get the grand prize. In order to win, you have to score the maximum number of points, i.e. in a certain time, during four attempts, shoot all the targets without missing any, and in addition you have to do it with a specific, imposed weapon.
If you fail, the Side Job will also end, and you can collect the main prize from the winner, while also remembering that you will have to kill a large group of enemies.
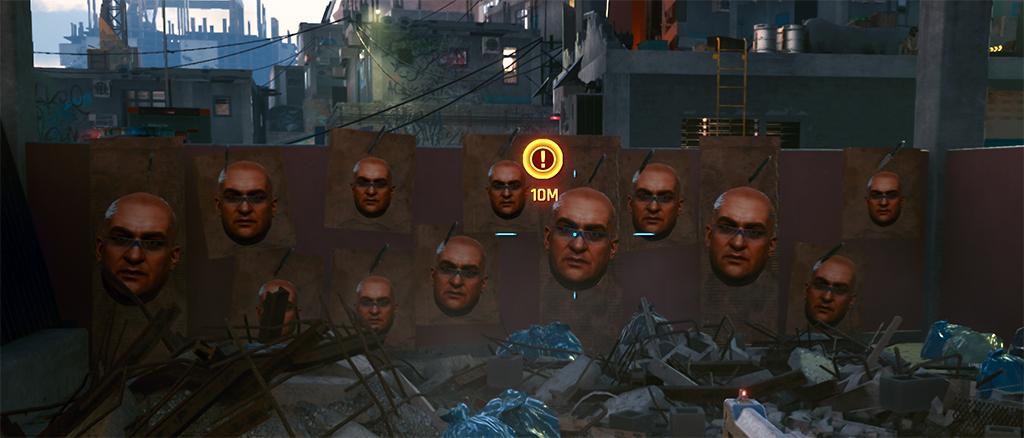
Targets for Stadium Love
Tips on how to successfully complete Stadium Love.
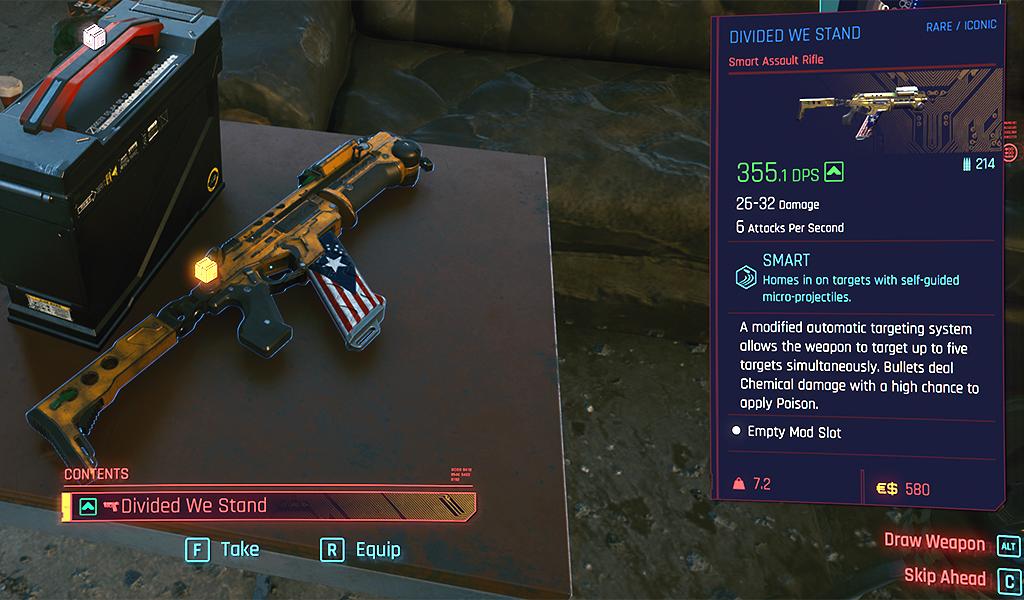
Divided We Stand for Stadium Love
Playing for Time
Every bum in this town dreams someday they'll hit the jackpot on something they dug up in a dumpster and it'll transform their life. A briefcase stuffed with eddies, a shard holding big company secrets, a cuttin' edge implant that'll pawn for a few dozen Gs. Problem is, usually whoever "misplaced" the thing to begin with is probably still lookin' for it – and they ain't in a good mood. Do these poor street rats a favor and take this case off their hands. Before the previous owner shows up and decides to make target practice out of 'em.
The Rescue
A fight in an Animals' club? Oof… feel sorry for you, I do. These guys play hard, V. It won't be easy… and it won't be fun.
Beat on the Brat: Rancho Coronado is connected with Gig: For my Son.
If you do Gig: For my Son in silent way, you can still fight Champions of the Animals.
If you do Gig: For my Son in violent way and kill all inside building, you will automatic win in Beat on the Brat: Rancho Coronado, so you dont need to fight. Just kill all and exit location. (if you got problems with killing Rhino, leave him alive and go out.
Major Side Job A Like Supreme +12h
A Like Supreme
Gig: Life’s Work + few days
Who ever said no to a free car? Not to mention it's a Quadra Turbo Fuckin' R. So quit picking your nose, head down to Rancho Coronado and get behind that wheel.
You will get free car for helping Jake Estevez.
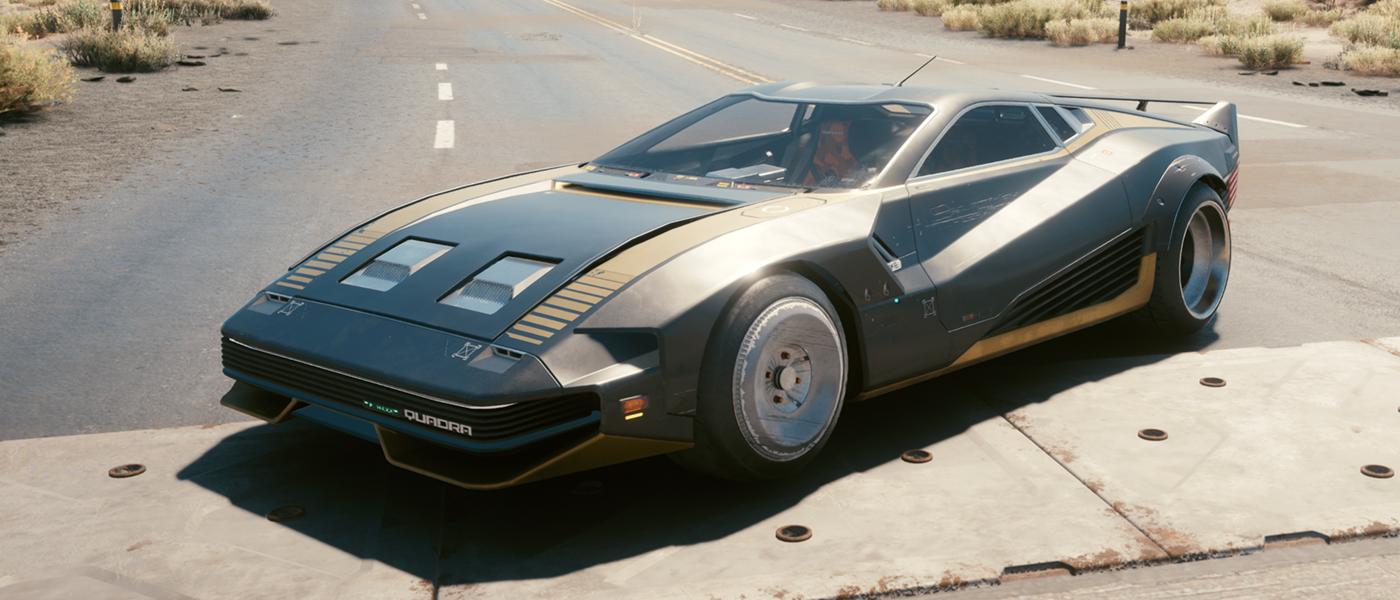
Quadra Turbo-R V-Tech
You get this car for free when you help Jake Estevez in Gig: Life's Work (in The Glen) and finish Sex On Wheels Side Job
The Ride
There's a still of some young guy in the garage – the heartbreaker type. Emails on the computer are from a certain James – don't have to be a genius to connect the dots. Might be worth looking for our Romeo – especially in Japantown. Got a feeling the still was snapped there. Wouldn't surprise me – kids go on dates there all the time. Shit... it always starts off so cute, doesn't it? Rarely ever ends that way.
Another mystery, another missing person in Night City. Used to be the cops would put out a search for people like her. Today, her fate's in your hands.
Enter the garage ... check the Youtube video Walkthrough below.
You got Nazaré "Itsumade" Bike as a reward.
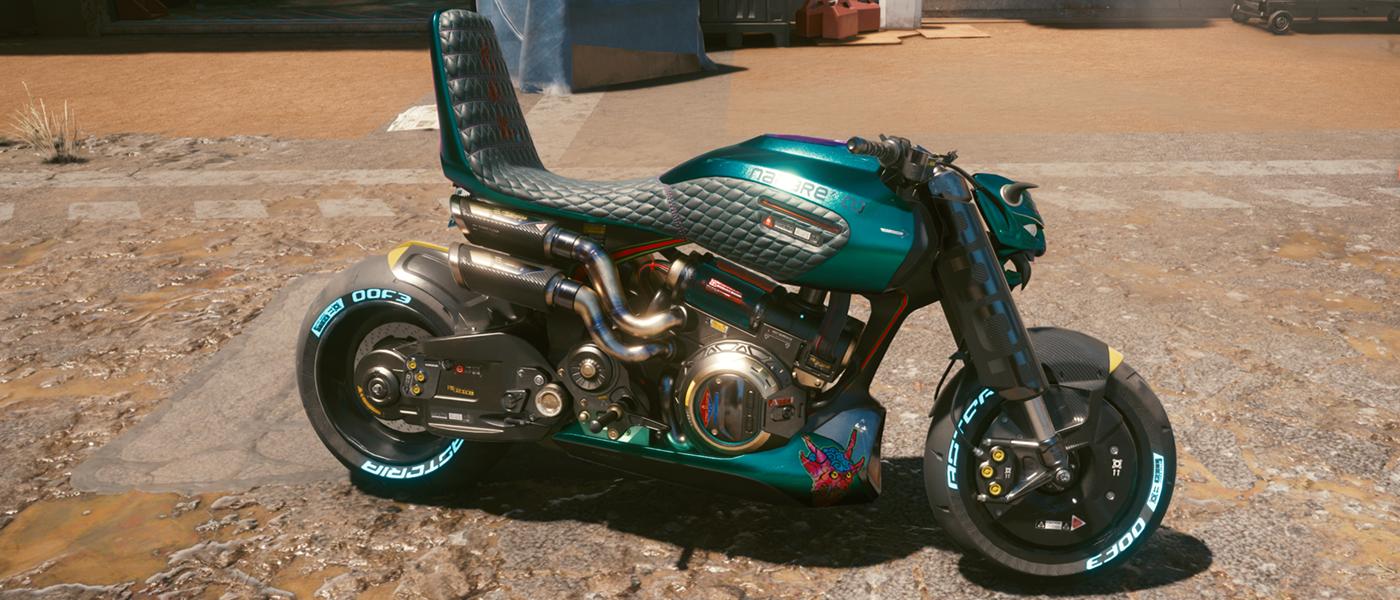
Nazaré 'Itsumade'
You get this bike for The Highwayman Side Job in Rancho Coronado
For more, check All Unique Weapons List.
Tech Sniper Rifle (have to be crafted)
Location: Rancho Coronado (South), boss in Suspected Organized Crime Activity
Base Weapon: Nekomata - Ricochet piercing projectiles.
Smart Assault Rifle
Location: Rancho Coronado, Side Job Stadium Love, shooting contest reward or looted from contest participants.
Base Weapon: D5 Sidewinder - Can target up to five enemies at once.
Gigs are additional tasks that you get from the Fixer in a given district. More Gigs spawn as your Street Cred Level increases. Gigs are not related to the main plot of the game but provide experience points, equipment and resources.
I like everyone to know I'm patient, understanding. I realize there's a time for work and a time for family. Without a good work-life balance we'd all blast our brains out. I get it, I do. But... disappearing for 2 weeks cuz of "family issues?" That how Juliet thinks of me? How much she respects me? I love her cuz she's ripped so much nova data outta Zetatech for me, but man she's starting to hurt my feelings, you know?
Go to her place, see what her deal is. But remember – #1 priority is that data she still owes me. Juliet's nova and all, but if she's got a problem with that, well... like I said, data is prio #1.
The chip is in a ground floor safe inside the house. You will find the way to open the safe in the basement, after killing Rose Horrington.
At first I thought it was just rumors and the kind of drunken bullshit you hear at a bar at 3 AM, y'know? But when you hear the same story from three separate witnesses, you start taking an interest. Now that my informant confirmed the accounts, it's time to dive into the action.
Look, I don't wanna sound like some naggy old crone, but back in my day workers knew how to stand up for themselves. Instead of fixers they had unions to fight for their rights. I know, I know. Anyway, now with the unions gone, these workers can't afford to hire fixers on starvation-level salaries. Lucky for them, I like to do some pro bono work from time to time. You know, a little something for the public good.
Onto the fine detes. Vincent Vega – the kind of scum who writes "cracking skulls" in the hobby section of his CV. Well, that's exactly what he's doing in Rancho Coronado. Cracking skulls. Not only that, but he's got the full backing of the corp execs, who'd rather give their workers brain damage instead of a 2% raise.
Vega and his people've been terrorizing the whole neighborhood. Workers've had enough – who the fuck wouldn't agree? You're gonna find Vic Vega and end that psycho for good. Maybe then the corpos'll realize they crossed the line.
The access card is on the Receptionist's desk, when you talk to her about other topics (Corpo), you will be able to get it.
Theoretically, the mission can be performed in hiding and bloodless, but I just failed and had to kill everyone in the building.
6th Street got shaken up with an internal coup, the boss took a bullet in the back of the head. The guy who filled his shoes was the same who pulled the trigger – they call him Gunner. The new bossman has unleashed a purge to rid the gang of all the people loyal to the last chief. My client, Flavio, is next in line to get shot and he'd very much like to skip town.
Already struck a deal with the nomads who agreed to ship him to the other coast. All you have to do is escort Flavio to the place their guide will pick him up. Little problem to note: there's already a price on our friend's head, so he's gotta watch it.
Sending you coords of where Flavio's holed up. You need to get there, load him into your ride, and deliver to the nomads ASAP. Keep your iron at the ready and don't forget to always check your mirrors. 6th St gave him a death sentence so any tails on his ass are likely to be hot.
If you kill all enemies, there will be no pursuit
I'm not a fan of badges. They stick there nose in other people's biz, give ordinary people a hard time, do the corps' bidding. But sometimes it's worth getting into bed with your enemies – at least they'll owe you something for later.
There's this badge, Jasmine Dixon. She's been patrolling NC streets since '61, reached the rank of sergeant. One day at the precinct she heard something she shouldn't've. Instead of keeping her mouth shut, she took it to her supervisor. The next day they wheeled her off to a psych ward. The kind where they prescribe lobotomies and electrotherapy.
Your job is to get her out of there, but she doesn't have any scratch. I'll spot her this time – she'll owe me a favor when I need one.
To sneak in undetected, after entering the hospital, use the door on the right and the ventilation passage.
If you want to solve it by force, it is important not to collect loot from the guards until you get the command "Take the guard's keys", then go back and search all the guards, one of them will have the keys.
Politics. Only thing slimier than the thongs at Licks. At least corpos usually tell you to your face how they're gonna screw you in the end. Fake smiles, impossible promises, shameless pandering – all foreplay till they fuck you in the ass and pay themselves for it with eddies outta your wallet. It's in their nature. And what's in ours? Blowing shit up. Got just such a gig for you this time.
6th Street's got a stiffy Jefferson Peralez so they have these servers pumping out anti-Holt propaganda. They see Peralez becoming mayor as like the second coming of Abraham Lincoln or some shit, here to unite the city with the NUSA. Naive gonks.
My client wants 6th Street's propaganda machine gone. Simple.
The servers are at the opposite end of the site to where you are entering.
Watch out for defensive turrets.
You ever watch the news? Personally, I think it's all propaganda. But that's just me. Still, people watch, and some people make the news.
My client's Ted Fox, an N54 reporter. He's doing a story on the link between gangs and corps. On paper, they're enemies, but in reality, seems like the corporats and gangoons are scratching each other's backs. Key word – seems. Ted needs hard evidence.
That's where you come in to save the day. Ted'll tell you exactly what you have to do, but be ready to get onto Kendachi factory grounds, poke around. All clear? Head on over to Ted. As they say in the media biz – it's showtime!
Target's name is one Logan Garcia. He runs an Animals fight club. Used to fight himself, actually. Still gets in the ring from time to time. Problem is he doesn't know when to put on the brakes. Recently he knocked his sparring buddy, Lenny Steiner, to the mat with a giant dent in his skull. Except instead of calling for help, he had the kid thrown in the bay with a cinderblock tied round his neck.
The kid's mom, Monica Steiner, wants justice for her sweet baby boy, Lenny. More importantly, she's willing to pay to get it. Do the job, it's yours. Minus my modest cut, of course.
This Gig can be performed in several ways, and it is also complicated by the fact that the Gig is connected to Side Job Beat on the Brat: Rancho Coronado.
My suggestion is as follows:
This is how I passed Gig: For My Son, without sneaking and moving the corpse, and at the same time I finished Beat on the Brat: Rancho Coronado, because I have no opponent to fight, becouse I kill everyone.
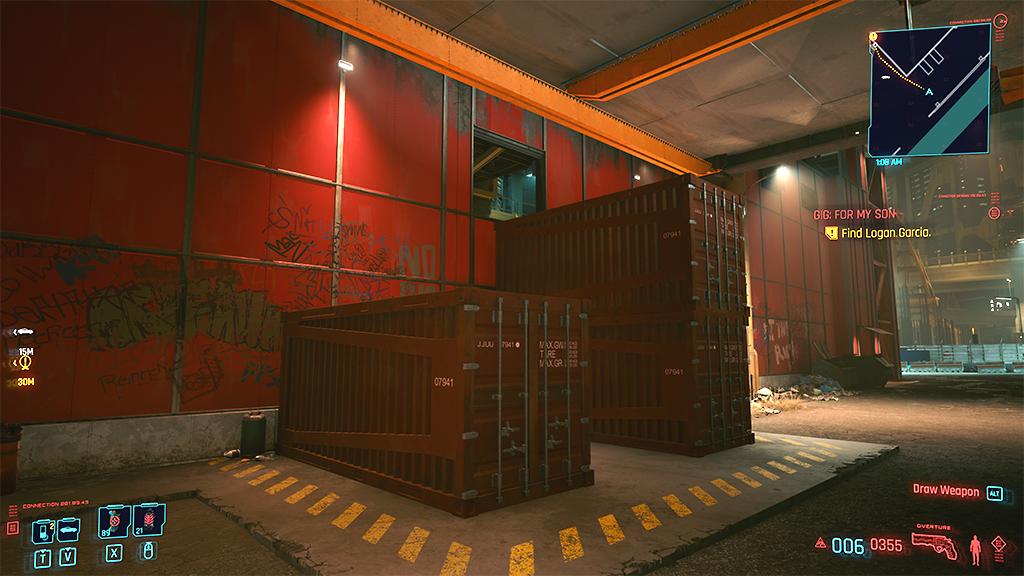
Climb containers for Gig: For My Son
Reported Crimes are NCPD Scanner Hustles in which you are looking for clues leading you to the next location where you are carrying out the task.
Looks like the prison guard was in 6th Street's pocket. Surprised? Me neither. But clearly something way bigger was being planned here. Wonder what went wrong.
In the place of "evidence" you have to check the files on the laptop.
The dead don't talk, but their money sure does. Check out the house on Mallagra. Mr. skunky scuba over here sure won't be needing those eddies anymore.
The stash is on the first floor, outside the house. To reach it, you have to climb a water tanker
Our Wraith dealer here chose the wrong market. He made, as they say, a deadly misstep. But now you can get something out of it, right V? Just check his stash.
See, V? Not everyone finds a new best friend in the dump. That samurai's not waking up anytime soon.
There are 17 Cyberpsycho Sighting in Cyberpunk 2077. Treat your opponents like Mini Bosses, choosing the right tactics for each one.
Working on a construction site has its perks: breeze on your face, sun on your shoulders, no creepy corpo smell and tangible results you can show off to the world. It's good, honest work. 'Course Night City's always got a way of fucking things up.
Read Messages on the terminal in the garage
Fast Travel is a way to travel fast in Cyberpunk 2077. If you discover a particular Dataterm by approaching it, you will be able to move there from any other Fast Travel point.
FT 01 San Amaro ST
FT 02 Rancho Coronado North
FT 03 Metro Rancho Coronado
FT 04 Mallagra & Mazanita
FT 05 Kendal Park
FT 06 Tama Viewpoint
FT 07 Rancho Coronado East
FT 08 Almunecar & Jerze
FT 09 Rancho Coronado South
FT 10 Piez
Recognizable locations in Rancho Coronado related to Cyberpunk 2077 Lore.
El Capitan has carved out a nice little place for himself by the beltway in Rancho Coronado with a view onto the dam. It's a secluded place, ideal for making deals that require discretion. If there's something you need to discuss with Capitan in person, he'll probably want to meet you there.
Access to Tarot Cards will become open to you (you will see them on the walls) at the beginning of Act 2, during the "Fool on the Hill" mission for Misty. You have to scan them with Scanner, check the location of all Cards on All Tarot Cards Location.
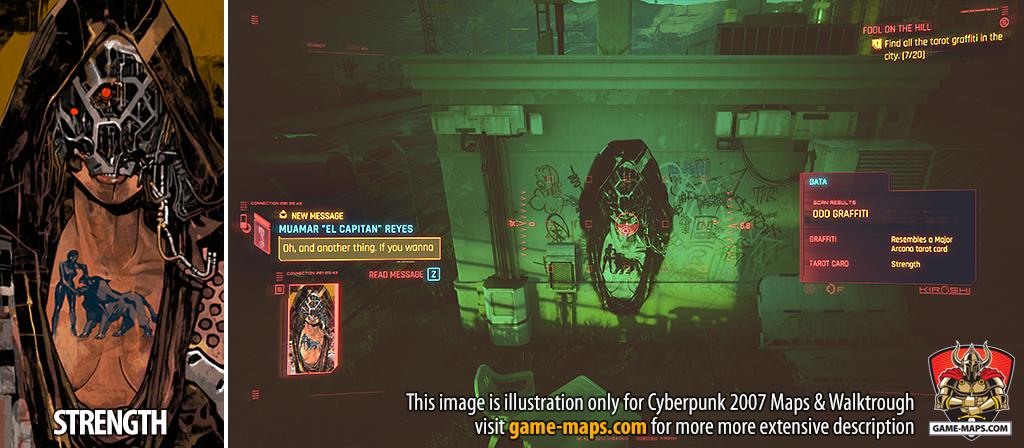
Strength - Cyberpunk 2077 Tarot Card
Strength of will, discipline and courage will always be rewarded...
Strength is the card of resilience. It is associated with determination, bravery and internal struggle. One must have dedication in order to overcome obstacles and reach one's goal. Strength is about physical prowess and spiritual fortitude – the power that must be unleashed to achieve the impossible.
Once you start Act 2, the fixer in the district will start sending you offers for cars that you can buy. Besides the amount you have to pay, it is sometimes up to your Street Cred to get an offer. You have to go to the place marked by the marker on the map and make the transaction.
For more check Full Car and Bike List.
Location: Rancho Coronado
Price: 58,000
Street Cred: 20
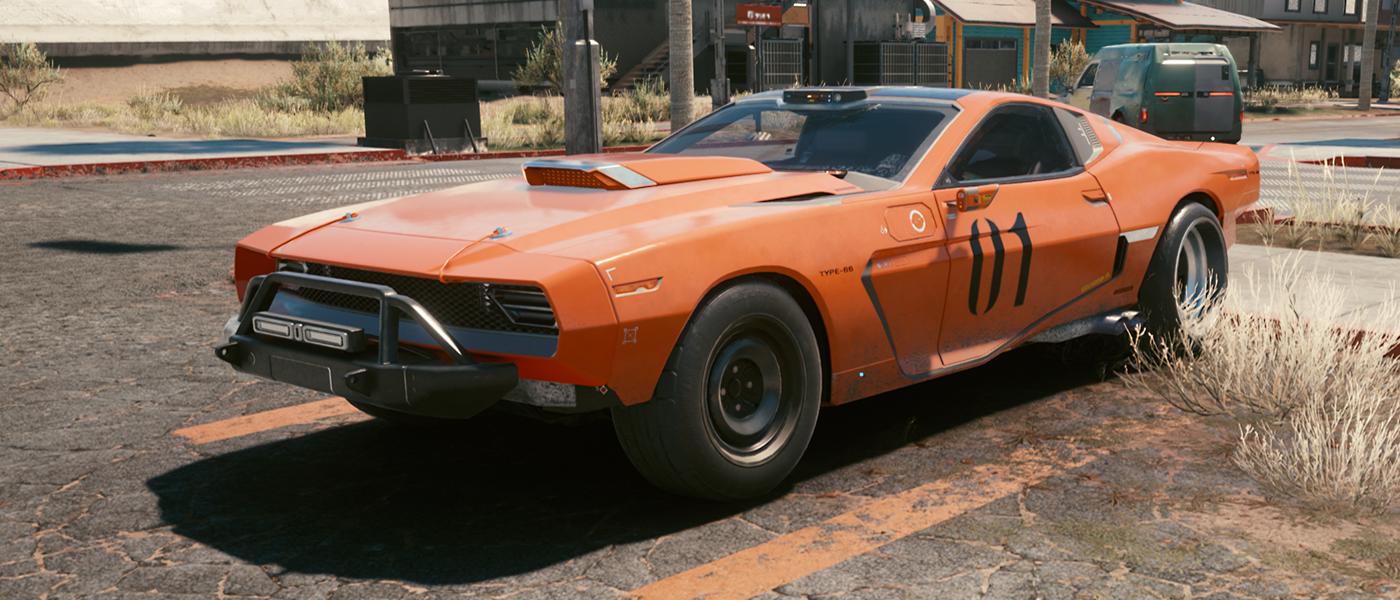
Quadra Type-66 640 TS
The Quadra Type-66 is faster than a bat out of hell. Breaking news? Hardly. Originally released in 2055, the Quadra was quickly adopted by edgerunners and illegal street racers. For the NCPD, a Quadra tearing up the streets means a long list of traffic violations, but rarely has a patrol car ever managed – or even tried – to pull one over.
Location: Rancho Coronado
Price: 43,000
Street Cred: 21
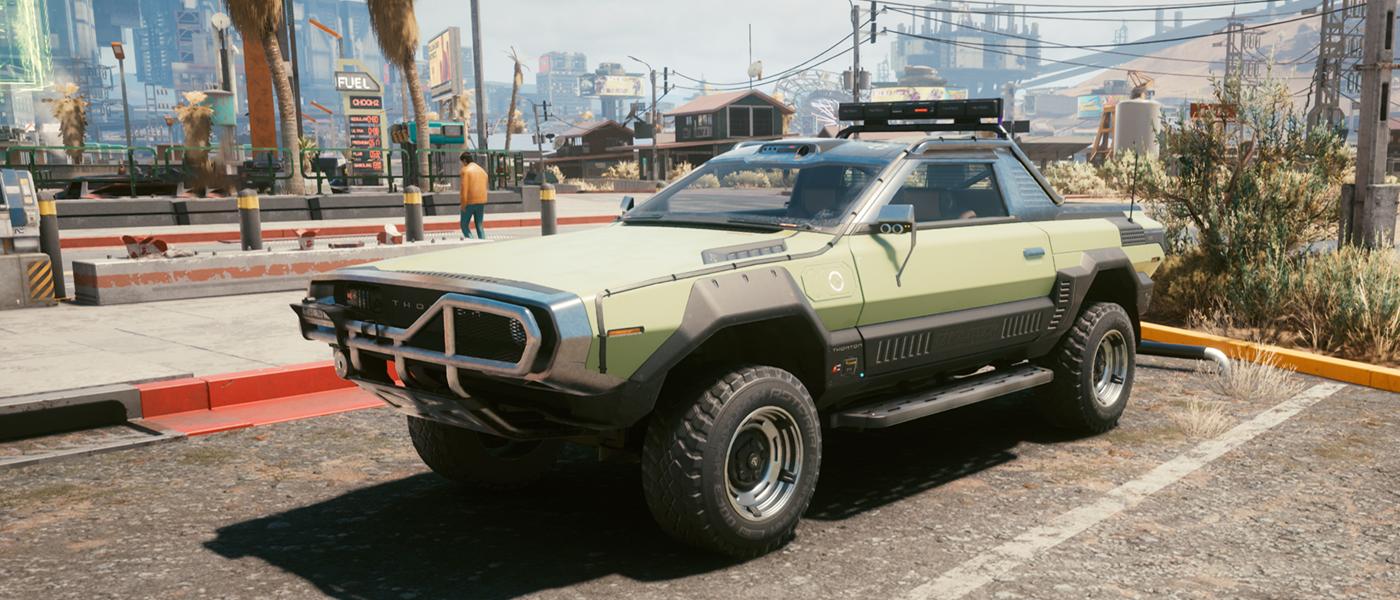
Thorton Colby CX410 Butte
How does the Butte differ from the base Colby? The most important difference: the standard trunk has been replaced with a pickup truck bed. It's found popularity among small business owners who use it to transport stock and among street thugs who find using a truck bed and tarp is more convenient than a car trunk for moving bodies.
