Map of Japantown in Westbrook District for Cyberpunk 2077
Japantown Map in Westbrook District - Cyberpunk 2077

Detailed and revealed Map for Japantown Subdistrict located in Westbrook District for Cyberpunk 2077 Maps & Walkthrough (CP77).
Japantown Map in Westbrook District - Cyberpunk 2077

Fast Travel terminals

Main Jobs

Side Jobs

Gigs

Gun for Hire

Search and Recover

Thievery

Agent Saboteur

SOS: Merc Needed

Convoy

Reported Crime Clues

Reported Crime Location

Assault in Progress

Organized Crime

Cyberpsycho Sighting

Tarot Card

Vehicles

Drop Point

Clothing

Ripperdoc

Netrunner

Weapon Shop

Melee Vendor

Medpoint

Food

Bar

Joytoy

Junk Shop

Fixer

Apartment
Japantown is an game zone for players with 10-20 experience levels.
Japantown, given its popularity with tourists, it's no wonder Japantown feels like it's constantly buzzing with life. Crowds occupy the local bars, upscale restaurants, arcades, the famous Cherry Blossom Market and especially the Shinto Shrine that's a must-see if you're in the area. Ever corner holds a luxurious backdrop for a perfect photo op – Japantown doesn't disappoint. So what's the catch, you might ask? Japantown can be expensive, especially its nighttime attractions. Corpos with fat credchips come here to play hard after a hard day's work with cash-liquid tourists right beside them. Local braindance clubs, casinos and bars are never short on customers. Just watch out for the Tyger Claws – they rule Japantown.
Main Jobs in Cyberpunk 2077 are quests related to the main plot of the game. You can check the order in which they appear on the diagram Main Jobs.
Prologue
Jackie Welles T-Bug
Virtual Tutorial Simulations.
Before Main Job The Rescue, Jackie Welles will give you a Training Shard, use it for 4 tutorials.
Better to be prepared than dead. The street can be brutally unforgiving, so a quick brush-up on combat skills certainly couldn’t hurt.
Prologue
Wakako Okada Jackie Welles Sandra Dorsett T-Bug
Hideout in Japantown
On behalf of Fixer, you are to rescue Sandra Dorsett from the implant dealers and eliminate the scavengers.
This Main Job will open a new Side Jobs.
Wakako Okada’s got us a gig. Fixer got an SOS call from one of her clients, Sandra Dorsett. All signs point to her having been plucked off the street by scavengers. Motherfuckers are in the biz of carving people up and selling their implants on the black market. Think it’s time we paid them a visit. Whaddaya say, ese?
ACT 2
Judy Alvarez Fingers Ripperdoc
Jig-Jig Street Fingers Clinic
Still looking for Evelyn Parker, you head to Jig-Jig Street to visit Fingers Ripperdoc at his clinic.
If I’ve learned one thing from joyhouses, it’s to quit while the going’s good. Stare at those fake smiles too long, and all you’ll see is misery. As far as clubs go they’re all pretty pathetic, but at least it’s in their own way. You know the chances of finding Evelyn are close to zilch, right? Like that’s gonna change your mind… Anyway, let’s go pay a visit to this so-called Fingers. But if we don’t find Parker, you owe me a drink.
ACT 2
Judy Alvarez Wakako Okada Evelyn Parker
Jig-Jig Street Old Power Plant in Charter Hill
Still looking for Evelyn Parker. Get XBD, analyze braindance with Judy, then drive to Old Power Plant in Charter Hill and rescue Evelyn from the underground of the building.
Every city's got its shady neighborhoods and "no-go" zones. Stepping into these areas in Night City is like wading into the abyss and feeling it stare back through your soul. Anyone with an ounce of sense avoids these haunts altogether. Your average gonk's usually seen limping out, bleeding from one or more places. And you, V? Just make sure you come out intact.
ACT 2
Goro Takemura Sandayu Oda Wakako Okada
Japantown Docks Jig-Jig Street
After phone call from Takemura, meet him at Japantown Docks to find out about his proposal.
If someone told me I'd be taking calls from Saburo Arasaka's fucking bodyguard, I'd've laughed in their face. And now we're supposed to meet with some Takemura? Hand over all our detes? I'm not even gonna pretend like this is a good idea. But fuck it - sometimes you just gotta go all in.
ACT 2
Goro Takemura
Market in Japantown Arasaka Industrial Park in Arroyo
Meet Goro Takemura and break with him into Arasaka Industrial Park to hack the float.
Our crazed ronin shows no signs of slowing his roll. We barely get intel from Wakako about the parade and Takemura's already hatching some hairbraned scheme in Japantown. He wants to meet at the market? Fine, let's parley, but you already know where I stand. Don't let him strong-arm you into anything. Who knows how many loose screws are bouncing around that skull at this point...
ACT 2
Goro Takemura Sandayu Oda
Arasaka's Funeral Parade in Japantown
Insure Takemur on his way to Hanako's platform, kill three snipers and eliminate Sandayu Oda.
Since I obviously wasn’t invited to Saburo Arasaka’s funeral, I guess this sad little parade will have to do – I’m just missing confetti. But in all seriousness, Takemura must have a death wish. He’s just gonna jump onto Hanako’s platform? Be my fucking guest – we’ll deal with the snipers. Meanwhile, keep an eye out for an escape route. This is gonna go all kinds of wrong – I can feel it.
Side Jobs will appear with the completion of specific storyline Main Jobs or other Side Jobs. Some of the Side Jobs are closed episodes, others open up more Side Jobs. There are also important Side Jobs influencing the game endings called Major Side Job.
Do not reject any calls to Side Jobs so as not to close the storyline variants. You can check all Side Jobs and their availability on the Side Job List
The Rescue
This is a legacy of Prologue: The Rescue Main Job, you are to claim your reward for this mission from Wakako.
Playing for Time
To activate it you have to find Street Musician on market area, north of Megabuilding H08.
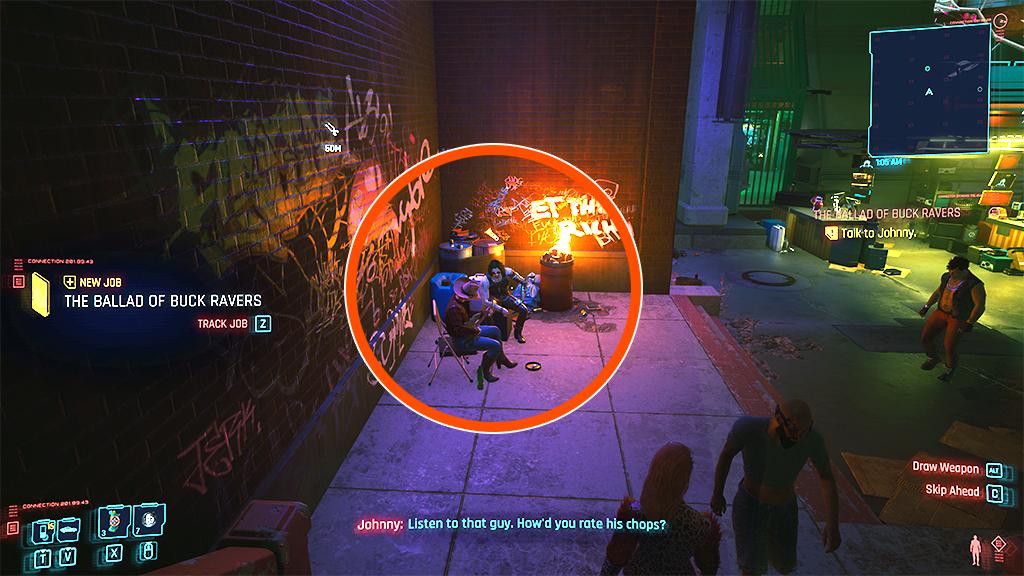
Street Musician for The Ballad of Buck Ravers
Don't think I've gone all sentimental or anything. Honestly, I couldn't give a shit if I've got any fans left in this city. If someone hears one of my tracks and they get the itch to take to the streets, then that's fuckin' nova, but those old recordings don't matter anymore. Find 'em, listen to 'em, I don't care. Although, while we're on the subject... Wonder how things are over at Rainbow Cadenza...
Automatic Love
No specific location.
4 times you have to talk to Johnny:
Playing for Time
To activate this side job you have to:
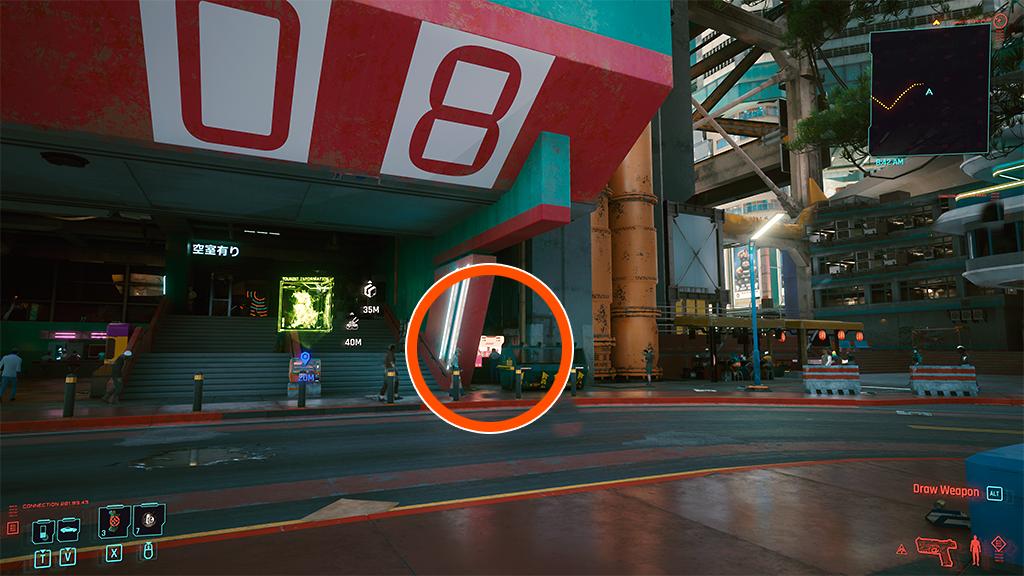
Location of Brendan for I Can See Clearly Now
Waiting until no one is standing by the vending machine, it may take more than a day. When no one is there, approach Brendan and talk to him pleasantly.
Brendan will ask you to "Move the dumpster".
When you move the container, the conversation will end.
You have to wait (more than a day) and go back to Brendan. You will see a girl talking to Brendan, this is Theo.
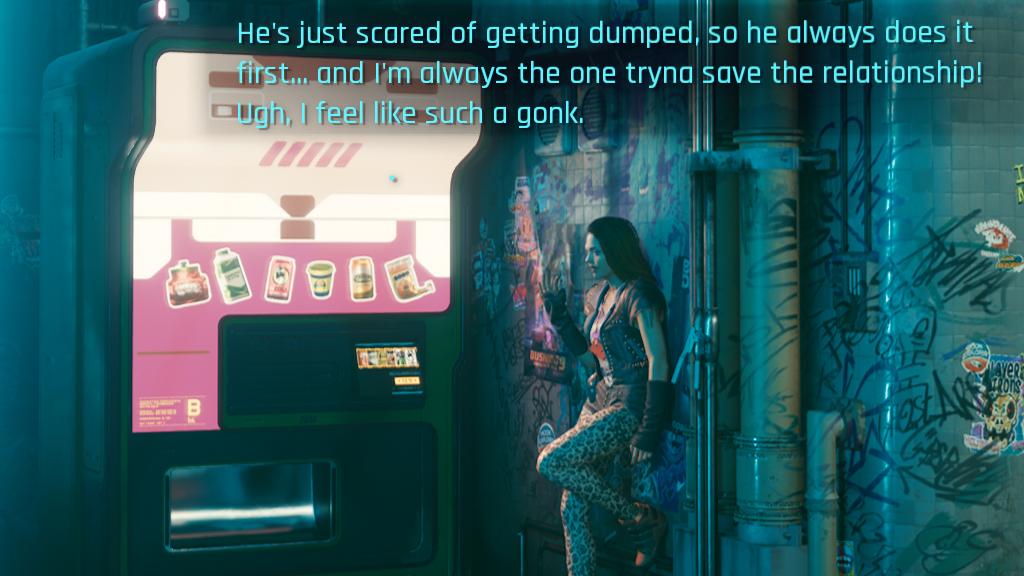
Theo talking to Brendan
After Theo leaves, talk to Brendan and wait another day.
Next: Spray Paint Side Job
I Can See Clearly Now +24h
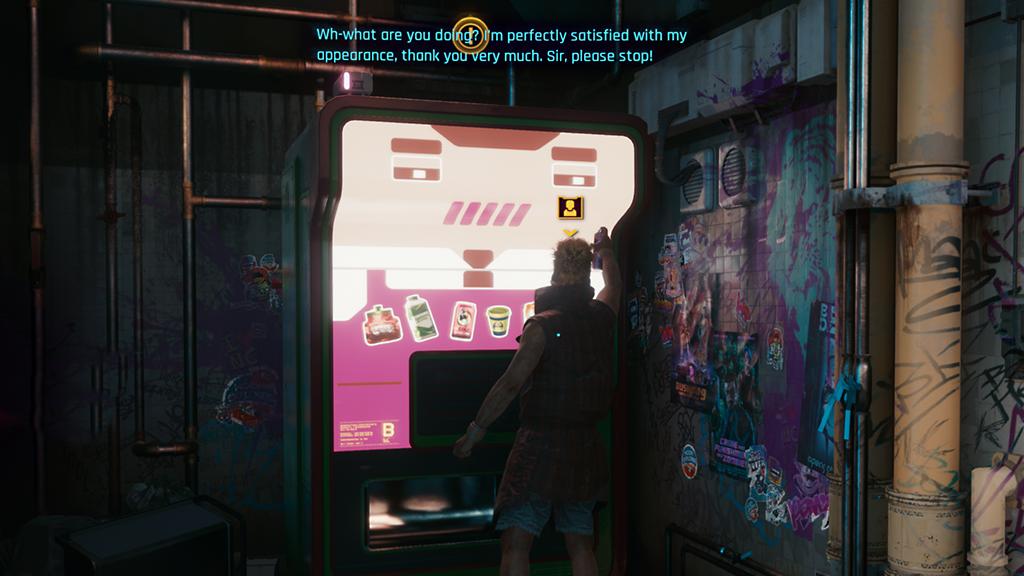
Vandal destroying Brendan
You see the vandal destroying Brendan. Stun him.
Talk to Brendan.
You must wait more than a day again and go back to Brendan.
Next: Coin Operated Boy Side Job
Spray Paint +24h
All right, so I'm feeling like a sucker for this story. Do you really think Brendan is just spitting out the sentences is was programmed for? The stuff some marketing guru thinks customers want to hear? That'd be pretty fucked even by Night City standards. In any case, we won't know until you find him.
When you come back to Brendan after a while, Brendan is gone. Instead, you will meet Theo, who desperately asks you for help.
You need to go to the Service Point in The Glen
Major Side Job Both Sides, Now +12h, call from Judy, +12h
Major Side Job Talking' 'Bout a Revolution +12h
Major Side Job I Don't Wanna Hear It +12h
I Fought the Law
Transmission
Sinnerman +12h
Imagine
Look at that, your Zen master has reappeared. Some advertising shtick, no doubt. Thing is, I don't know fuck all about what he's trying to sell you. Stay sharp around characters like him.
"Stairway To Heaven" it is second of 4 Side Jobs series related to Zen Master.
Side Jobs in order are:
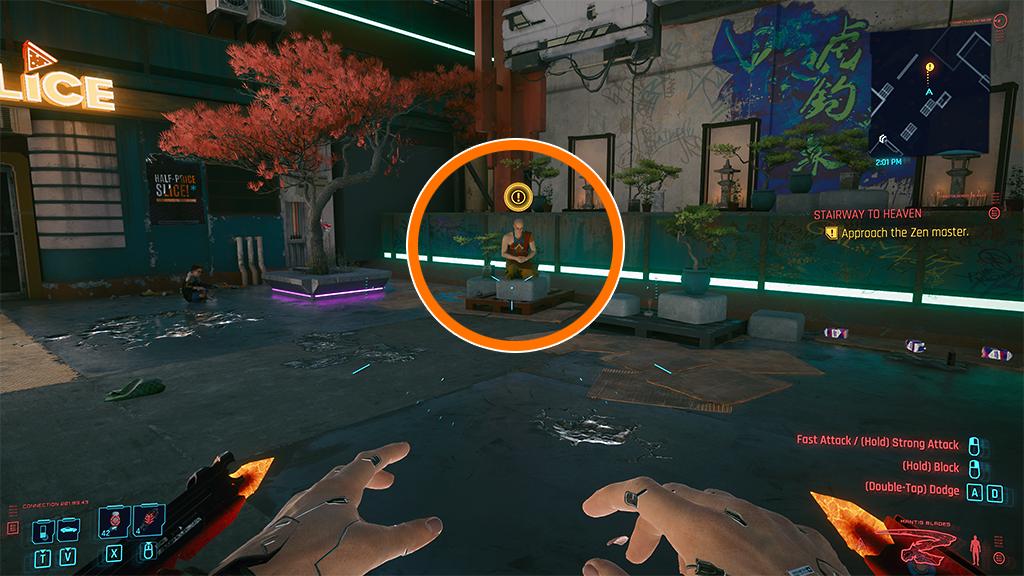
Zen Master in Japantown for Stairway To Heaven Side Job
Go to North Oak for "Poem Of The Atoms".
For more, check All Unique Weapons List.
Power Double-Barrel Shotgun (have to be crafted)
Location: Japantown, boss in Suspected Organized Crime Activity.
Base Weapon: DB-4 Igla - two rounds per shoot, reduced reload time.
Katana
Location: Japantown, Main Job Automatic Love, Clouds Club upstairs, makeup room
Base Weapon: Katana - High base damage.
Two-Handed Club
Location: Japantown, Main Job The Space In Between, Fingers bedroom.
Base Weapon: Electric Baton Gamma
Katana
Location: Japantown, Main Job Play it Safe, dropped by Oda
Base Weapon: Katana - While Kerenzikov cyberware is active Crit Chance 100%.
Katana
Location: Japantown, Side Job Pisces, in room where you meet Maiko.
Base Weapon: Katana - deals electrical damage and Shock, also increases electrical resistance.
Smart Pistol
Location: Japantown, Main Job Play it Safe, behind a closed door on way to second sniper.
Base Weapon: HJKE-11 Yukimura - Fires four rounds per shot, larger magazine size, up to six targers.
Grenade
Location: Japantown, Side Job Send in the Clowns Reward.
Base Weapon: Frag Grenade - high damage.
Gigs are additional tasks that you get from the Fixer in a given district. More Gigs spawn as your Street Cred Level increases. Gigs are not related to the main plot of the game but provide experience points, equipment and resources.
For years, I worked to get jobs done comfortably, with a crew I hand-picked myself. I chose Chang-Hoon Nam years ago, and he hasn't let me down once. I don't know what happened to him, but you must get him back. Check the basement in that Chinese place. He keeps his gear there, sometimes takes a side gig or two. I think he's still alive - if he weren't, he's the type who'd come back as a ghost and apologize, just like in those tales from the old country that make me want to puke. He's sentimental like that.
When going down to the basement, disarm the trap. Find Chang lying in the chair, check his condition, check the nearby terminal and read the message.
In the darkness, find the first red lamp and go towards it, the lamp will go out, go to the next lamp. So follow the path in the dark. Open the grate in the floor and keep going until you find Netrunner's Shard. Return from the shard to Chang. Slot the shard in Chang Hoon Nam's neural port.
Sergei Karasinsky called. He's a solo who, like my husband, acts before he thinks. It's a personal characteristic that always leads to the same thing sooner or later - trouble. Fortunately for us, Sergei is not only a man who acts without thinking but a panicked one at that. This means the pay is good and almost literally flying out of his account into ours.
Sergei is waiting for you at Silk Road. You will meet him there and pick up the peace offering he would like delivered to the Tyger Claws. He can't do this himself because he's recently been added to their blacklist.
The boy believes this small token will help the Tygers find forgiveness in their hearts for his terrible mistake.
The plot is that you will deliver "package" to the Tyger Claws, if you do so the Fixer will be satisfied.
You can free the man trapped in the trunk, but doing so will result in a violent ending.
Old sins cast long shadows. And Bradley Costigan is guilty of many. As a result, he not only found himself in prison, but also invited trouble into the life of his wife, Lauren Costigan. It's your task to help her.
When Bradley landed a spot behind bars, he was contacted by old acquaintances in the Tyger Claws. Shiv some snitches, they said. He said no.
Tygers don't like that word. They kidnapped his wife and sent stills as proof. No great surprise, Bradley began to cooperate. But he also remembered me. He's promised payment and I believe he's desperate enough to be good for it.
My people have already tracked where the stills were taken. Once you have the coordinates, set to work immediately.
Lauren is in the basement of the garage, your safest bet is to kill everyone inside the walls before you rescue her.
A great treasure can turn out to be a great curse. Remember that, V.
One of the fences in my territory, Leah Gladen, came into possession of some highly valuable equipment - a lockbreak device capable of jailbreaking corp cyberware (some call it a CorpCracker). This tech opens doors for suits who want out but don't want to lose function of corp-issued chrome or are looking to make an extra eddie by selling secondhand.
Leah wasn't born yesterday. She knows what the tech is worth. She and I went back and forth, long price negotiations. We were close to reaching a deal when all contact was lost.
Your job is to find out what happened to Leah - but more importantly to get that skeleton key for me. Don't bother reporting back until you have it. Don't waste time.
Used to be 8ug8ear and the Tygers got along. They were supposed to work a Kiroshi warehouse job together, but she left them out to dry - remotely drove out a van packed with high-end gear and abandoned them inside. Certain death. But those Tygers are a tough crew, you know how stubborn they can be. The next day they pull up to her apartment wanting to know where she stashed the tech. 8ug8ear was desperate, escaped to the Net, shrouded herself in soft that'd flatline her if they tried to disconnect her. Of course now they just have to watch the clock tick. Eventually, 8ug8ear will have to come out or risk frying her own synapses. And the Tygers are patient, especially in matters of revenge. Personally, I think they like it more this way.
Get 8ug8ear out of there and give word - I'll send transport. But remember to disconnect her safely. She's useless to me dead.
Reported Crimes are NCPD Scanner Hustles in which you are looking for clues leading you to the next location where you are carrying out the task.
Choom wanted to grab someone's data, got himself burned. Clear? BURNED. But seriously - it could be worth checking the coords from his gear. Chooms like him usually have some nice toys.
You have to jump on the roof to do that, first jump on the booth nearby and jump to the small roof. Search the corpse of Dante lying on the yellow roof on the first floor level.
Then go to the garage north near Redwood Market.
Dealer torn up by hungry junkies. It happens. So, what'll it be, V? Wanna see what they got in that stash of theirs? Might just get something outta this.
Loot Jacobs body, then go to garage near Skyline & Salinas, kill enemies and loot stash.
There are 17 Cyberpsycho Sighting in Cyberpunk 2077. Treat your opponents like Mini Bosses, choosing the right tactics for each one.
Fast Travel is a way to travel fast in Cyberpunk 2077. If you discover a particular Dataterm by approaching it, you will be able to move there from any other Fast Travel point.
FT 01 Megabuilding H08
FT 02 Cherry Blossom Market
FT 03 Silk Road West
FT 04 Crescent & Broad
FT 05 Redwood Market
FT 06 Metro Japantown South
FT 07 Dark Matter
FT 08 Fourth Wall Studios
FT 09 Metro: Monroe ST
FT 10 Sagan & Diamond
FT 11 Japantown West
FT 12 Skyline & Salinas
FT 13 Capitola ST
Recognizable locations in Japantown related to Cyberpunk 2077 Lore.
Japantown isn't just restaurants with signs in kanji and nightclubs playing J-lazrpop. It's a hub for Japanese culture, a home for those with strong connections to the land of the rising sun – both material and spiritual. Many visit this shrine to learn more about Japanese tradition or to simply take a break from the rat-race of the city.
Located on Jig-Jig Street in Japantown, this pachinko parlor is said to belong to Wakako Okada. She claims she just uses the backroom as an office, but since the old fixer always controls everything and everyone around her, it's hard to believe she's not calling the shots here too.
Though the crown for the most colorful market goes to the Chinese community in Kabuki, Japantown is a serious contender. The Cherry Blossom Market isn't just in constant bloom with pink-and-white flowers from which the market gets its name, but also limitless possibilities for shopping and business. Open day and night.
Every city needs its red light district, does it not? Night City has Jig-Jig Street, located in a section of Japantown where not only can you buy love by the hour, but also encounter suspect dealers offering exotic, rare and very illegal wares. Jig-Jig Street doesn't have a reputation for being safe – it's not uncommon to enter with your wallet and leave with a black eye and empty pockets. But in spite of its reputation, it's popular with corpos who like to get their game on before venturing deeper into the city's many attractions.
An established braindance studio with years of industry experience, Fourth Wall owns a large recording complex in Japan Town. The studio has become famous for its controversial documentaries and reality shows scrolled using the latest braindance technology.
One of the priciest and most technologically advanced dollhouses in Night City. Clouds offers you an experience tailored to your deepest desires – desires you might not even be aware of. First you jack into the system, then your fantasies and preferences are scanned, and finally the data is automatically transferred to the most suitable doll who eagerly fulfills them. The doll is controlled by a chip, which means they aren't aware of what happens in the session and their memory is wiped every time.
Dollhouses are frequented not only by people with your run-of-the-mill fetishes, but also those who are antisocial or cripplingly shy.
Wakako has an office in the backroom of a pachinko parlor on Jig-Jig Street. By day, the parlor's relatively quiet, with biz picking up at night. But Wakako's den is always an old-school oasis of calm, refined elegance.
Access to Tarot Cards will become open to you (you will see them on the walls) at the beginning of Act 2, during the "Fool on the Hill" mission for Misty. You have to scan them with Scanner, check the location of all Cards on All Tarot Cards Location.
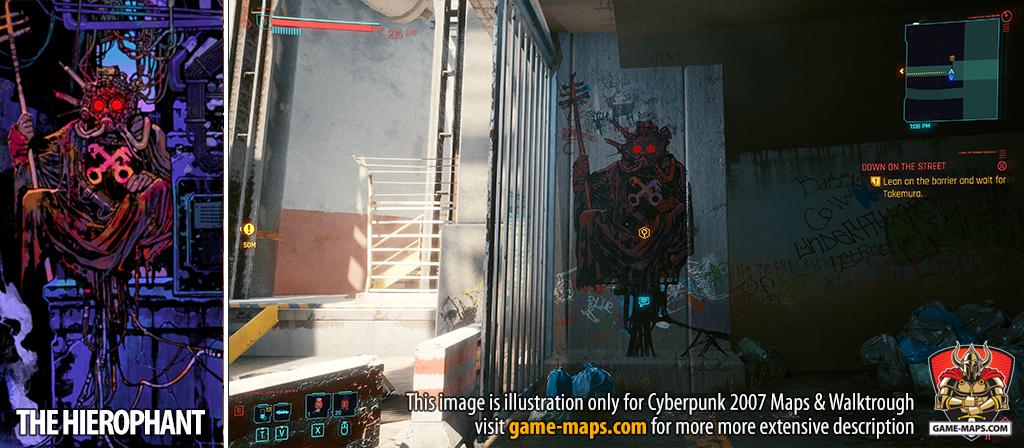
The Hierophant - Cyberpunk 2077 Tarot Card
He brings crisis, both of life and authority, rebellion and fanaticism... He is a grave threat.
The Hierophant symbolizes a respect for tradition. It represents one who tries to maintain the established order, even though their very character is shaped by it. The Hierophant places his faith in institutions – for the alternative is pure chaos. Only by placing his faith in order can he draw strength.
Once you start Act 2, the fixer in the district will start sending you offers for cars that you can buy. Besides the amount you have to pay, it is sometimes up to your Street Cred to get an offer. You have to go to the place marked by the marker on the map and make the transaction.
For more check Full Car and Bike List.
Location: Japantown
Price: 22,000
Street Cred: 12

Yaiba Kusanagi CT-3X
The Yaiba Kusanagi CT-3X is the fastest, and unsurprsingly, the most expensive motorcycle, originally built in collaboration with the Arasaka Corporation. Its sleek, aerodynamic frame conceals a wickedly powerful engine. Ideally, anyone riding one should be chipped with reflex boosters to avoid flying into a traffic light at 100MPH when making a sharp turn. The Kusanagi is a favorite among gangers, especially the Tyger Claws.