Dungeons Map Hogwarts Legacy
Dungeons Map for Hogwarts Legacy

Dungeons Map for Hogwarts Legacy, Dungeons is in The Astronomy Wing region of Hogwarts Castle with location of Floo Flames, Secrets, Puzzles, NPC, Quests, Field Guide Pages, Conjurations, Wand Handles, Chests and Legendary Chest, Demiguise Statues, Daedalian Keys, Moths, Hogwarts Legacy Maps, Walkthrough & Guide.
Dungeons Walkthrough Hogwarts Legacy
Dungeons is located in The Astronomy Wing of Hogwarts Castle in Hogwarts Legacy.
- Dungeons
- Muggle Studies
- Alchemy Class
- Werewolf Room
- Map Chamber
Summary for Dungeons
1
![]() Floo Flames
Floo Flames
1
![]() Exits
Exits
5
![]() Revelio Pages
Revelio Pages
1
![]() Flying Pages
Flying Pages
1
![]() Braziers Pages
Braziers Pages
1
![]() Levioso Pages
Levioso Pages
1
![]() Wand Handles
Wand Handles
2
![]() Daedalian Keys
Daedalian Keys
2
![]() House Cabinet
House Cabinet
2
![]() Lock 1 Level
Lock 1 Level
1
![]() Lock 2 Level
Lock 2 Level
1
![]() Legendary Chest
Legendary Chest
5
![]() Chest
Chest
1
![]() Eyeball Chest
Eyeball Chest
1
![]() Demiguise Statue
Demiguise Statue
The Map Chamber
Floo Flames Location
Exit to North Hall in The Bell Tower Wing
Secret Passage
Teleport Frog
Quests in Dungeons
M19 Main Quest
The Map Chamber
Story Chapter: Complete the First Keeper Trial
Prerequisite: In the Shadow of the Undercroft completed
Required Level: 10 lvl
Starting Location: Dungeons in The Astronomy Wing
Now that Professor Fig has returned, I'm excited to show him the missing pages and the secret map chamber I found below the school.
I took Professor Fig to the Map Chamber and introduced him to the portrait of Professor Rackham. We placed the book on a pedestal and it brought to life an extraordinary map of Hogwarts and the surrounding areas. Professor Rackham explained that the map will show us the first of four trials that I must complete. Professor Fig is going to scout ahead to see what could be waiting for us. I must admit, I'm both excited and apprehensive for what lies ahead.
M28 Main Quest
Back on the Path
Story Chapter: Prepare For Your Search For the Final Keeper
Prerequisite: The High Keep completed
Required Level: 18 lvl
Starting Location: Map Chamber
Professor Fig is in the Map Chamber. I should speak to him about recent events.
I met with Professor Fig in the Map Chamber and updated him on my dealings with Lodgok. The portrait of Charles Rookwood advised me that the next trial is at his former residence, Rookwood Castle. I told Professor Rookwood that his descendant, Victor Rookwood, is a Dark wizard. He was incensed and needs me to go to the castle. He says there is something beneath it that Victor Rookwood and the goblins cannot find. I'm to go there and complete the trial and view Professor Rookwood's Pensieve memory. Then he'll tell me more.
M33 Main Quest
The Headmistress Speaks
Story Chapter: Stop Ranrok and Rookwood
Prerequisite: It's All Gobbledegook and In the Shadow of the Mine completed
Required Level: 23 lvl
Starting Location: Dungeons
I spoke to Professor Fitzgerald in the Map Chamber. She’s directed me to the next trial, in the Headmaster’s office. Professor Fig will know what to do next.
M38 Main Quest
San Bakar's Trial
Story Chapter: Prepare for Your O.W.L.S.
Prerequisite: Lodgok’s Loyalty completed
Required Level: 24 lvl
Starting Location: Dungeons, Map Chamber
It's time to share with the Keepers what I've learned about Ranrok and his plans.
I met Fig at the location revealed to us by Professor Bakar’s portrait. We deduced that only a Graphorn could open the passage to the Pensive chamber. I found a Graphorn called the ‘Lord of the Shore and tamed the terrifying beast. I rode it to the chamber and its presence unlocked the door. Inside, San Bakar’s Pensive memory revealed the terrible truth: Isidora was experimenting on Hogwarts students. The Keepers confronted her and the resulting battle killed her. I returned to the Map Chamber and the Keepers said I have the materials to build a unique wand that will open the final repository. I am to ask Mr Ollivander to construct the wand. Is this the beginning of the end?
Quest Reward: Graphorrn Mount
M40 Main Quest
The Final Repository
Story Chapter: Stop Ranrok
Prerequisite: Wand Mastery completed
Required Level: 24 lvl
Starting Location: Dungeons, Map Chamber
Mr. Ollivander fashioned a wand from the Keepers' artefacts. Now to return with it to the Map Chamber.
The professors and I defeated Ranrok, but not before he broke open the Repository and exploited its power. Professor Fig sacrificed his life to help me repair the Repository and contain its contents.
Revelio Field Guide Pages
Revelio Field Guide Pages in Dungeons.
085
Urn of Ashes
Revelio Field Guide Page
This particular urn is rumoured to have once borne the inscription: 'Pioneer in Dragon Taming. Should not have started with the Hungarian Horntail.'
086
Werewolf Saga Tapestries
Revelio Field Guide Page
This set of tapestries tells the tragic tale of a witch bitten by a werewolf. She chose to flee from her home to protect her infant daughter and husband. Rumour has it that her daughter fell asleep to the howl of a wolf for years thereafter.
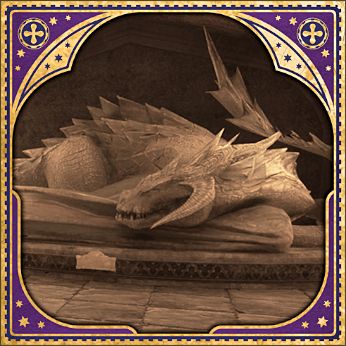
087
Sleeping Dragon Statue
Revelio Field Guide Page
The Hogwarts motto 'Draco Dormiens Nunquam Titillandus' means 'Never Tickle a Sleeping Dragon.' Fortunately, this particular sleeping dragon is made of stone and will never awaken. It may be tickled to absolutely no effect.
088
Important Muggle Artefact
Revelio Field Guide Page
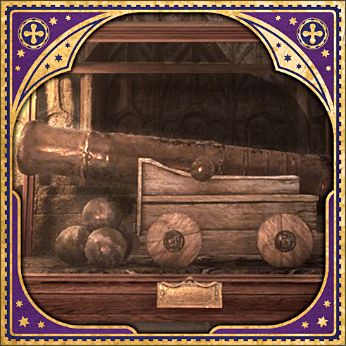
This misunderstood artefact is supposedly important to Muggle warfare, though most of wizardkind find the prospect of wielding such a hefty - weapon? - utterly head-scratching.
089
Alchemy Class
Revelio Field Guide Page
An arcane subject offered to older students on the rare occasion when demand suffices, Alchemy focuses on the four natural elements and the science of transmutation.
Dungeons Map Legend
Castle maps have a different set of icons and descriptions than The Highlands maps in Hogwarts Legacy.
Field Guide Pages (not Revelio)
Flying Field Guide Pages, they float in the air, you see them as flying pages, you have to attract them with the Accio spell.
Braziers Field Guide Pages are invisible and are located in braziers in the shape of dragons. You must light a fire in the brazier, at close range with Incendio or, at long range, with Confringo.
Levioso Field Guide Pages, are invisible and hidden in the statues, the figure of a man holding a sphere in one hand and a wand in the other. You must cast Levioso on the statue.
Lumos Painting Field Guide Pages are hidden in empty paintings with moths on frames. You need to cast Lumos, see what is in the painting, go to that location and use Lumos to lure the Moth to the frame.

Main Quests

Side Quests

Relationship Quests

Professor's Assignments
Conjurations
Decorations and gameplay stations conjured in the Room of Requirement. Conjuration spellcrafts can be found in collection chests and purchased in Hogsmeade. Some are also hidden near butterflies and in Vivariums.
Wand Handles
Cosmetic alterations applied to your wand via the Gear Menu. Wand handles are primarily found in collection chests throughout the world.

Moths
Cast Revelio, Cast Lumos and lure Moth to proper Lumos Painting
Daedalian Keys
Daedalian Keys are for "The Daedalian Keys" Side Quest for open House Chests with House Tokens. Each key opens a specific House Cabinet.
House Cabinet
Can be unlock with proper Daedalian Key, for "The Daedalian Keys" Side Quest.
Lock 1 Level, you need Alohomora on Level 1 to unlock it.
Lock 2 Level, you need Alohomora on Level 2 to unlock it.
Lock 3 Level, you need Alohomora on Level 3 to unlock it.
Ordinary Treasure Chest
Ordinary Locked Treasure Chest - you need to cast Alohomora unlock it
Eyeball Chests, this chest is watching you, you must approach it using the Disillusionment spell
Legendary Chest, contains a random Legendary Gear based on your experience level
Lore Note
Demiguise Statues
You can start to collect Demiguise Statues after "The Caretaker's Lunar Lament" Main Quest, they are needed for upgrade Alohomora spell.
Dungeons Entrance
Astronomy Tables
You will require "Astronomy Class" Main Quest to use it.
User Comments
All your comments, suggestions and corrections are very welcome. Your experience helps other players. Each comment will be read and the information contained therein used to improve the content of this page. Thank You.