Clock Tower Map Hogwarts Legacy
Clock Tower Map for Hogwarts Legacy

Clock Tower Map for Hogwarts Legacy, Clock Tower is in The South Wing region of Hogwarts Castle with location of Floo Flames, Secrets, Puzzles, NPC, Quests, Field Guide Pages, Conjurations, Wand Handles, Chests and Legendary Chest, Demiguise Statues, Daedalian Keys, Moths, Hogwarts Legacy Maps, Walkthrough & Guide.
Clock Tower Walkthrough Hogwarts Legacy
Clock Tower is located in The South Wing of Hogwarts Castle in Hogwarts Legacy.
Summary for Clock Tower
1
![]() Floo Flames
Floo Flames
3
![]() Exits
Exits
1
![]() Revelio Pages
Revelio Pages
1
![]() Flying Pages
Flying Pages
1
![]() Braziers Pages
Braziers Pages
1
![]() Levioso Pages
Levioso Pages
1
![]() Lumos Painting
Lumos Painting
2
![]() Conjuration
Conjuration
1
![]() Wand Handles
Wand Handles
2
![]() Daedalian Keys
Daedalian Keys
1
![]() House Cabinet
House Cabinet
2
![]() Lock 1 Level
Lock 1 Level
1
![]() Legendary Chest
Legendary Chest
4
![]() Chest
Chest
1
![]() Locked Chest
Locked Chest
1
![]() Eyeball Chest
Eyeball Chest
Clock Tower Courtyard
Floo Flames Location
Exit to Clock Tower Courtyard
Exit to Griffindor Tower
Exit to Hospital Wing
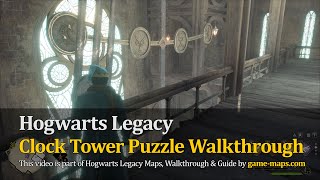
Clock Tower Puzzle
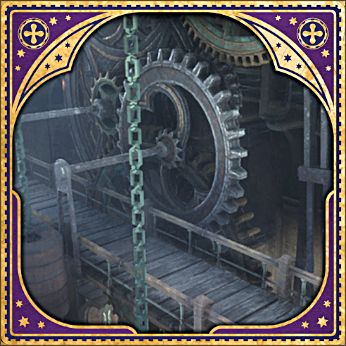
The Clock Tower has 4 magically closed doors (P1, P2, P3 and P4), on different floors of the tower, each of them is with a magical symbol. Clock Tower Puzzle consists in getting to each of the 4 closed rooms.
Standing at the ground level, you see a large clock pendulum hanging from the ceiling. There are 4 symbols on the ground under the pendulum, the same one that you will find the door. When the pendulum passes over a given symbol, the door with such a sign opens.
To open the door with a given symbol, you need to stop the pendulum with Arresto Momentum or Glacius over a specific symbol on the floor.
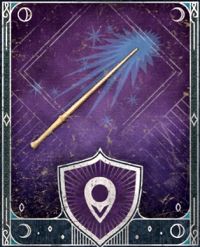
First Door
for Clock Tower Puzzle
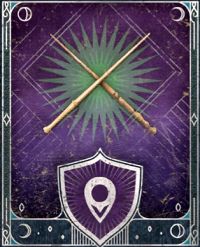
Second Door
for Clock Tower Puzzle
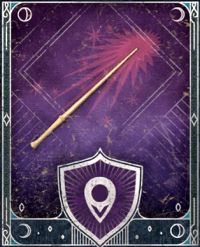
Third Door
for Clock Tower Puzzle
Fourth Door
for Clock Tower Puzzle
Quests in Clock Tower
S02 Side Quest
Crossed Wands: Round 1
Prerequisite: Defence Against The Dark Arts Class completed
Required Level: 1 lvl
Starting Location: Clock Tower
Quest Giver: Lucan Brattleby
I should speak with Lucan Brattleby about the secret dueling club.
I won my first round of Crossed Wands and it was exhilarating. I noticed that Levioso works well against opponents with yellow shields so I should keep that in mind for future battles. I still need to win another round to complete this part of Professor Hecat's assignment. I wonder if I should fight with Sebastian or Natty? Or should I try to go it alone? That would surely get people talking.
S07 Side Quest
Crossed Wands: Round 2
Prerequisite: Crossed Wands: Round 1 and Professor Hecat’s Assignment 1 completed
Required Level: 4 lvl
Starting Location: Clock Tower
Quest Giver: Lucan Brattleby
I should check in with Lucan Brattleby and see if another round of Crossed Wands is available.
I just won my second round of Crossed Wands. During my match I learned that violet shielded opponents were vulnerable to Accio, so I should keep that in mind for future battles. This practice also completes the duelling part of Professor Hecat's assignment. I'm finally starting to feel more comfortable with the spells I've learned. Duelling like this keeps you on your toes.
S08 Side Quest
Spell Combination Practice 1
Prerequisite: Professor Hecat’s Assignment 1 completed
Required Level: 4 lvl
Starting Location: Clock Tower
Quest Giver: Lucan Brattleby
I should speak with Lucan Brattleby about Spell Combination.
S10 Side Quest
Crossed Wands: Round 3
Prerequisite: Crossed Wands: Round 2 and Tomes and Tribulations completed
Required Level: 5 lvl
Starting Location: Clock Tower
Quest Giver: Lucan Brattleby
The final round of duelling is available at Crossed Wands. It will determine the champion of the school. I should see Lucan Brattleby.
I did it, I won the final round of Crossed Wands! It was a tough fight, but it feels good to be able to come out on top. All and all this has been great practice for learning all sorts of different spell combinations and when to use them.
Quest Reward: Crossed Wands Champion Garb
S15 Side Quest
Spell Combination Practice 2
Prerequisite: Spell Combination Practice 1 and Tomes and Tribulations completed
Required Level: 7 lvl
Starting Location: Clock Tower
Quest Giver: Lucan Brattleby
The Crossed Wands club meets regularly in the Clock Tower. I should be able to find Lucan Brattleby there.
Revelio Field Guide Pages
Revelio Field Guide Pages in Clock Tower.
002
Clock Mechanics
Revelio Field Guide Page
While the moving gears of the clock tower's inner mechanics serve as a deterrent to many, others find the privacy offered by the cogs and wheels appealing.
Clock Tower Map Legend
Castle maps have a different set of icons and descriptions than The Highlands maps in Hogwarts Legacy.
Field Guide Pages (not Revelio)
Flying Field Guide Pages, they float in the air, you see them as flying pages, you have to attract them with the Accio spell.
Braziers Field Guide Pages are invisible and are located in braziers in the shape of dragons. You must light a fire in the brazier, at close range with Incendio or, at long range, with Confringo.
Levioso Field Guide Pages, are invisible and hidden in the statues, the figure of a man holding a sphere in one hand and a wand in the other. You must cast Levioso on the statue.
Lumos Painting Field Guide Pages are hidden in empty paintings with moths on frames. You need to cast Lumos, see what is in the painting, go to that location and use Lumos to lure the Moth to the frame.

Main Quests

Side Quests

Relationship Quests

Professor's Assignments
Conjurations
Decorations and gameplay stations conjured in the Room of Requirement. Conjuration spellcrafts can be found in collection chests and purchased in Hogsmeade. Some are also hidden near butterflies and in Vivariums.
Wand Handles
Cosmetic alterations applied to your wand via the Gear Menu. Wand handles are primarily found in collection chests throughout the world.

Moths
Cast Revelio, Cast Lumos and lure Moth to proper Lumos Painting
Daedalian Keys
Daedalian Keys are for "The Daedalian Keys" Side Quest for open House Chests with House Tokens. Each key opens a specific House Cabinet.
House Cabinet
Can be unlock with proper Daedalian Key, for "The Daedalian Keys" Side Quest.
Lock 1 Level, you need Alohomora on Level 1 to unlock it.
Lock 2 Level, you need Alohomora on Level 2 to unlock it.
Lock 3 Level, you need Alohomora on Level 3 to unlock it.
Ordinary Treasure Chest
Ordinary Locked Treasure Chest - you need to cast Alohomora unlock it
Eyeball Chests, this chest is watching you, you must approach it using the Disillusionment spell
Legendary Chest, contains a random Legendary Gear based on your experience level
Lore Note
Demiguise Statues
You can start to collect Demiguise Statues after "The Caretaker's Lunar Lament" Main Quest, they are needed for upgrade Alohomora spell.
Dungeons Entrance
Astronomy Tables
You will require "Astronomy Class" Main Quest to use it.
User Comments
All your comments, suggestions and corrections are very welcome. Your experience helps other players. Each comment will be read and the information contained therein used to improve the content of this page. Thank You.