Faculty Tower Map Hogwarts Legacy
Faculty Tower Map for Hogwarts Legacy

Faculty Tower Map for Hogwarts Legacy, Faculty Tower is in The South Wing region of Hogwarts Castle with location of Floo Flames, Secrets, Puzzles, NPC, Quests, Field Guide Pages, Conjurations, Wand Handles, Chests and Legendary Chest, Demiguise Statues, Daedalian Keys, Moths, Hogwarts Legacy Maps, Walkthrough & Guide.
Faculty Tower Walkthrough Hogwarts Legacy
Faculty Tower is located in The South Wing of Hogwarts Castle in Hogwarts Legacy.
Summary for Faculty Tower
1
![]() Floo Flames
Floo Flames
4
![]() Exits
Exits
4
![]() Revelio Pages
Revelio Pages
1
![]() Flying Pages
Flying Pages
1
![]() Braziers Pages
Braziers Pages
1
![]() Conjuration
Conjuration
2
![]() Wand Handles
Wand Handles
1
![]() Daedalian Keys
Daedalian Keys
1
![]() House Cabinet
House Cabinet
3
![]() Lock 1 Level
Lock 1 Level
2
![]() Lock 2 Level
Lock 2 Level
1
![]() Lock 3 Level
Lock 3 Level
1
![]() Legendary Chest
Legendary Chest
12
![]() Chest
Chest
1
![]() Locked Chest
Locked Chest
7
![]() Lore Note
Lore Note
Faculty Tower
Floo Flames Location
Exit to Gryffindor Tower
Exit to Hospital Wing
Exit to Grand Staircase
Exit to Gryffindor Common Room
Hidden Room Entrance
Use Glacius Spell to extinguish the fire in the fireplace and go inside.

Youtube: Faculty Tower Secret Room
Use Glacius Spell to extinguish the fire in the fireplace and go inside.
YouTube: Faculty Tower Secret RoomToad Teleportation Statue
He will take you to a hidden room above.
Gladwin Moon, at night, he will send you Owl Post with meeting request.
Quests in Faculty Tower
M23 Main Quest
The Caretaker's Lunar Lament
Story Chapter: Prepare For Your Search For the Final Keeper
Prerequisite: Percival Rackham’s Trial completed
Required Level: 14 lvl
Starting Location: Faculty Tower
Gladwin Moon, the Hogwarts caretaker, wishes to speak with me about something. I should find him near the Reception Hall.
I met with the Caretaker, Gladwin Moon, and he believes there's a plot to torment him with Demiguise statues placed all over Hogwarts and Hogsmeade. The Caretaker wants me to collect the moons from these statues which will make them disappear. He's a bit of an irrational fellow and seems overly fearful of these statues. He's asking for my help. He says he'll teach me additional techniques with Alohomora if I bring him more moons. It's important that I remember that I can only collect them at night.
Quest Reward: Alohomora Spell Level 1


S20 Side Quest
The Man behind the Moons
Prerequisite: The Caretaker’s Lunar Lament completed
Required Level: 11 lvl
Starting Location: Faculty Tower
Quest Giver: Gladwin Moon
Mr Moon will teach me a more advanced form of Alohomora once I find all the Demiguise statues. I should search Hogwarts, Hogsemeade and any hamlets for the statues. I can only collect the moons from the statues at night.
I was able to retrieve all of the Demoguise Moons Mr Moon asked me to find so that he would teach me two advanced versions of Alohomara. I should be able to unlock any locks that require the spell now. In addition, Mr Moon mentioned there may be more statues that I should look for. Ultimately, I discovered found (sic) the culprit behind the prank – a Mr Piers Pemberton, an old classmate of Mr Moon's who was repaying him for bullying when they were young.
Quest Reward: Alohomora Spell Level 2 & Alohomora Spell Level 3
Revelio Field Guide Pages
Revelio Field Guide Pages in Faculty Tower.
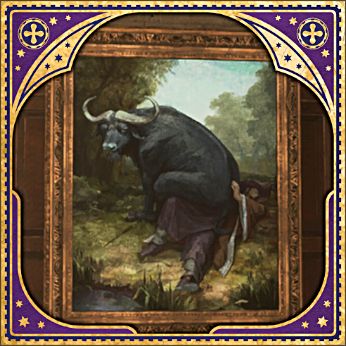
006
Portrait of Baruffio
Revelio Field Guide Page
This portrait depicts the wizard Baruffio, famed for his Brain Elixir and as an example of what happens when incantations are improperly spoken: he once said 's' instead of 'f' and found himself on the floor with a buffalo on his chest.
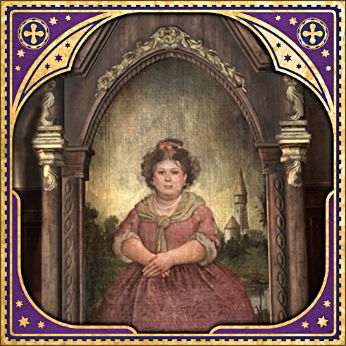
007
Fat Lady Portrait
Revelio Field Guide Page
This portrait guards the Gryffindor common room, requiring a password from any who wish to enter. She and her friend Violet are known to wander among the other portraits, periodically helping themselves to vats of wine therein.
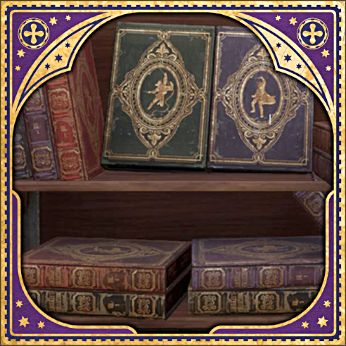
008
Adventure Novel Set
Revelio Field Guide Page
Sketched inside the cover of this old, slightly worn set of serialised adventure novels is what looks like a gazelle. Perhaps the novels were a gift to Professor Onai or her daughter Natsai.
009
Jewel-Encrusted Tortoise Shell
Revelio Field Guide Page
Many assume this to be the shell of a Fire Crab, native to Fiji. However, those in the know swear it's a bejewelled tortoise shell created by a mad wizard near Versailles. When his chateau was overrun by Nifflers, the dazzling shell was carried off to be discovered years later by a Hogwarts professor on holiday in the Ardennes.
Wizarding Crackers Notice
Lore Note
Letter to Fig from the Minister
Lore Note
Letter from Sirona Ryan
Lore Note
Note from Miriam
Lore Note
Letter from Ronan's Wife
Lore Note
Letter from a Friend
Lore Note
Potions Shop List
Lore Note
Arithmancy Door Puzzle

Arithmancy Study Guide Page
A page torn from an Arithmancy study guide that contains a list of numbers assigned to various magical beasts.
Faculty Tower Map Legend
Castle maps have a different set of icons and descriptions than The Highlands maps in Hogwarts Legacy.
Field Guide Pages (not Revelio)
Flying Field Guide Pages, they float in the air, you see them as flying pages, you have to attract them with the Accio spell.
Braziers Field Guide Pages are invisible and are located in braziers in the shape of dragons. You must light a fire in the brazier, at close range with Incendio or, at long range, with Confringo.
Levioso Field Guide Pages, are invisible and hidden in the statues, the figure of a man holding a sphere in one hand and a wand in the other. You must cast Levioso on the statue.
Lumos Painting Field Guide Pages are hidden in empty paintings with moths on frames. You need to cast Lumos, see what is in the painting, go to that location and use Lumos to lure the Moth to the frame.

Main Quests

Side Quests

Relationship Quests

Professor's Assignments
Conjurations
Decorations and gameplay stations conjured in the Room of Requirement. Conjuration spellcrafts can be found in collection chests and purchased in Hogsmeade. Some are also hidden near butterflies and in Vivariums.
Wand Handles
Cosmetic alterations applied to your wand via the Gear Menu. Wand handles are primarily found in collection chests throughout the world.

Moths
Cast Revelio, Cast Lumos and lure Moth to proper Lumos Painting
Daedalian Keys
Daedalian Keys are for "The Daedalian Keys" Side Quest for open House Chests with House Tokens. Each key opens a specific House Cabinet.
House Cabinet
Can be unlock with proper Daedalian Key, for "The Daedalian Keys" Side Quest.
Lock 1 Level, you need Alohomora on Level 1 to unlock it.
Lock 2 Level, you need Alohomora on Level 2 to unlock it.
Lock 3 Level, you need Alohomora on Level 3 to unlock it.
Ordinary Treasure Chest
Ordinary Locked Treasure Chest - you need to cast Alohomora unlock it
Eyeball Chests, this chest is watching you, you must approach it using the Disillusionment spell
Legendary Chest, contains a random Legendary Gear based on your experience level
Lore Note
Demiguise Statues
You can start to collect Demiguise Statues after "The Caretaker's Lunar Lament" Main Quest, they are needed for upgrade Alohomora spell.
Dungeons Entrance
Astronomy Tables
You will require "Astronomy Class" Main Quest to use it.
User Comments
All your comments, suggestions and corrections are very welcome. Your experience helps other players. Each comment will be read and the information contained therein used to improve the content of this page. Thank You.