Floodmoor Basin Map for Borderlands 3
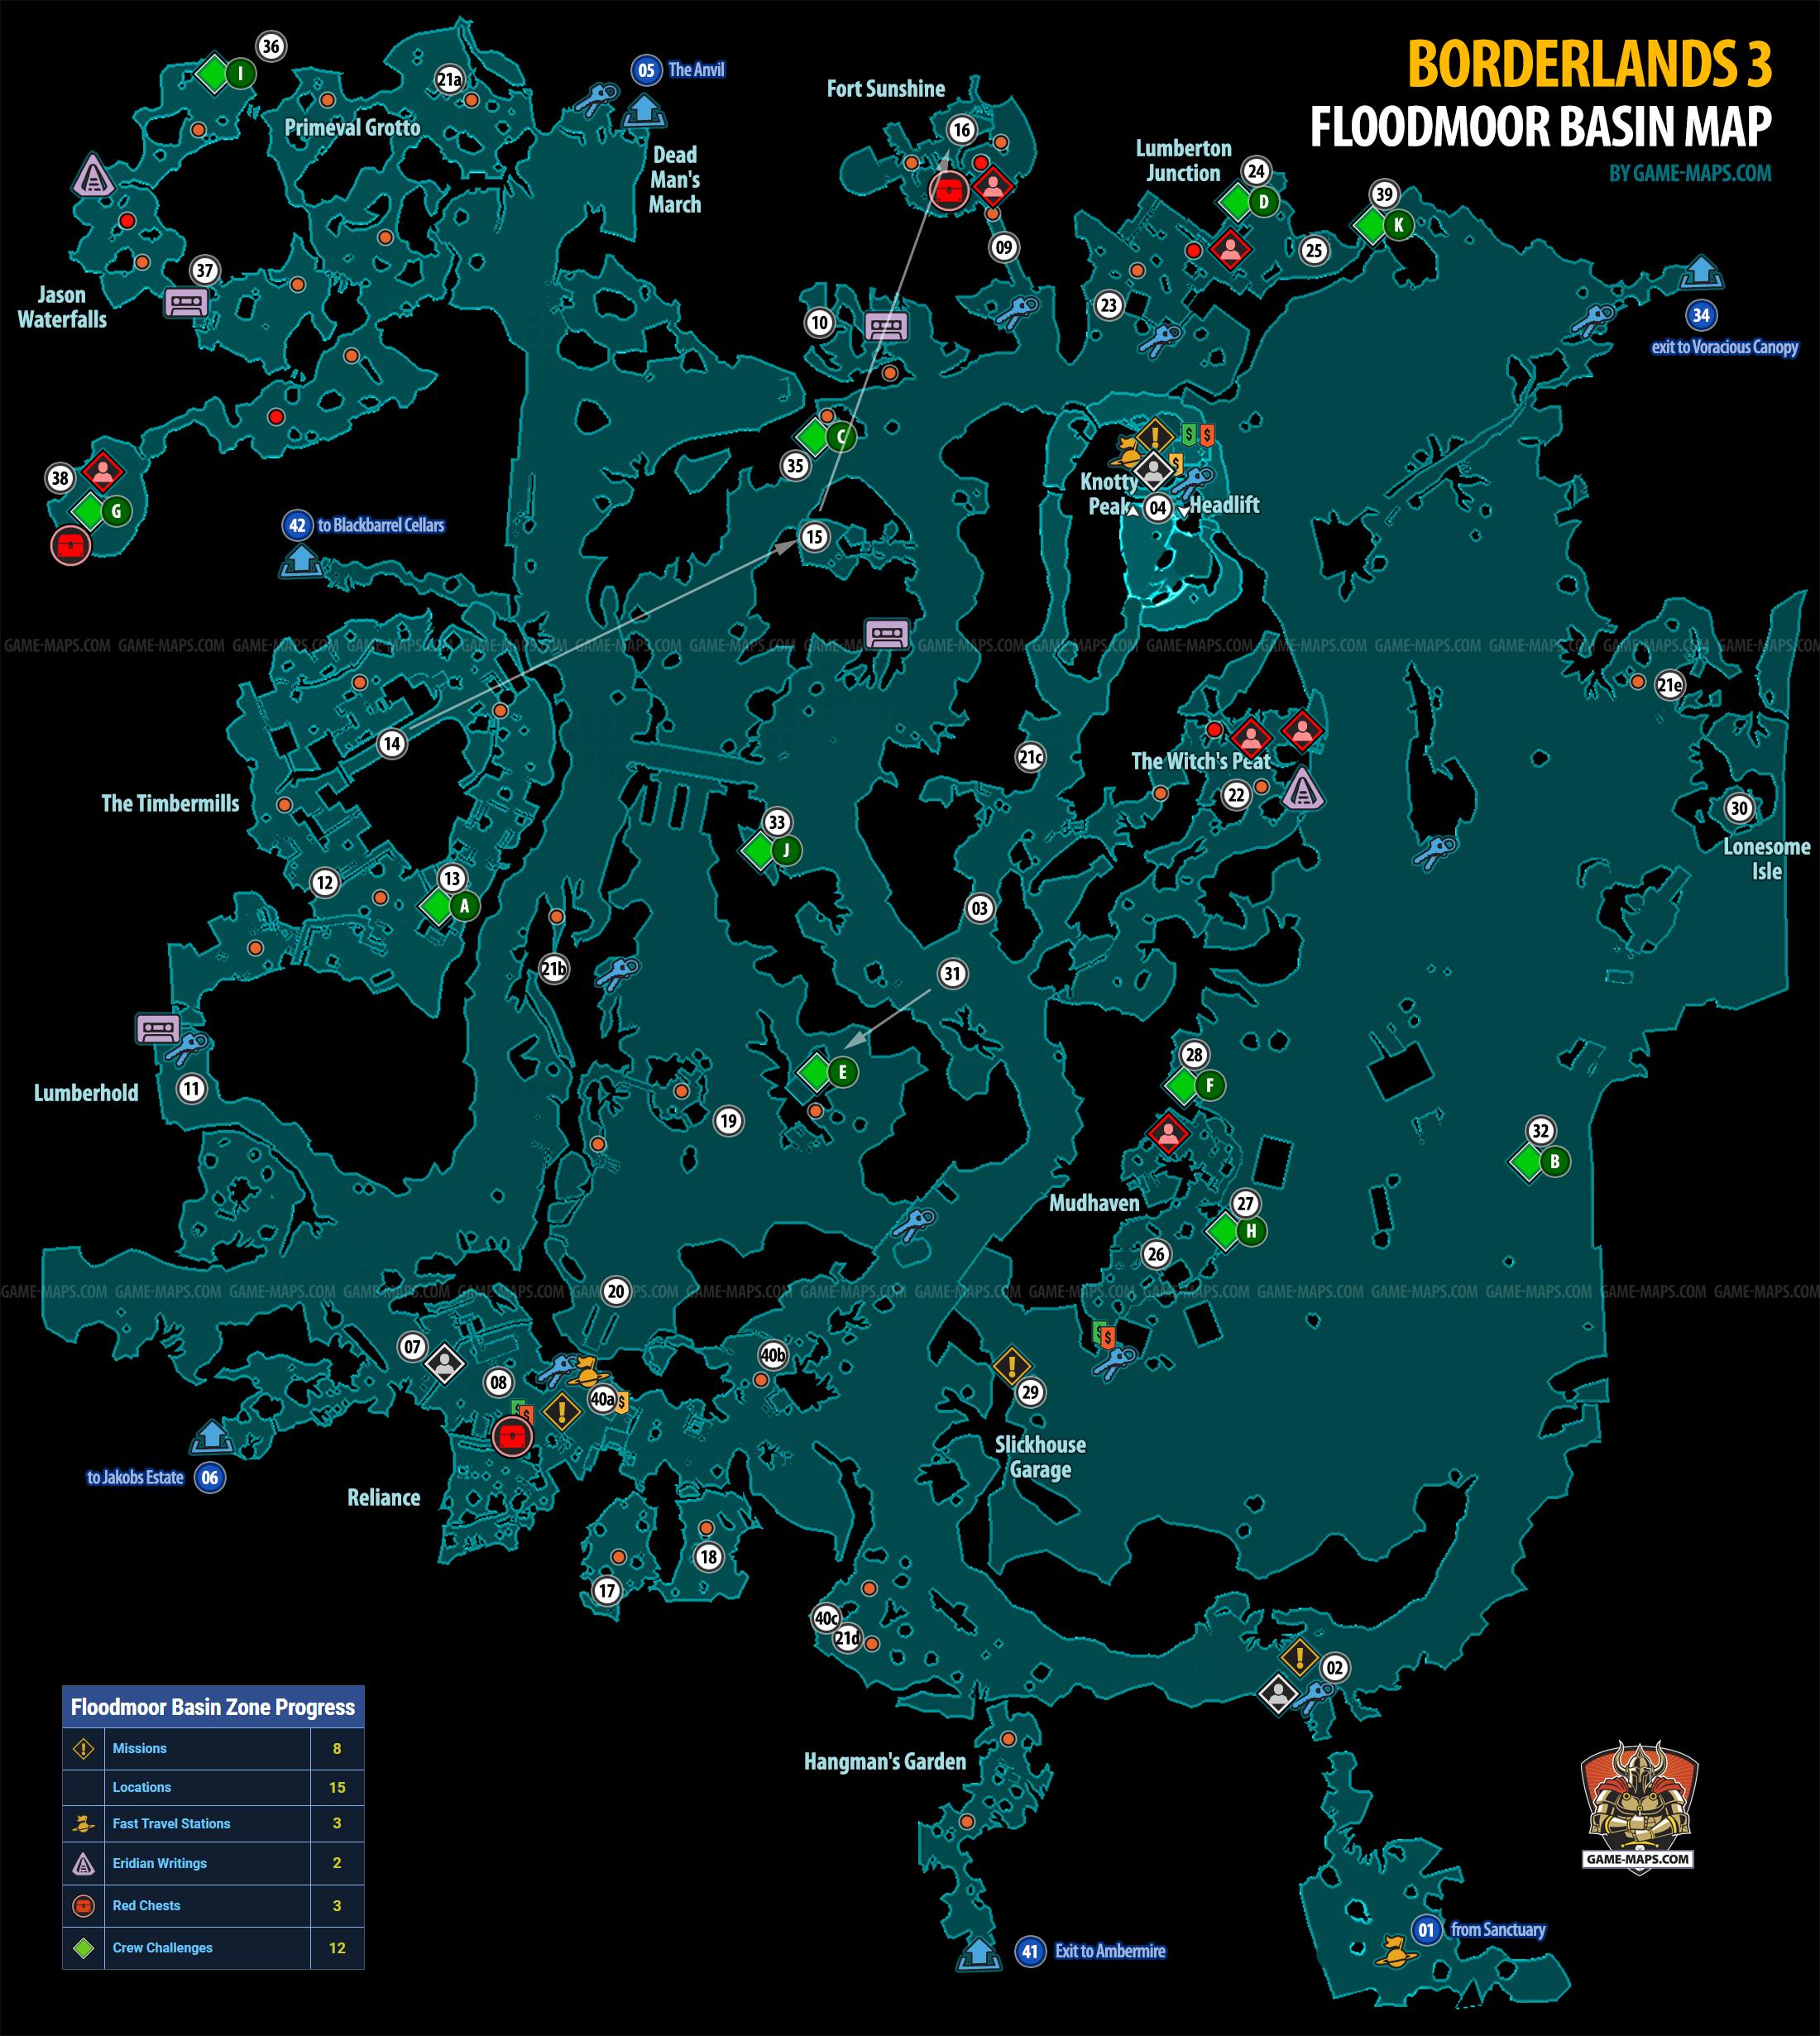
Borderlands 3 Map for Floodmoor Basin on Eden-6 planet, with Zone Progress, Quest Starters, NPC, Bosses, Crew Challenges, ECHO Logs, Typhon Logs, Eridian Writings, Vending Machines, Red Chests, Vehicle Station and Fast Travel Station. Borderlands 3 Game Guide & Walkthrough.

Floodmoor Basin Zone Progress
Floodmoor Basin Zone Progress | ||
|---|---|---|
| Missions | 8 | |
| Locations | 15 | |
| Fast Travel Stations | 3 | |
| Eridian Writings | 2 | |
| Red Chests | 3 | |
| Crew Challenges | 12 | |
Floodmoor Basin Crew Challenges
Crimson Radio
Sabotage the Floodmoor Basin Broadcast Tower.
Help Moxxi recruit for the Crimson Alliance by sabotaging the Children of the Vault's Broadcast Towers.

Floodmoor Basin - The Timbermills - Crimson Radio Walkthrough YouTube
Crimson Radio (Eastern)
Sabotage the Floodmoor Basin Broadcast Tower.
Help Moxxi recruit for the Crimson Alliance by sabotaging the Children of the Vault's Broadcast Towers.

Floodmoor Basin - Eastern Crimson Radio Walkthrough YouTube
Dead Claptrap
Salvage a Reinforced Rear Panel.
Salvage parts from decommissioned Claptrap units to help Claptrap build a friend.
Dead Claptrap
Salvage a "Love" Module.
Salvage parts from decommissioned Claptrap units to help Claptrap build a friend.
Hijack Target
Retrieve the Outrunner's Razor Wings.
Scan rare vehicles at CAR stations to unlock unique parts.

Floodmoor Basin - Hijack Target - Outrunner's Razor Wings YouTube
Hijack Target
Retrieve the Cyclone's Wide Wheel.
Scan rare vehicles at CAR stations to unlock unique parts.

Floodmoor Basin - Mudhaven - Hijack Target - Cyclone's Wide Wheel YouTube
Legendary Hunt
Defeat the legendary Chonk Stomp.
Defeat unique beasts for Sir Hammerlock.
Typhon Logs
Find the Floodmoor Basin Typhon Logs (3)
Follow the decades-old journey of The First Vault Hunter by collecting all three Typhon Journals in this area. Once you've found them all, Tannis will be able to triangulate the location of the secret Typhon Dead Drop cache and unlock it for you.
Typhon Dead Drop
Loot the Floodmoor Basin Dead Drop cache.
Collect all three Typhon Journals so Tannis can triangulate the location of Typhon's Dead Drop cache and unlock it for you.
Floodmoor Basin Locations
- Dead Man's March
- Fort Sunshine
- Hangman's Garden
- Headlift
- Jason Waterfalls
- Knotty Peak
- Lonesome Isle
- Lumberhold
- Lumberton Junction
- Mudhaven
- Primeval Grotto
- Reliance
- Slickhouse Garage
- The Timbermills
- The Witch's Peat
Floodmoor Basin Missions
Hammerlocked Main Mission, LVL 23 - from Sanctuary
Don't Truck with Eden-6 Side Mission LVL.23
The Guns of Reliance Main Mission, LVL 27
Malevolent Practice Side Mission, LVL 24
Irregular Customers Side Mission, LVL 27
The Family Jewel Main Mission, LVL 29
Capture the Frag Side Mission, LVL 27 - from Clay
Repeatable Dynasty Dash: Eden-6 Side Mission, LVL 27 - from Bounty Board
Swamp Bro Side Mission, LVL 27 - from Chadd
Get Quick, Slick Side Mission, LVL 23
Floodmoor Basin Walkthrough: Swamp Region

Floodmoor Basin Zone Borderlands 3
The Floodmoor Basin location is a hub connecting five main locations covering the entire Eden-6 planet: The Anvil, Jakobs Estate, Ambermire, Voracious Canopy, Blackbarrel Cellars with The Floating Tomb
You don't have to explore the entire The Floodmoor Basin thoroughly on the first try, rather go where the next Main Missions lead you, from zone to zone.
Pad from Sanctuary
You come here for Hammerlocked Main Mission, LVL 23
You've opened the Promethea Vault, but at great cost. It's more important than ever to open the Vaults before the Calypsos grow more powerful. The next Vault is on Eden-6. Lilith's friend Sir Hammerlock might be able to help, if he weren't in a spot of bother.
Miller House
Inspect body on the road, and go talk to Miller, he is near nearest house.
Don't Truck with Eden-6 Side Mission Lvl.23
Well, that happened. Take out Inquisitor Bloodflap and his gang, and put a stop to his reign of terror.
Complete this mission before you start doing something else.
Take vehicle.
The first step in the mission is to destroy two gang vehicles. Vehicles move along main roads and you can check their position on the map if this quest is active.
The next step is to destroy the Inquisitor Bloodflap vehicle and return to Miller.
Knotty Peak Entrance
Get to the top eliminating all opponents along the way for Hammerlocked Main Mission.
Knotty Peak
This is the central location of the entire planet Eden-6, always come back here using Fast Travel Station.

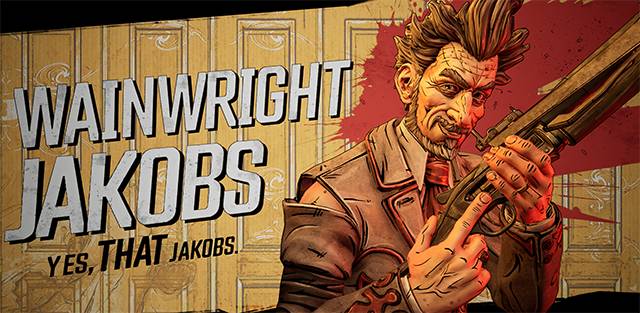
Wainwright Jakobs
Wainwright Jakobs talk to him and explore lodge.
Now Hammerlocked Main Mission will lead you to The Anvil Zone.
Use elevator to go down and go to Dead Man's March to find exit to The Anvil.
Exit to The Anvil
Now go to The Anvil to continue Hammerlocked Main Mission.
After visiting The Anvil
Knotty Peak
Talk to Wainwright Jakobs for Lair of the Harpy Main Mission.
Exit to Jakobs Estate
Now go to Jakobs Estate for Lair of the Harpy Main Mission.
After visiting Jakobs Estate
Knotty Peak
Give Record to Wainwright Jakobs to finish Lair of the Harpy Mission
The Guns of Reliance Main Mission, LVL 27
Wainwright has a plan to take back Eden-6, but first, he needs an army. He's hired a gunslinger named Clay to help start a resistance. People don't really need much encouragement to turn against Aurelia. They just need guns...
Talk to Wainwright Jakobs again to finish Sacked Mission.
Talk to Sir Hammerlock for Side Mission.
Malevolent Practice Side Mission, LVL 24
Troy's flexing his new powers and experimenting on live subjects, including Hammerlock's old prison gang. Hope they're okay!
Malevolent Practice will lead you back to The Anvil, go there now. If you think this mission is too difficult at this point in the game, you can skip it and do it later.
After Malevolent Practice Mission
Now we will continue The Guns of Reliance, take vehicle and go to (07) Reliance Gate
Reliance Gate
You come here for The Guns of Reliance Mission.
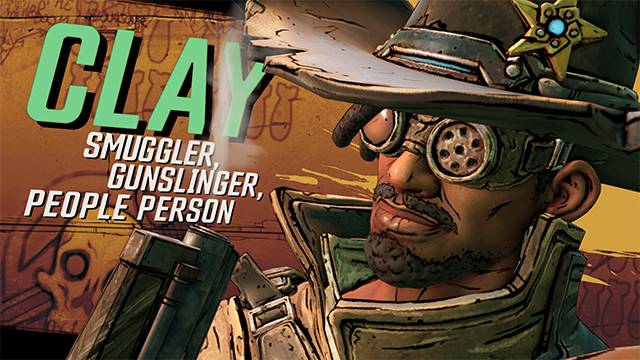
Meet Clay outside Reliance gate, talk to him and follow his orders.

Clay
Reliance
Enter city with Clay, in Reliance Kill COV enemies, free Rebel loyalists from cages.
Enter weapon shed shotting door control and take Red Chest.
Kill COV attackers, fall back to gas station and kill next wave, the do it again. Last one will be Long Arm the Smasher.
Turn on main power, you are controlling Reliance now.
Read Bounty Board for side mission.
Irregular Customers Side Mission, LVL 27
The Witch's Peat bar has been overrun, and people need their drinks to cope with life on Eden-6. Help Kay get the bar up and running.
There are 2 locked containers in Reliance, you will open them later.
Now take vehicle and drive to Fort Sunshine Gate
Fort Sunshine Gate
You come here for The Guns of Reliance Mission.
Kill COVs outside the gate, but it looks like you can't go inside. Go to (10) Historical Lookout
Historical Lookout
For The Guns of Reliance Mission, take ECHO Log and climb the top, look at Fort Sunshine.
Now you should go to (11) Lumberhold
Lumberhold
For The Guns of Reliance Mission.
Take Echo Log and go to The Timbermills.
The Timbermills
For The Guns of Reliance Mission.
Kill all enemies here.
Crimson Radio in The Timbermills
Sabotage the Floodmoor Basin first Broadcast Tower - video walkthrough is in Crew Challenges section.
Loading Dock
For The Guns of Reliance Mission.
Jump on moving Shipping Crane and ride to Fort Sunshine
Alternate Catch-A-Rail
If you fall from the container while moving to Fort Sunshine, you can also here jump on it again.
Fort Sunshine
For The Guns of Reliance Mission, jump of the crane, and defeat all opponents. Watch out for the turrets.
Turnkey Tim
Murdock the Anointed
Free Dalton and take Chest Key, with this Key you can open Dalton's Gun Cabinet in Reliance.
Take Red Chest in Fort Sunshine.
Return to Reliance
After Fort Sunshine
Reliance
Open Dalton's Gun Cabinet
Talk to Clay to finish The Guns of Reliance Mission.
The Family Jewel Main Mission, LVL 29
Montgomery Jakobs left a final message for his son, Wainwright, with a clue to find the Eden-6 Vault Key fragments. Hopefully they're just in a safety deposit box or something and not nestled deep in the primeval heart of an untamed jungle. Fingers crossed...
Take other Side Missions.
Capture the Frag Side Mission, LVL 27 - from Clay
Looks like the COV started killing each other down in the valley nearby. Some crazy deathmatch the Calypsos started between their followers. You know. For funsies.
Dynasty Dash: Eden-6 (Repeatable) Side Mission, LVL 27 - from Bounty Board
Beau is expanding the Dynasty Diner franchise into an interplanetary express delivery service! He needs a reckless, er, EXPERT driver to deliver all of the juicy burgers to his hungry customers. Time is of the essence since cold burgers are a damn tragedy!
Swamp Bro Side Mission, LVL 27 - from Chadd
It's Chadd time, brah! Chadd's fixin' to pull some wicked crazy stunts, and he needs your help! And don't you dare forget to taste the danger!
Start with Swamp Bro Side Mission and follow Chadd, jump after him.
For Swamp Bro Side Mission, kill grogs and take grog guts, give it to Chadd. Follow Chadd.
For Swamp Bro Side Mission, kill ravagers. Follow Chadd.
For Swamp Bro Side Mission, get 3 fuel cans.
For Swamp Bro Side Mission, attach fuel cans to boosters, shot igniter, it is below platform and send Chadd to the stars.
Return to Reliance and open Chadd's Righteous Loot chest to finish Swamp Bro Side Mission.
Now continue Dynasty Dash: Eden-6 Side Mission and pick up Dynasty Meal in Reliance, you have to deliver burgers to 5 locations in Floodmoor Basin.
You will manage to do this task without any problems moving around in a vehicle. It will be harder for you to finish in bonus time, but you can repeat this task. The secret of this mission is that when driving a vehicle you should shoot at glowing red posters, a hit gives you 10 seconds to your time. To complete this task with the maximum bonus you have to play co-op with other players. The additional reward is not significant.
Place where you have to deliver burgers for Dynasty Dash: Eden-6 Side Mission
Place where you have to deliver burgers for Dynasty Dash: Eden-6 Side Mission
Place where you have to deliver burgers for Dynasty Dash: Eden-6 Side Mission
Place where you have to deliver burgers for Dynasty Dash: Eden-6 Side Mission
Place where you have to deliver burgers for Dynasty Dash: Eden-6 Side Mission
Return to Beau's sign spinner in Reliance to finish Dynasty Dash: Eden-6 Side Mission
Now continue Irregular Customers Side Mission go to The Witch's Peat.
The Witch's Peat
For Irregular Customers Side Mission, kill Jabbers.
Kill Apollo and grab Coolant Valve, install it, flip 3 breaker switches.
Enter bar and kill Artemis to finish Irregular Customers Side Mission
Now continue Capture the Frag Side Mission
Tyreen's Camp
For Capture the Frag Side Mission, kill enemies, kill God-Queen's Chosen
Dead Claptrap
Salvage a "Love" Module, it under platform
Activate payload for Capture the Frag Side Mission, shot it to move.
Now take vehicle and follow payload, shoot him from time to time to push him forward. You have to reach (26)
Troy's Camp
For Capture the Frag Side Mission, kill enemies, kill God-King's Chosen and drop the load.
You almost finished Capture the Frag, but before you return to Clay do other stuff around.
Typhon Log
Take Typhon Log.
Hijack Target
Retrieve the Cyclone's Wide Wheel - video walkthrough is in Crew Challenges section.
Slickhouse Garage
Read Bounty Board for Side Mission.
Get Quick, Slick Side Mission, LVL 23
Leadfoot Prisa needs help from someone with drivin' skillz to tidy up some loose ends. Use her special outrunner-she's the fastest thing in these parts. Remember, it's all about driving fast, because she has no weapons!
Take Prisa's Outrunner Slickhouse Garage and follow orders. You will jump (use buster) till you will end in (30) Lonesome Isle.
Lonesome Isle
For Get Quick, Slick Side Mission, destroy Pop's Outrunner, take Pop's Loot, to finish Get Quick, Slick Side Mission.
Now with Prisa's Outrunner or other Outrunner try to finish Hijack Target (E) Outrunner's Razor Wings.
Hijack Target
Retrieve the Outrunner's Razor Wings, you have to jump using fast Outrunner - video walkthrough is in Crew Challenges section
Eastern Crimson Radio
Sabotage the Floodmoor Basin Broadcast Tower - video walkthrough is in Crew Challenges section.
Typhon Log
Take Typhon Log.
Return to Reliance
Talk to Clay to finish Capture the Frag
Return to Knotty Peak
Talk to Sir Hammerlock for The Family Jewel Main Mission, take Record and play it.
Now go to Voracious Canopy
Exit to Voracious Canopy
Go there for The Family Jewel Main Mission.
After Voracious Canopy and Sanctuary
Let's finish Floodmoor Basin challenges.
Dead Claptrap
Salvage a Reinforced Rear Panel.
Typhon Log
Get Typhon Log
Jason Waterfalls
Take Echo Log.
Legendary Hunt
Defeat the legendary Chonk Stomp.
Open Red Chest
Typhon Dead Drop
Loot the Floodmoor Basin Dead Drop cache.
Return to Reliance and talk with Clay about Going Rogue Main Mission
Clay will give you Rogue-Sight Pistol, you will need it to get to next zone.
Equip Rogue-Sight, when you will look through the Scope you will see Rogue-Sight Marks.
Shot 3 Rogue-Sight Marks in your way to Ambermire Exit.

Floodmoor Basin - way to Ambermire - shotting Rogue-Sight Marks for Going Rogue YouTube
Rogue-Sight Mark
Shot for Going Rogue Main Mission.
Rogue-Sight Mark
Shot for Going Rogue Main Mission.
Rogue-Sight Mark
Shot for Going Rogue Main Mission.
Exit to Ambermire
Shot 3 more Rogue-Sight Mark near gate to Ambermire for Going Rogue Main Mission.
Exit to Ambermire
After Ambermire
Talk to Miles Brown for Raiders of the Lost Rock Side Mission
Talk to Clay for Cold as the Grave Main Mission
to Blackbarrel Cellars
Enter for Cold as the Grave
Borderlands 3 Map Legend
Crew Challenges
On most maps you will find hidden Crew Challenges. They appear on the map as you approach them. Crew Challenges can be treated as optional tasks. They are not mandatory, but they bring EXP and rewards, and are also included in Zone Progress.
Typhon Logs are a special type of Crew Challenges. The solution of three Typhon Logs on a given map gives you access to Typhon Dead Drop Crew Challenge with reward chest.
Red Chest
Red Chests are a special type of container with better weapons or equipment. They are treated as a reward. They are located in specific places, they are hidden or well protected by Bosses. They belong to the Zone Progress of a given zone map. There are from one to three Red Chests in each zone.
Fast Travel Station
Use the fast travel network to revisit explored areas.
Borderlands 3 lets you teleport from anywhere to any previously discovered Fast Travel station or even your most recently used vehicle, all via the map in your ECHO device, this also include Fast Travel stations on other planet.
Quest Starter
This is where the mission / quest begins. The Quest Giver can be an NPC, an item, or the quest starts automatically at the entrance to the location.
Catch-A-Ride - Vehicle Station
Vehicles you encounter are yours for the taking. You can always digistruct a vehicle at any Catch-A-Ride station, but there's also the option of a quick hijacking if aggressive bandit drivers get too close.
Marcus' Munitions
Vending Machine with Weapons and Equipment. In addition to buying, you can also sell your equipment here.
Veteran Rewards
There is a special vending machine with premium equipment on the Sanctuary III space ship.
Ammo Dump
Vending Machine with Ammunition.
Dr. Zed's Meds
Vending Machine with Medicines.
ECHO Logs
Collectible audio logs with lore about past of Borderlands universe.
Eridian Writings
At the beginning of the game you can't do anything about Eridian Writings, they will be needed later when the story comes to the right moment.
Friendly NPC
Friendly NPCs provide interaction, conversation, or give missions. You also often come back to them for prizes.
Hostile NPC
Hostile Boss, Special Enemy, tougher opponents.
Vehicle
You can take this vehicle, drive it or take it to Catch-A-Ride station to own it. If you disassembly it at Catch-A-Rideyou will acquire new components for your vehicle.
Map Transition
Location Exit / Entrance, connection to a different map.
Quick Change Station
Player Customization. Show off in style, equipping custom Heads, Skins, Emotes, and cool ECHO Skins. Explore skill builds, by resetting your invested skill points!
