The Howl Map - Borderlands 4
Borderlands 4 Map of The Howl, uncovered and described Map with Zone Progress, Missions, Activities, Collectibles and Locations, Borderlands 4 Maps and Walkthrough.
The Howl Map


You arrive at The Howl in The Fadefields from Coastal Bonescape to complete Main Mission 03: Down and Outbound. Head first to The Launchpad (Outbounders Faction Town) as directed by the mission.
The Launchpad is the most important location in The Howl.
The northwest part of The Howl's map is not accessible for exploration, although the in-game region boundaries indicate otherwise. Keep in mind that the southwest part of The Howl is only accessible from the northwest area of Coastal Bonescape.
At The Launchpad, you'll obtain your first vehicle, which will facilitate exploration and long-distance travel.
Walkthrough for The Howl
Recommended order for visiting The Howl:
| Icon | Name & Description | |
|---|---|---|
01 |
From Coastal BonescapeFollow Main Mission 03: Down and Outbound. | |
02 |
Approaching The LaunchpadYou witness a fight between The Order and the Outbounders, kill Order forcess. | |
03 |
The Launchpad
The next step in Main Mission 03: Down and Outbound is the Reach Order Surveillance Center located in Hungering Plain. Don't go there just yet, but explore the area around The Launchpad first. | |
04 |
Capture Order Silo: The Kit Hole | |
05 |
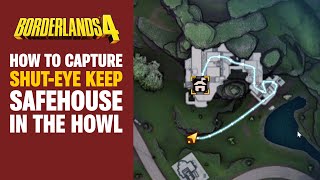
Capture Shut-Eye Keep Safehouse |
|
|
Now go to Hungering Plain to finish Main Mission 03: Down and Outbound. Then return to Rush in The Launchpad. | ||
06 |
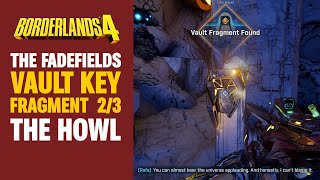
Start Main Mission 04: A Lot to ProcessTalk to Rush and Conway in The Launchpad. | |
07 |
Rootdown EstatesGo to Rootdown Estates Main Mission 04: A Lot to Process to "Reach Order scientist's home"
Next step for Main Mission 04: A Lot to Process "Reach meat processing plant" will lead you far outside The Howl, so finish the activities that you can finish in The Howl first. |
|
08 |
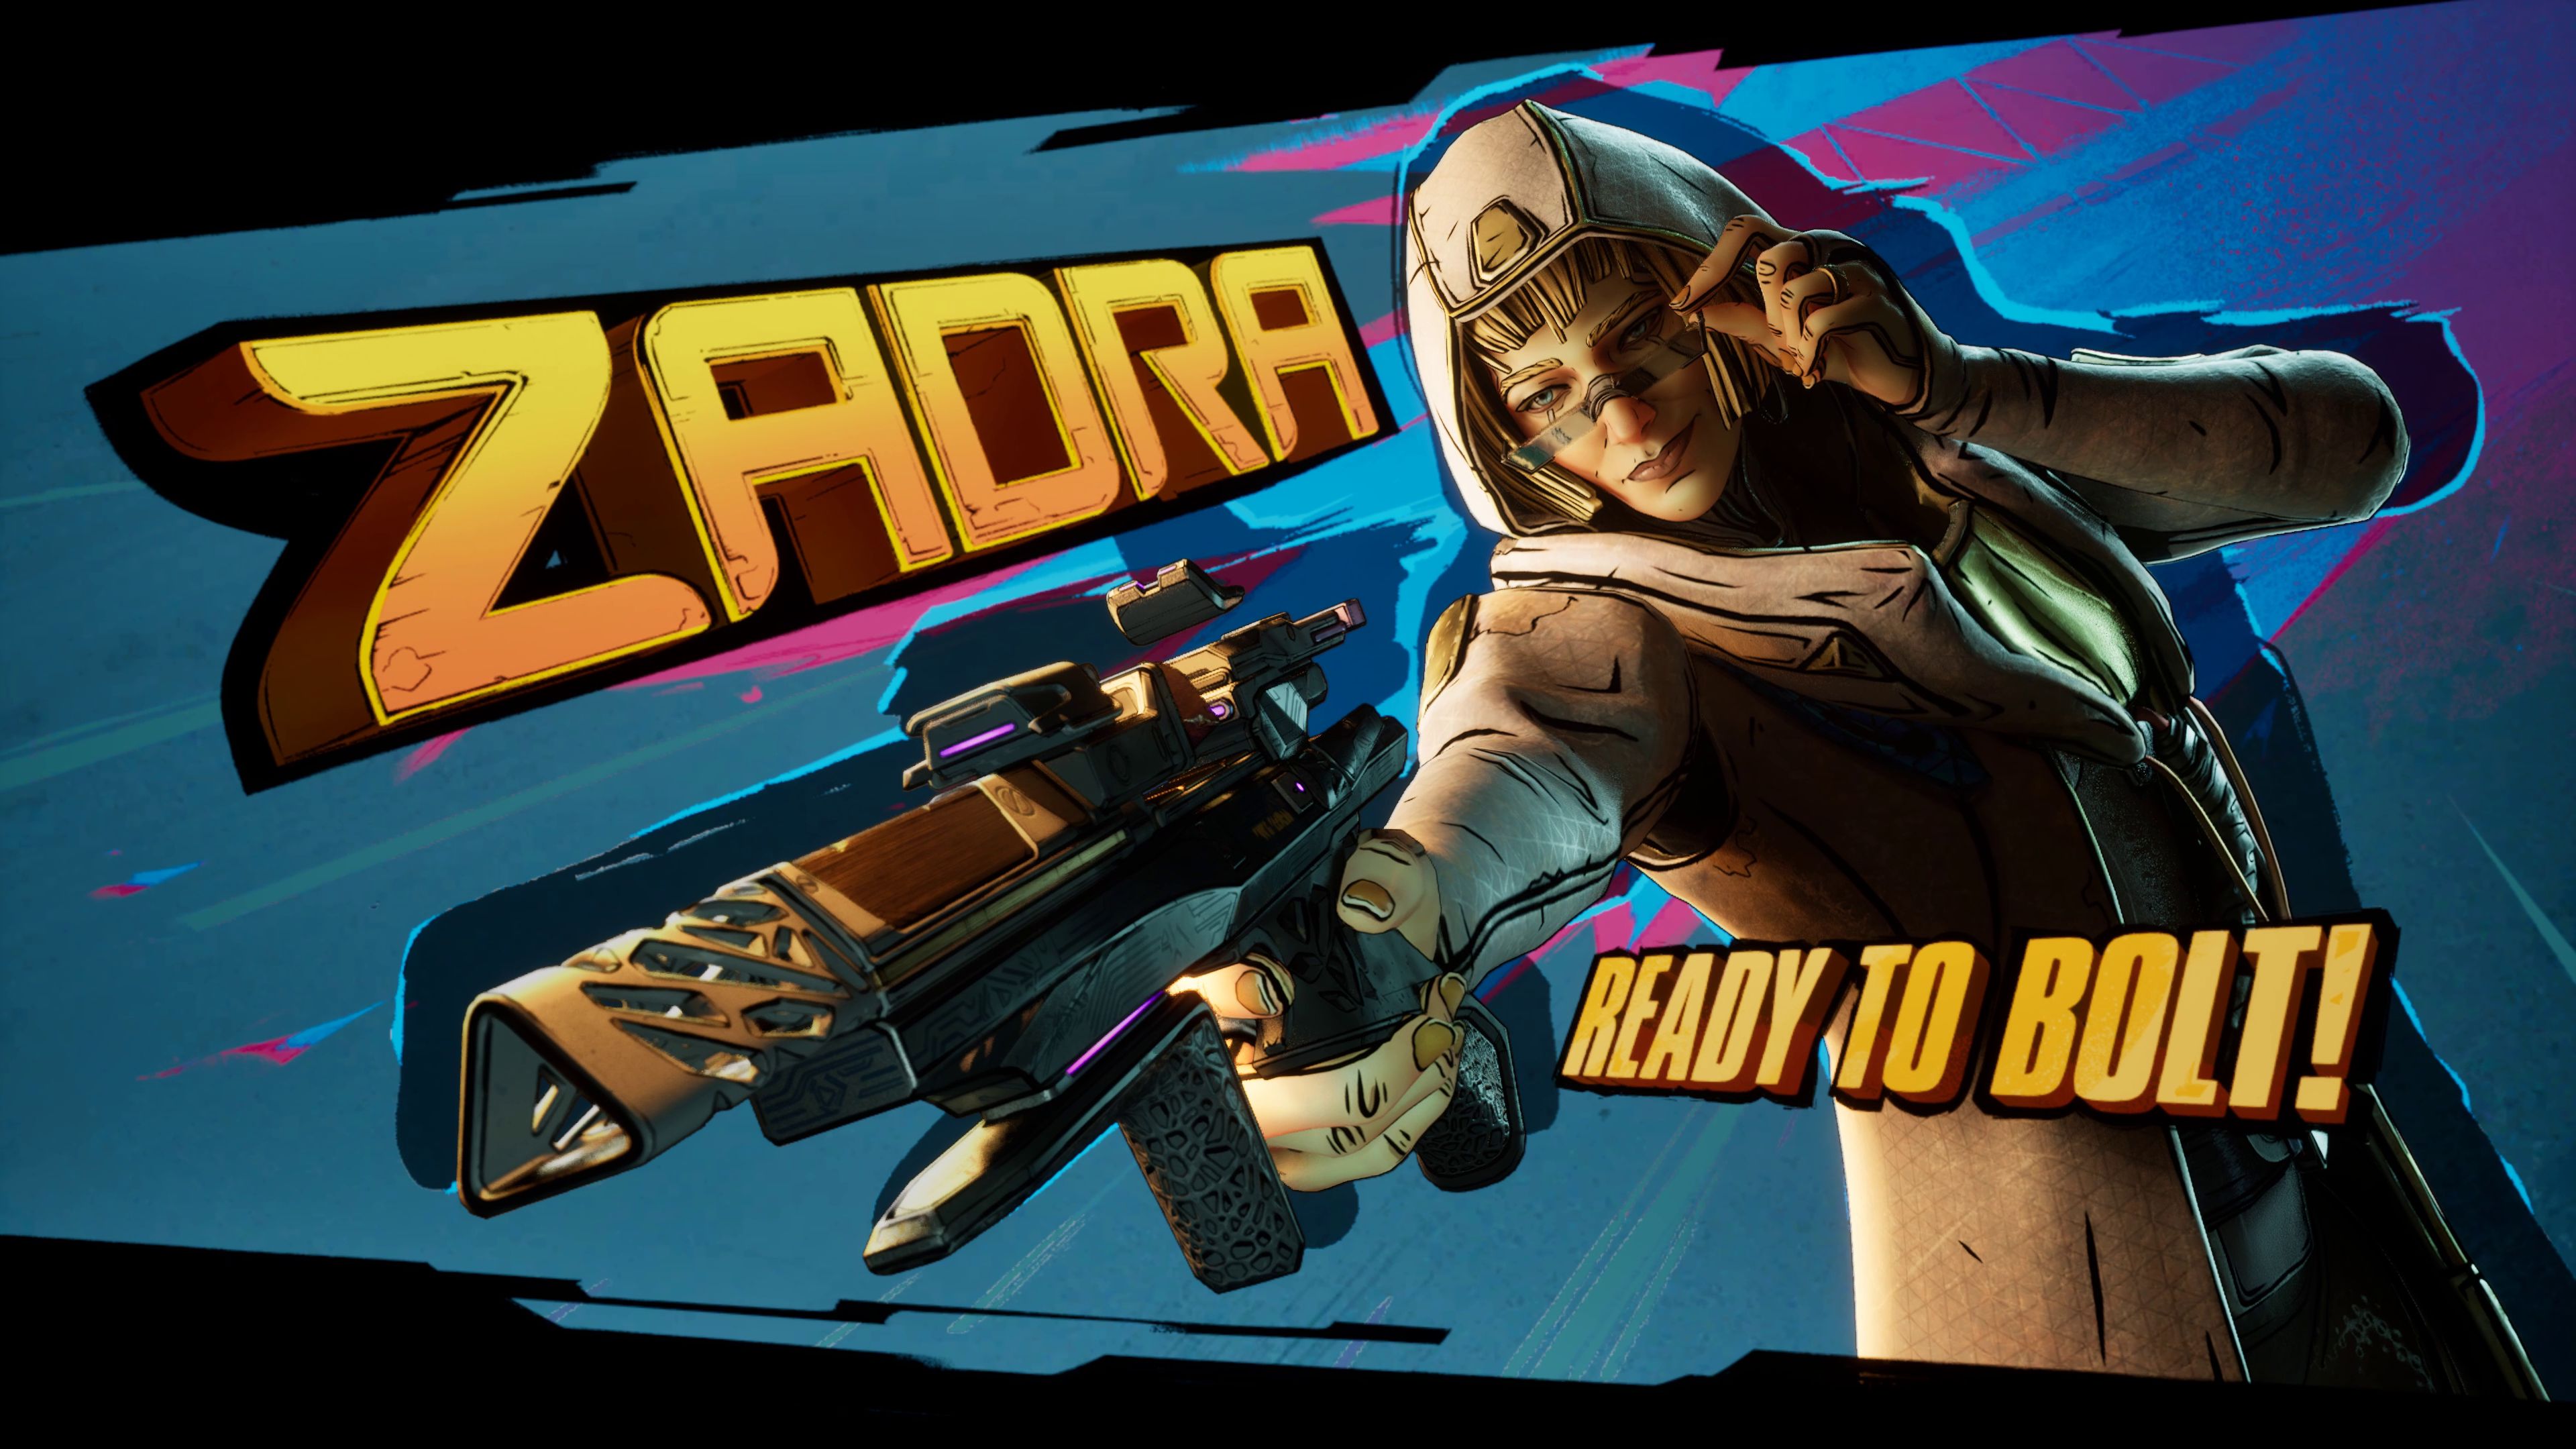
Gushing TurretTalk to Mort to get Side Mission 05: Breeding Daisies. | |
09 |
Tresher's CaveEnter for Side Mission 05: Breeding Daisies. Kill Treshers for eggs | |
10 |
Mort near Hump HutReturn to Mort to finish Mission 05: Breeding Daisies. Perform mating calls, and finish mission. After completing Side Mission 05: Breeding Daisies, wait a while and return to Mort and you will get Side Mission 06: Whack-A-Thresher. "Slam some treshers" - Use ground slam [space], [space], [CTRL] on PC. | |
11 |
Camp - Carried Away Side Mission
| |
12 |
Blacklime BunkerYou can enter Blacklime Bunker after Main Mission 5: One Fell Swoop. The bunker is embedded in a cave in the cliff, you probably can't enter it now, but we'll come back here later. | |
13 |
Wreck of the Maester
| |
14 |
Hollow Nob
| |
15 |
Ripper Drill
| |
|
You can now complete all the Collectibles shown on this map in The Howl. What you won't be able to do during this visit are ECHO Log 07, ECHO Log 08, and Blacklime Bunker; you'll need to progress further in the Main Missions to make them available. The next step is to complete Main Mission 04: A Lot to Process and "Reach Meat Processing Plant." I'll be preparing another map of The Howl, describing the Activities and Missions that will open up later in the Borderlands 4 storyline. | ||

Missions in The Howl
| Icon | Name & Description | |
|---|---|---|
|
|
Ready to Blow - Side Mission 04The Howl - The Launchpad - Bank - Check radio on counter. A lone missile failed to fulfill their one purpose – to explode. Time is running out before their systems completely shut down and leave them as nothing more than a monument to their own failure. Are they truly a dud, or can you show them what success looks like? This mission takes you further into The Fadefields, so leave it unfinished for now. | |
|
|
A Lot to Process - Main Mission 04The Howl - The Launchpad - Rush and Conway With the threat of Idolator Sol’s weapon looming, the Outbounders can focus on nothing else. They need help, and you’re
Next step "Reach meat processing plant" will lead you far outside The Howl (to Idolator’s Noose), so finish the activities that you can finish in The Howl first. | |
|
|
Breeding Daisies - Side Mission 05The Howl - Gushing Turret - Mort - help him and talk to him. Everyone knows threshers are great at digging. And that must mean they’re great at farming right? Well, that’s what it’s time to find out…once you help a farmer breed some threshers, that is. Go to the cave and kill Treshers, collect eggs, Return to Mort. Next to the Hump Hut, talk to Mort. Perform mating calls, defeat waves of enemies, and complete the mission. | |
|
|
Whack-A-Thresher - Side Mission 06The Howl - Hump Hut - Mort - talk to him a moment later after Side Mission 05: Breeding Daisies. The threat of violence is often more than enough to get your point across. But these are threshers, so there’s a 43% chance you get eaten alive instead. On "Slam some treshers" use ground slam [space], [space], [CTRL] on PC. | |
|
|
Carried Away - Side Mission 07The Howl - Camp East of Rootdown Estates - Naver, a drone locked in an outdoor restroom. Survey drones with personality? What's next, a depressed bot that tries to annoy you into friendship? Take Naver to the Gushing Turret. | |
|
|
Savage Salvage - Side Mission 08The Howl - Wreck of the Maester - check the turned on radio transmitter lying among the wreckage of the ship. Those that live through a crash usually count themselves lucky, but that luck disappears quickly on Kairos. Especially if you land in an area ripe with rippers. Thankfully, you’re here. And you’re damn good at killing rippers. A fairly sizable side quest, you explore the Wreck of the Maester and Hollow Nob in the northeastern part of The Howl. You begin by examining a powered-on radio lying on the ground. | |
|
These are all the missions you can complete in The Howl at this point in the story. Further missions and activities here will be found on the next map of The Howl. | ||
Activities in The Howl
| Icon | Name & Description | |
|---|---|---|
|
|
Shut-Eye KeepSafehouse | |
|
|
The Kit HoleOrder Silo | |
|
|
Blacklime BunkerOrder Bunker You can enter Blacklime Bunker after Main Mission 5: One Fell Swoop. | |
|
|
The LaunchpadFaction Town Home and shelter to the Outbounders Faction. | |
Vault Hunter’s Guide Collectibles in The Howl
| Icon | Name & Description | |
|---|---|---|
|
|
A Vault Hunter's Guide to Kairos: The FadefieldsHey there! It's your friendly tour guide Arjay again, taking you on a delightful audio tour of the scenic wonder known as... the Fadefields. This place is... alright, I guess, if you're into grass, and the-ah! N-Not the fun kind. Like... literal grass. The Fadefields are sorta like Kairos's heartland. Lot of farms. Lot of people-Grazers, we call 'em-forced by the Order to work on those farms. The Order produces tons of power out here, too. ALSO at gunpoint. Are you sensing a pattern? Until we kick Order bastards like Idolator Sol to the curb, none of us will be free. It hangs on a wooden pole supporting a roof in the NW part of the camp. | |
ECHO Log Collectibles in The Howl
| Icon | Name & Description | Walkthrough |
|---|---|---|
|
|
Fit to LeadYou have to do it. Look, I'm flattered, Conway. I really am. But I'm not the right choice. Everyone else disagrees. Myself included. You're not saying we're ALL wrong, right? Well... I mean... no, but You got us through the Cataclysm, Rush. Your hand reached out to those trapped and pulled them free. Your smiling face kept them in good spirits as they healed. I wasn't the only person helping. No, but... you were the one we looked to. The one we're still looking to now. Nobody is saying you have to be perfect-you just have to be you. Ghnhhh... Then I guess I better get baking. Can't have people listening to my first speech with empty stomachs! In the middle, between the buildings. |
|
|
|
When in NeedI'd heard stories of Vault Hunters on Kairos-Zeke or Zonk or something like that, but I didn't think I'd ever meet one, let alone that they'd come right to us when we needed help the most. I was going to say they weren't what I expected, but I realized I hadn't even formed expectations. Conway seemed impressed, but... I'm not sure that's sayin' much. Still, there WAS somethin' about them. A lack of fear, maybe? An abundance of confidence? I'm not sure. Whatever it was, I believed it-and I found myself drawn to them. Does bein' a Vault Hunter make you this way? Or do people with those qualities just gravitate toward becoming one? Not that it matters. What DOES is they're on our side, and that's a good thing. I hope. Inside the building, on the ground floor, in the corner of the room on the couch. |
|
|
|
Get PrankedYou're lucky you weren't hurt! The next time you get a message like that, you tell me first and I'll verify its validity. You're far too trusting, Rush! That's impossible! There's no such thing as TOO trusting. What are you... of COURSE there is! Nuh-uh! Wha— That is not a proper defense of your point! You can't just say "nuh-uh" and expect to win an argument! Uh-huh! Oh, I-I... did Conway put you up to this? They did, didn't they? Conway... Conway! Ha! Heh-heh— they were right, that worked. Oh, another message. Hm... mhm... mmhm... [gasp] I won?! It's my lucky day, ha! I better freshen up and head on over! Next to the empty pool, on the diving board, next to the chest. |
|
|
|
Safe CrackerAAHH! GET THEM AWAY FROM ME! Oh, really? Because I'm pretty sure I heard you say, “Sweetheart, there's no such thing as ghosts", and something about shooting my kneecaps. That was before I knew you were a WITCH! Oh, I'm nothing to be scared of. But these spectres? Hungry for kneecaps. They just loooove the crunch. I think the only thing that they'd like more is the combination to this safe. Take it! Just stop haunting me! Good boy. Oh, and when people come around asking who jacked your stuff and shot off your kneecap, you tell them it was Vex. But... you didn't- YEEEOWWHAAHOOOWWW! In front of a hut in the forest, on a chair. |
|
|
|
Hello, WorldI had the unfortunate experience of meeting an INCREDIBLY talkative bot today. Some trapezoidal, one-wheeled contraption with a toolbelt that no sensible inventor would design. I've already forgotten his name, which is surprising based on how many times he felt the need to say it. Whoever built and programmed him clearly had some... DEEP-SEATED issues. I can't imagine a single reason to create a bot with such a personality: erratic, manic, depressed... To be honest, I'm not sure how I feel about him-only that he was... a LOT. Still, meeting him DID give me an idea or two about my own creations. Namely, always include a kill switch. At the top of the tower in Gushing Turret, you have to fly there using the Balloon. |
|
|
|
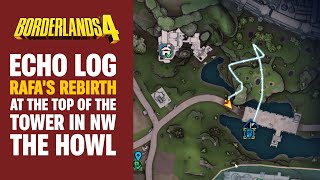
Rafa's RebirthNgh... Where am I? Soldier 35020! Glad to see you're still with us. How do you feel? Uh... Where are my legs? They're around here somewhere. Your immune system started to reject the Deadframe's artificial muscle fibers, and we had to pick: our new soldier, OR all his bits and bobs. I'm sure you understand. Now, stand for me. Ohh... Yeah. I thought it'd be heavier. So with this, I can go off-world? You'll go wherever Tediore needs you. And if you don't, our IP Protection Detonator will make sure everyone gets a piece of that pretty face. Ay, you think I'm pretty? Am I picking up some vibes? Hey, where are you going?! So only you can do gallows humor? Ay, that's not fair... The ECHO Log is located at the top of the tower, you need to fly from the nearby rock to the north. |
|
|
|
Kilo's InstructionsThe ECHO Log is located inside a locked room that will become available later in the Borderlands 4 storyline. |
|
|
|
How to HackThe ECHO Log is located inside a locked room that will become available later in the Borderlands 4 storyline. |
|
Dead Bolt Collectibles in The Howl
| Icon | Name & Description | |
|---|---|---|
|
|
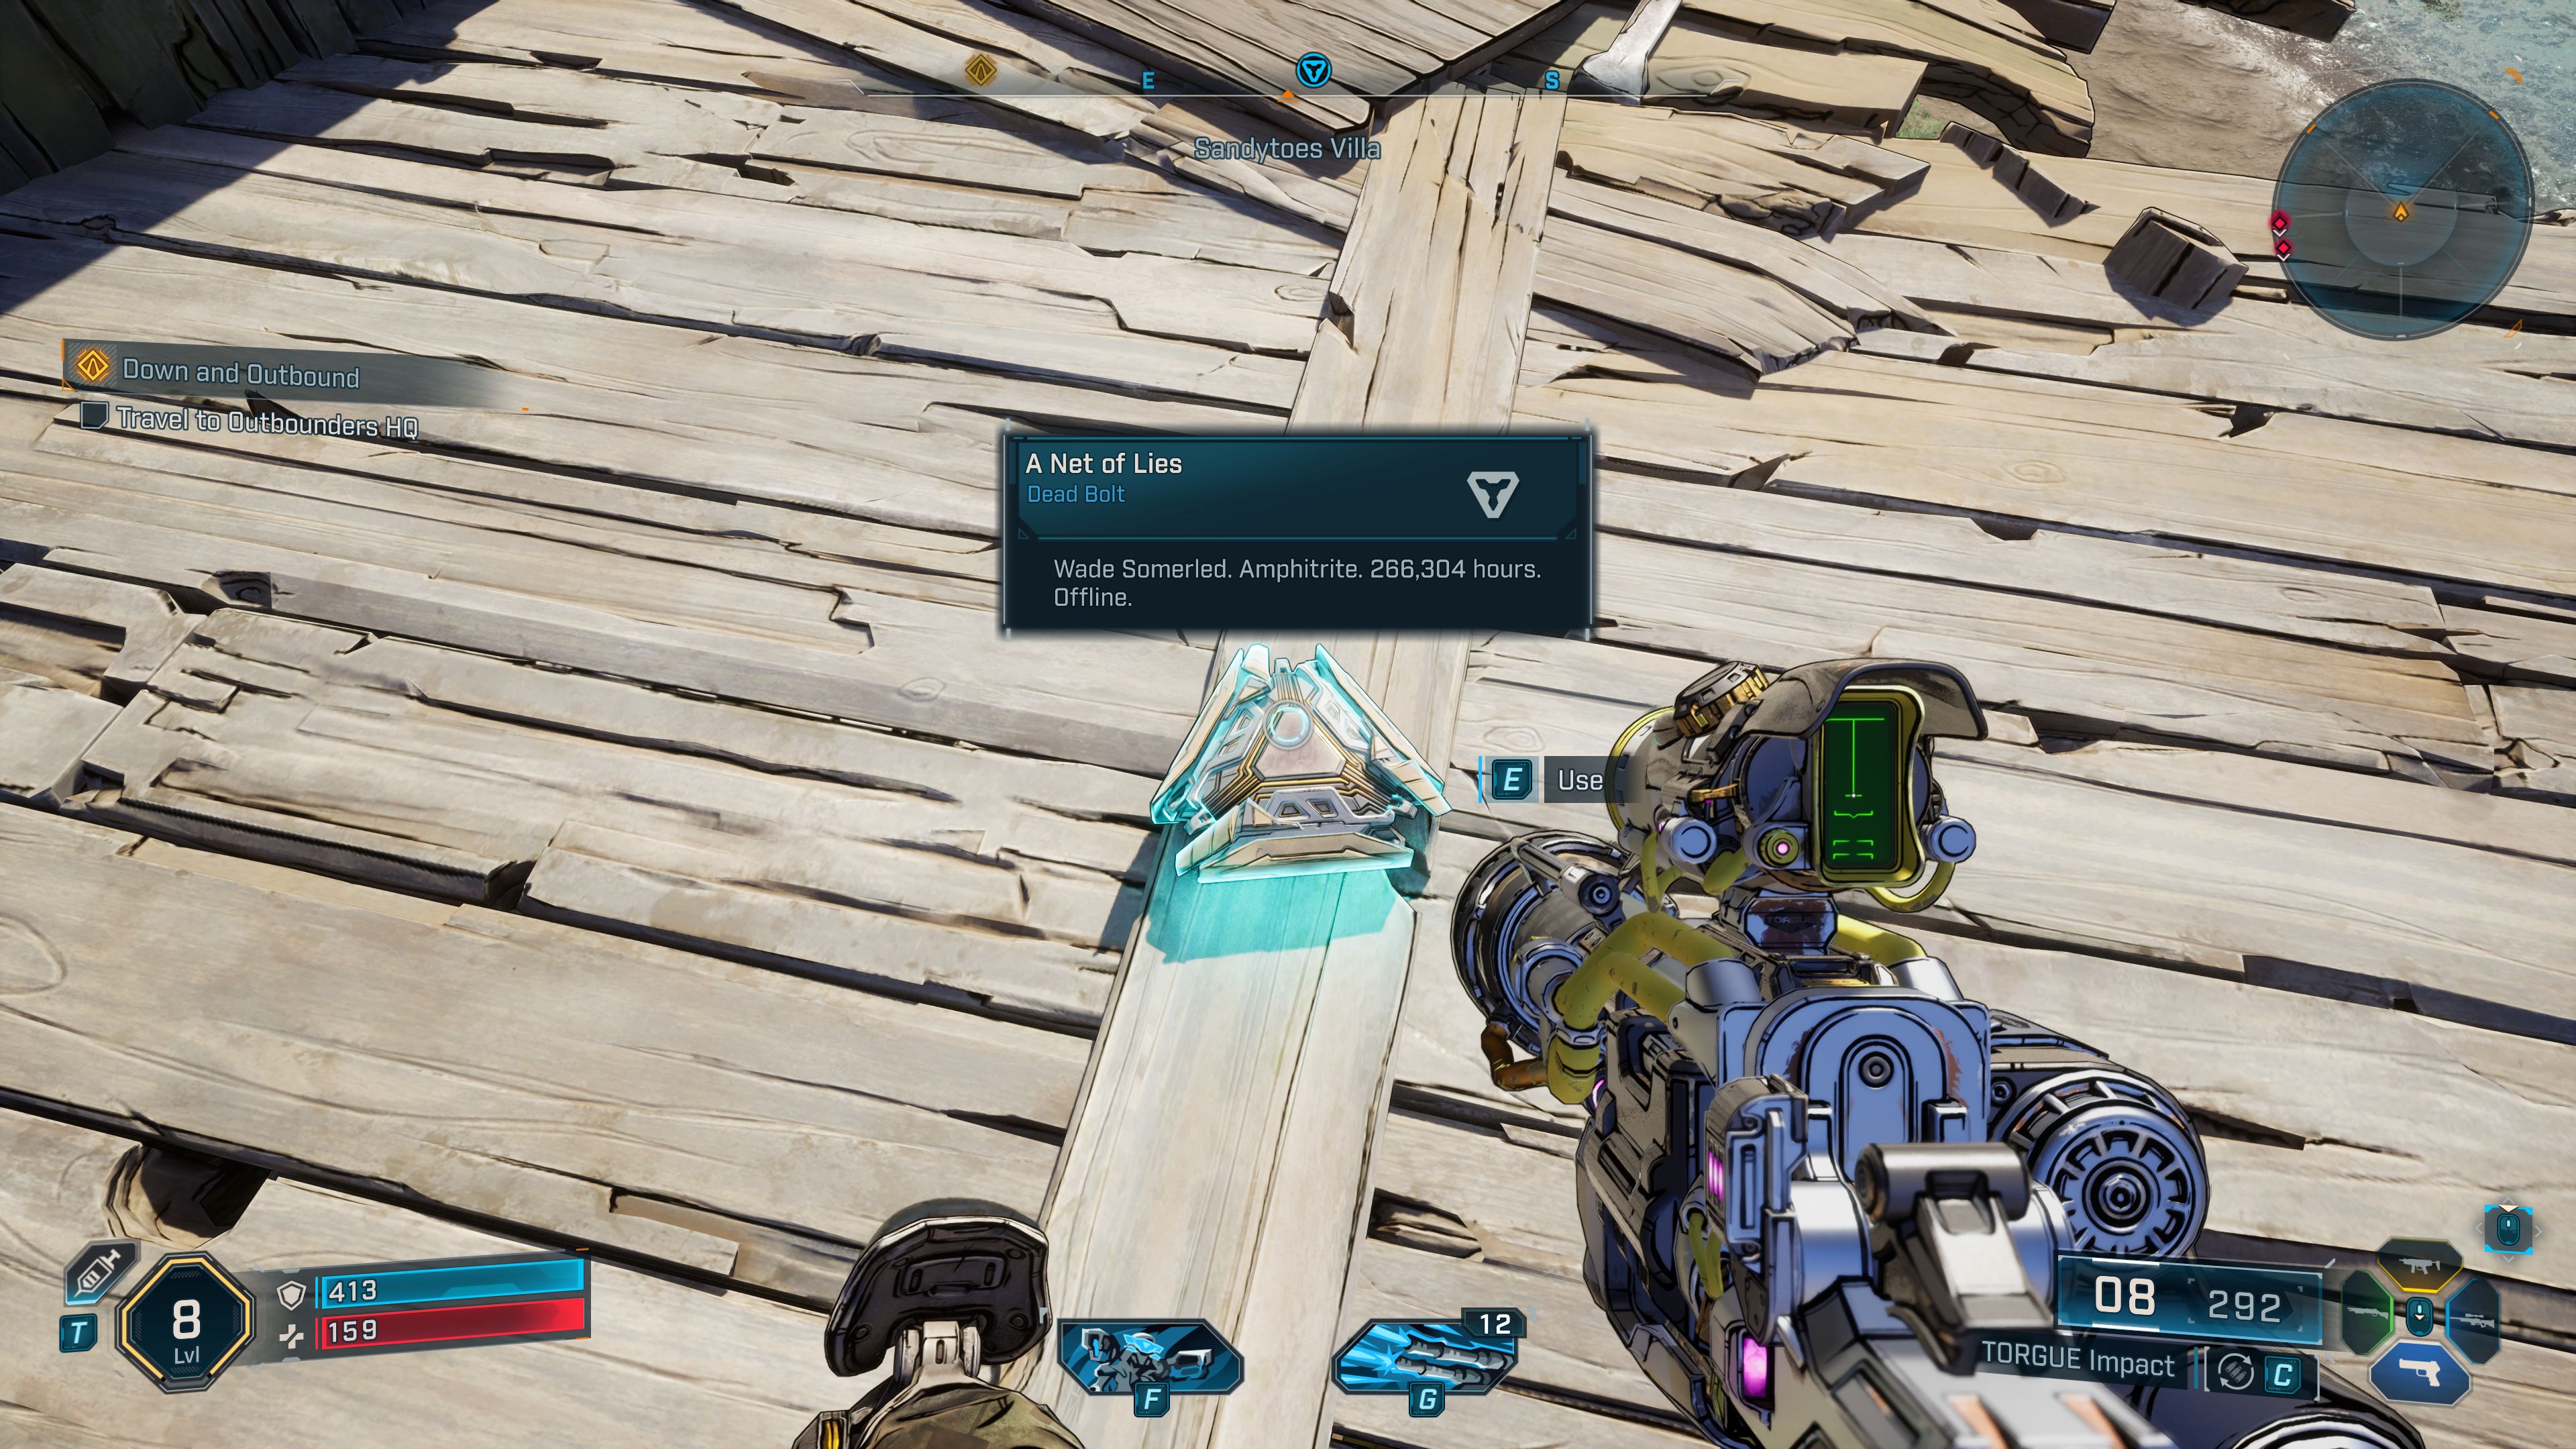
Snatch Me If You CanName: Melvina P. Lunt, Origin: Stribog, Initiated: 141,912 hours, Status: Offline Most Recent Inquiry: Sometimes you snatch the kratch. Sometimes, the kratch snatch you. | |
|
|
Into the MildName: Tracen Holt, Origin: Junpai-7, Initiated: 9,636 hours, Status: Offline. Most Recent Inquiry: Where did it all go wrong? Maybe I should've checked that the emergency flare was aimed upward before I fired it in that field of grass. Or I could've packed a map, compass, and lanterns, instead of that second sous vide. Or maybe I should've just listened to that Outbounder who said not to go glamping until mangler mating season ends. But at least I made it out of that kratch attack alive. Even managed to grab a tin of dry-rubbed roast, and this delightful steak-and-eggs scented candle! All right. Time to kick back, enjoy some leftover brunch by candlelight, and hope someone finds me. | |
Lost Capsule Collectibles in The Howl
| Icon | Name | |
|---|---|---|
|
|
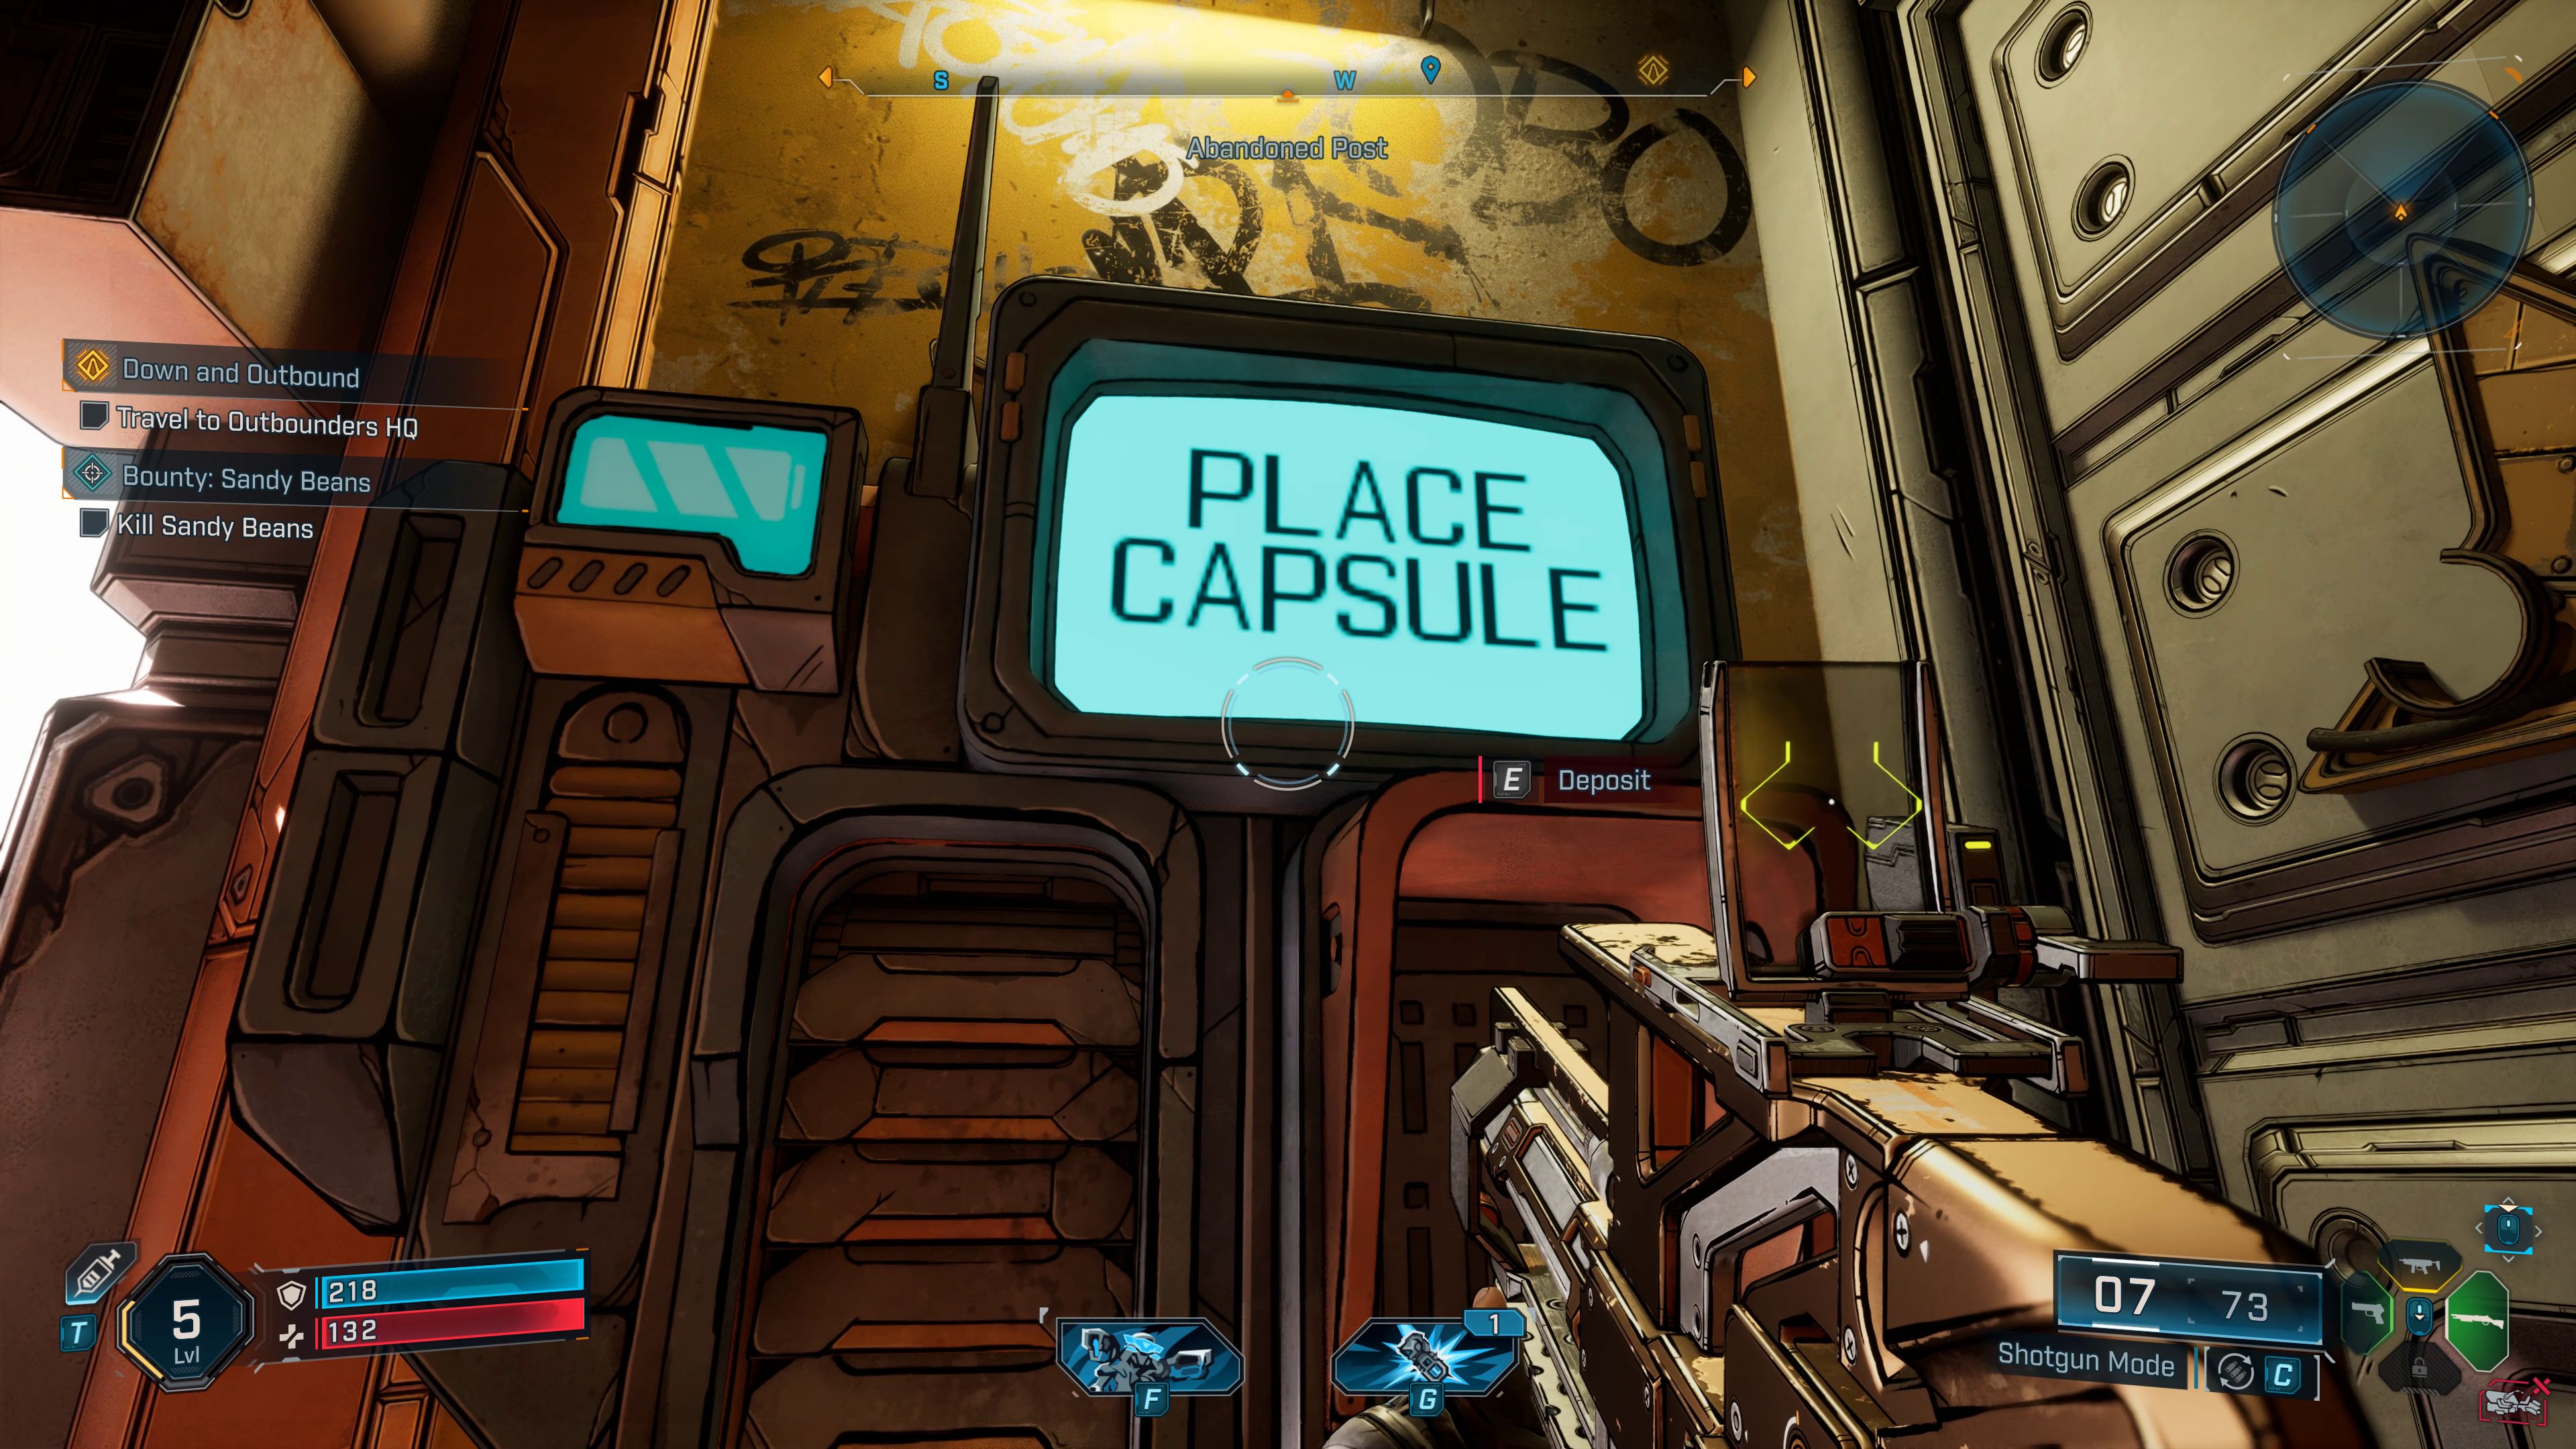
Encrypted code for Lost Capsule 01Inside small hut. You'll need to carry it on foot to The Launchpad. | |
|
|
Encrypted code for Lost Capsule 02The encrypted code is on the couch on the porch of the house in Ardor's Bounty, you must defeat the enemies first. You'll need to carry it on foot to Shut-Eye Keep. | |
|
|
Encrypted code for Lost Capsule 03In a cave next to the road. You'll need to carry it on foot to The Launchpad. |
|
Propaganda Speaker Collectibles in The Howl
| Icon | Name | |
|---|---|---|
|
|
Propaganda Speaker 01 | |
|
|
Propaganda Speaker 02Go from Rootdown Estates, you'll need to make your way through two large enemy camps. At the end, in the middle of the valley, you'll find a Propaganda Speaker. Before you start hacking it, kill everyone in the area. | |
Survivalist Cache Collectibles in The Howl
| Icon | Name | |
|---|---|---|
|
|
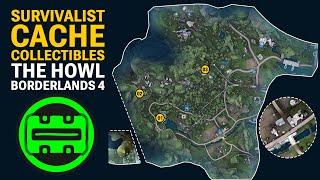
Survivalist Cache 01In the Gushing Turret basement, enter through the pipes on the water side. |
|
|
|
Survivalist Cache 02At the end of Tresher's Cave. You need to go through 3 rooms of Treshers, find a chest next to a destroyed walkway, turn into a side room and there is Survivalist Cache 02. |
|
|
|
Survivalist Cache 03The Survivalist Cache is inside a cave occupied by enemies, you must kill them first. |
|
Evocarium Collectibles in The Howl
| Icon | Name | Walkthrough |
|---|---|---|
|
|
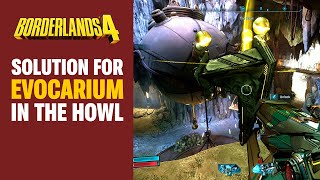
Evocarium 01Evocarium near Wreck of the Maester in The Howl. This planet is beautiful. Teeming with life, fertile and ferocious in equal measure. But it is also empty of any human presence. I've shouted from hilltops, lit signal fires, left messages in every language I know on every high place I passed. Nothing. If this planet is a prison, it's sorely lacking in prisoners. |
Vault Fragment Collectibles in The Howl
| Icon | Name | |
|---|---|---|
|
|
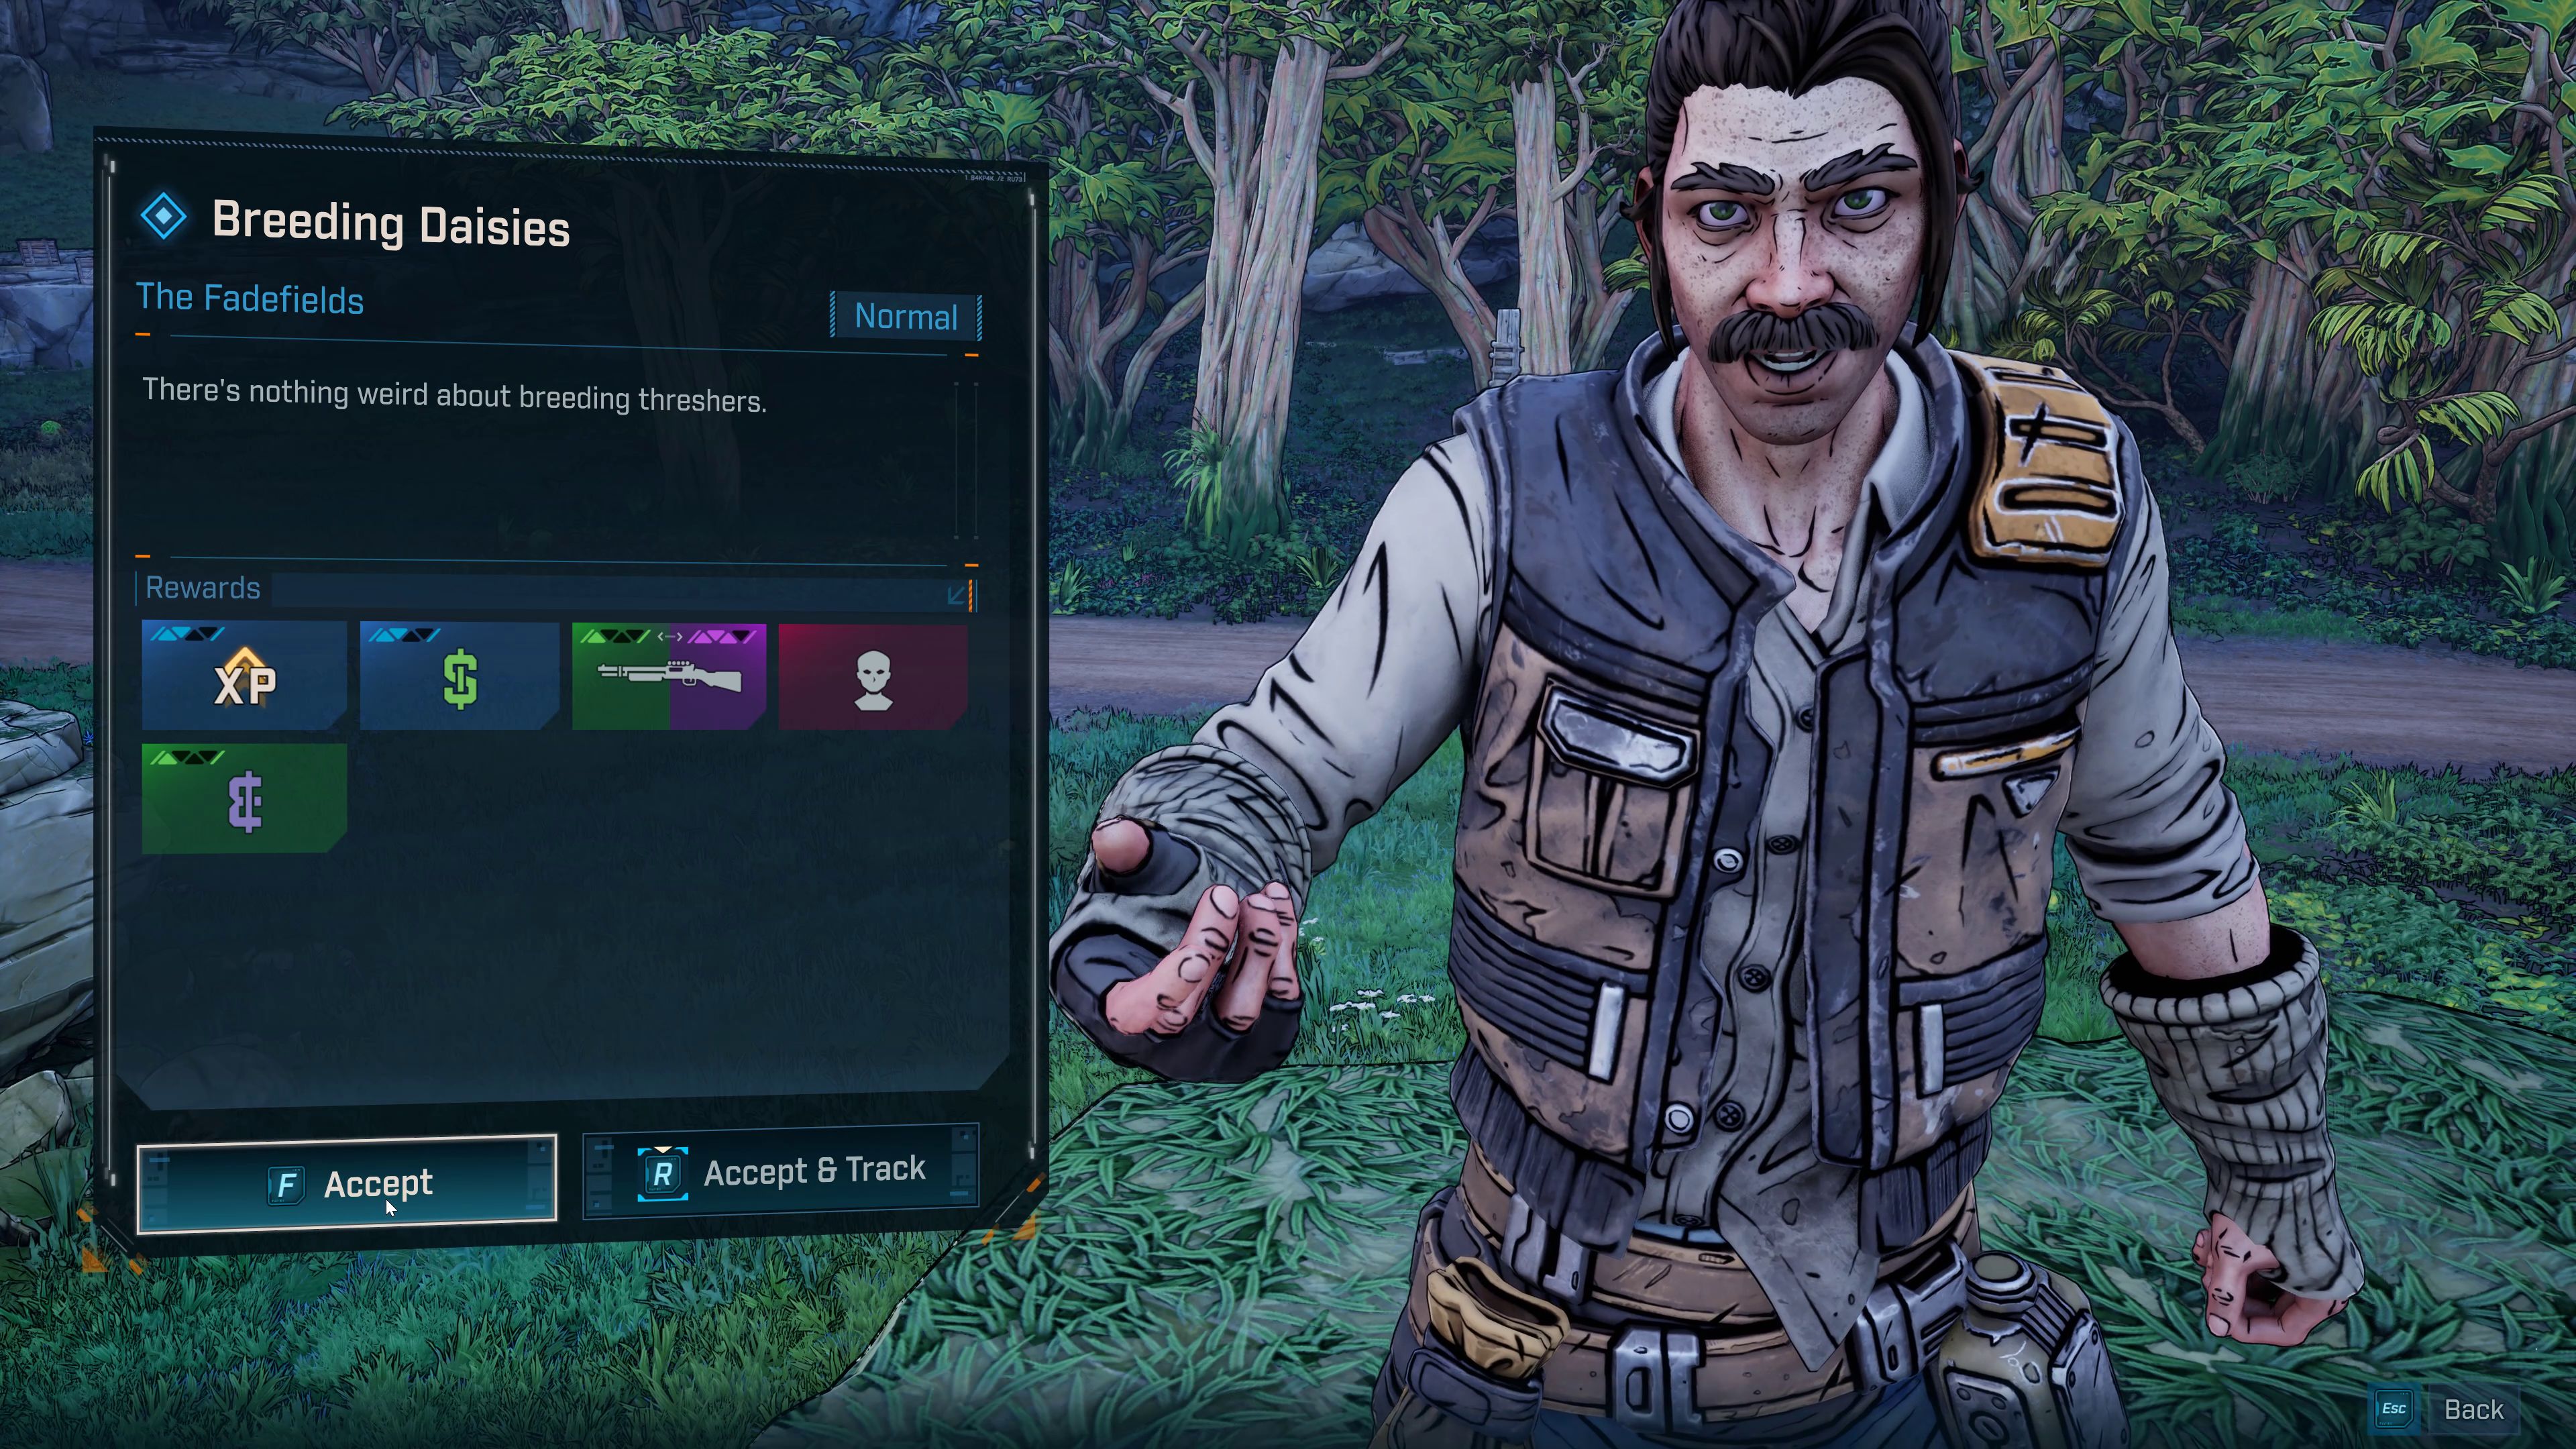
The Fadefields Vault Fragment 02Inside cave. |
|
Vault Symbol Collectibles in The Howl
| Icon | Name | |
|---|---|---|
|
|
Vault Symbol 01Vault Symbol Collectible in The Howl is in The Launchpad underground. |
|

Marcus Bobblehead Collectibles in The Howl
| Icon | Bobblehead | Walkthrough |
|---|---|---|
|
|
Bobblehead 01 |
|
|
|
Bobblehead 02 |
|
|
|
Bobblehead 03 |
|
|
|
Bobblehead 04 |
|
|
|
Bobblehead 05 |
|
|
|
Bobblehead 06 |
|
|
|
Bobblehead 07 |
|
|
|
Bobblehead 08 |
|
|
|
Bobblehead 09 |
|
|
|
Bobblehead 10 |
|
|
|
Bobblehead 11 |
|
|
|
Bobblehead 12 |
|
|
|
Bobblehead 13 |
|
|
|
Bobblehead 14 |
|
|
|
Bobblehead 15 |
|
|
|
Bobblehead 16 |
|
|
|
Bobblehead 17 |
|
|
|
Bobblehead 18 |
|
|
|
Bobblehead 19 |
|
|
|
Bobblehead 20 |
|
|
|
Bobblehead 21 |
|
|
|
Bobblehead 22 |
|
|
|
Bobblehead 23 |
|
|
|
Bobblehead 24 |
|
|
|
Bobblehead 25 |

Points of Interest in The Howl
| Icon | Name & Description | |
|---|---|---|
|
|
Rootdown Estates | |
|
|
Gushing Turret | |
|
|
Ardor's Bounty | |
|
|
Wreck of the Maester | |
|
|
Hollow Nob | |
|
|
Communications Balloon | |
Bosses in The Howl
| Icon | Name & Description | |
|---|---|---|
|
|
Core ObserverBoss inside Blacklime Bunker |
|
NPCs in The Howl
| Icon | Name & Description | |
|---|---|---|
|
|
RushRush is in the basement of The Launchpad - talk to him. Rush is the leader of the Outbounders. |
|
|
|
ConwayConway is Rush's assistant from Outbounders. |
|
|
|
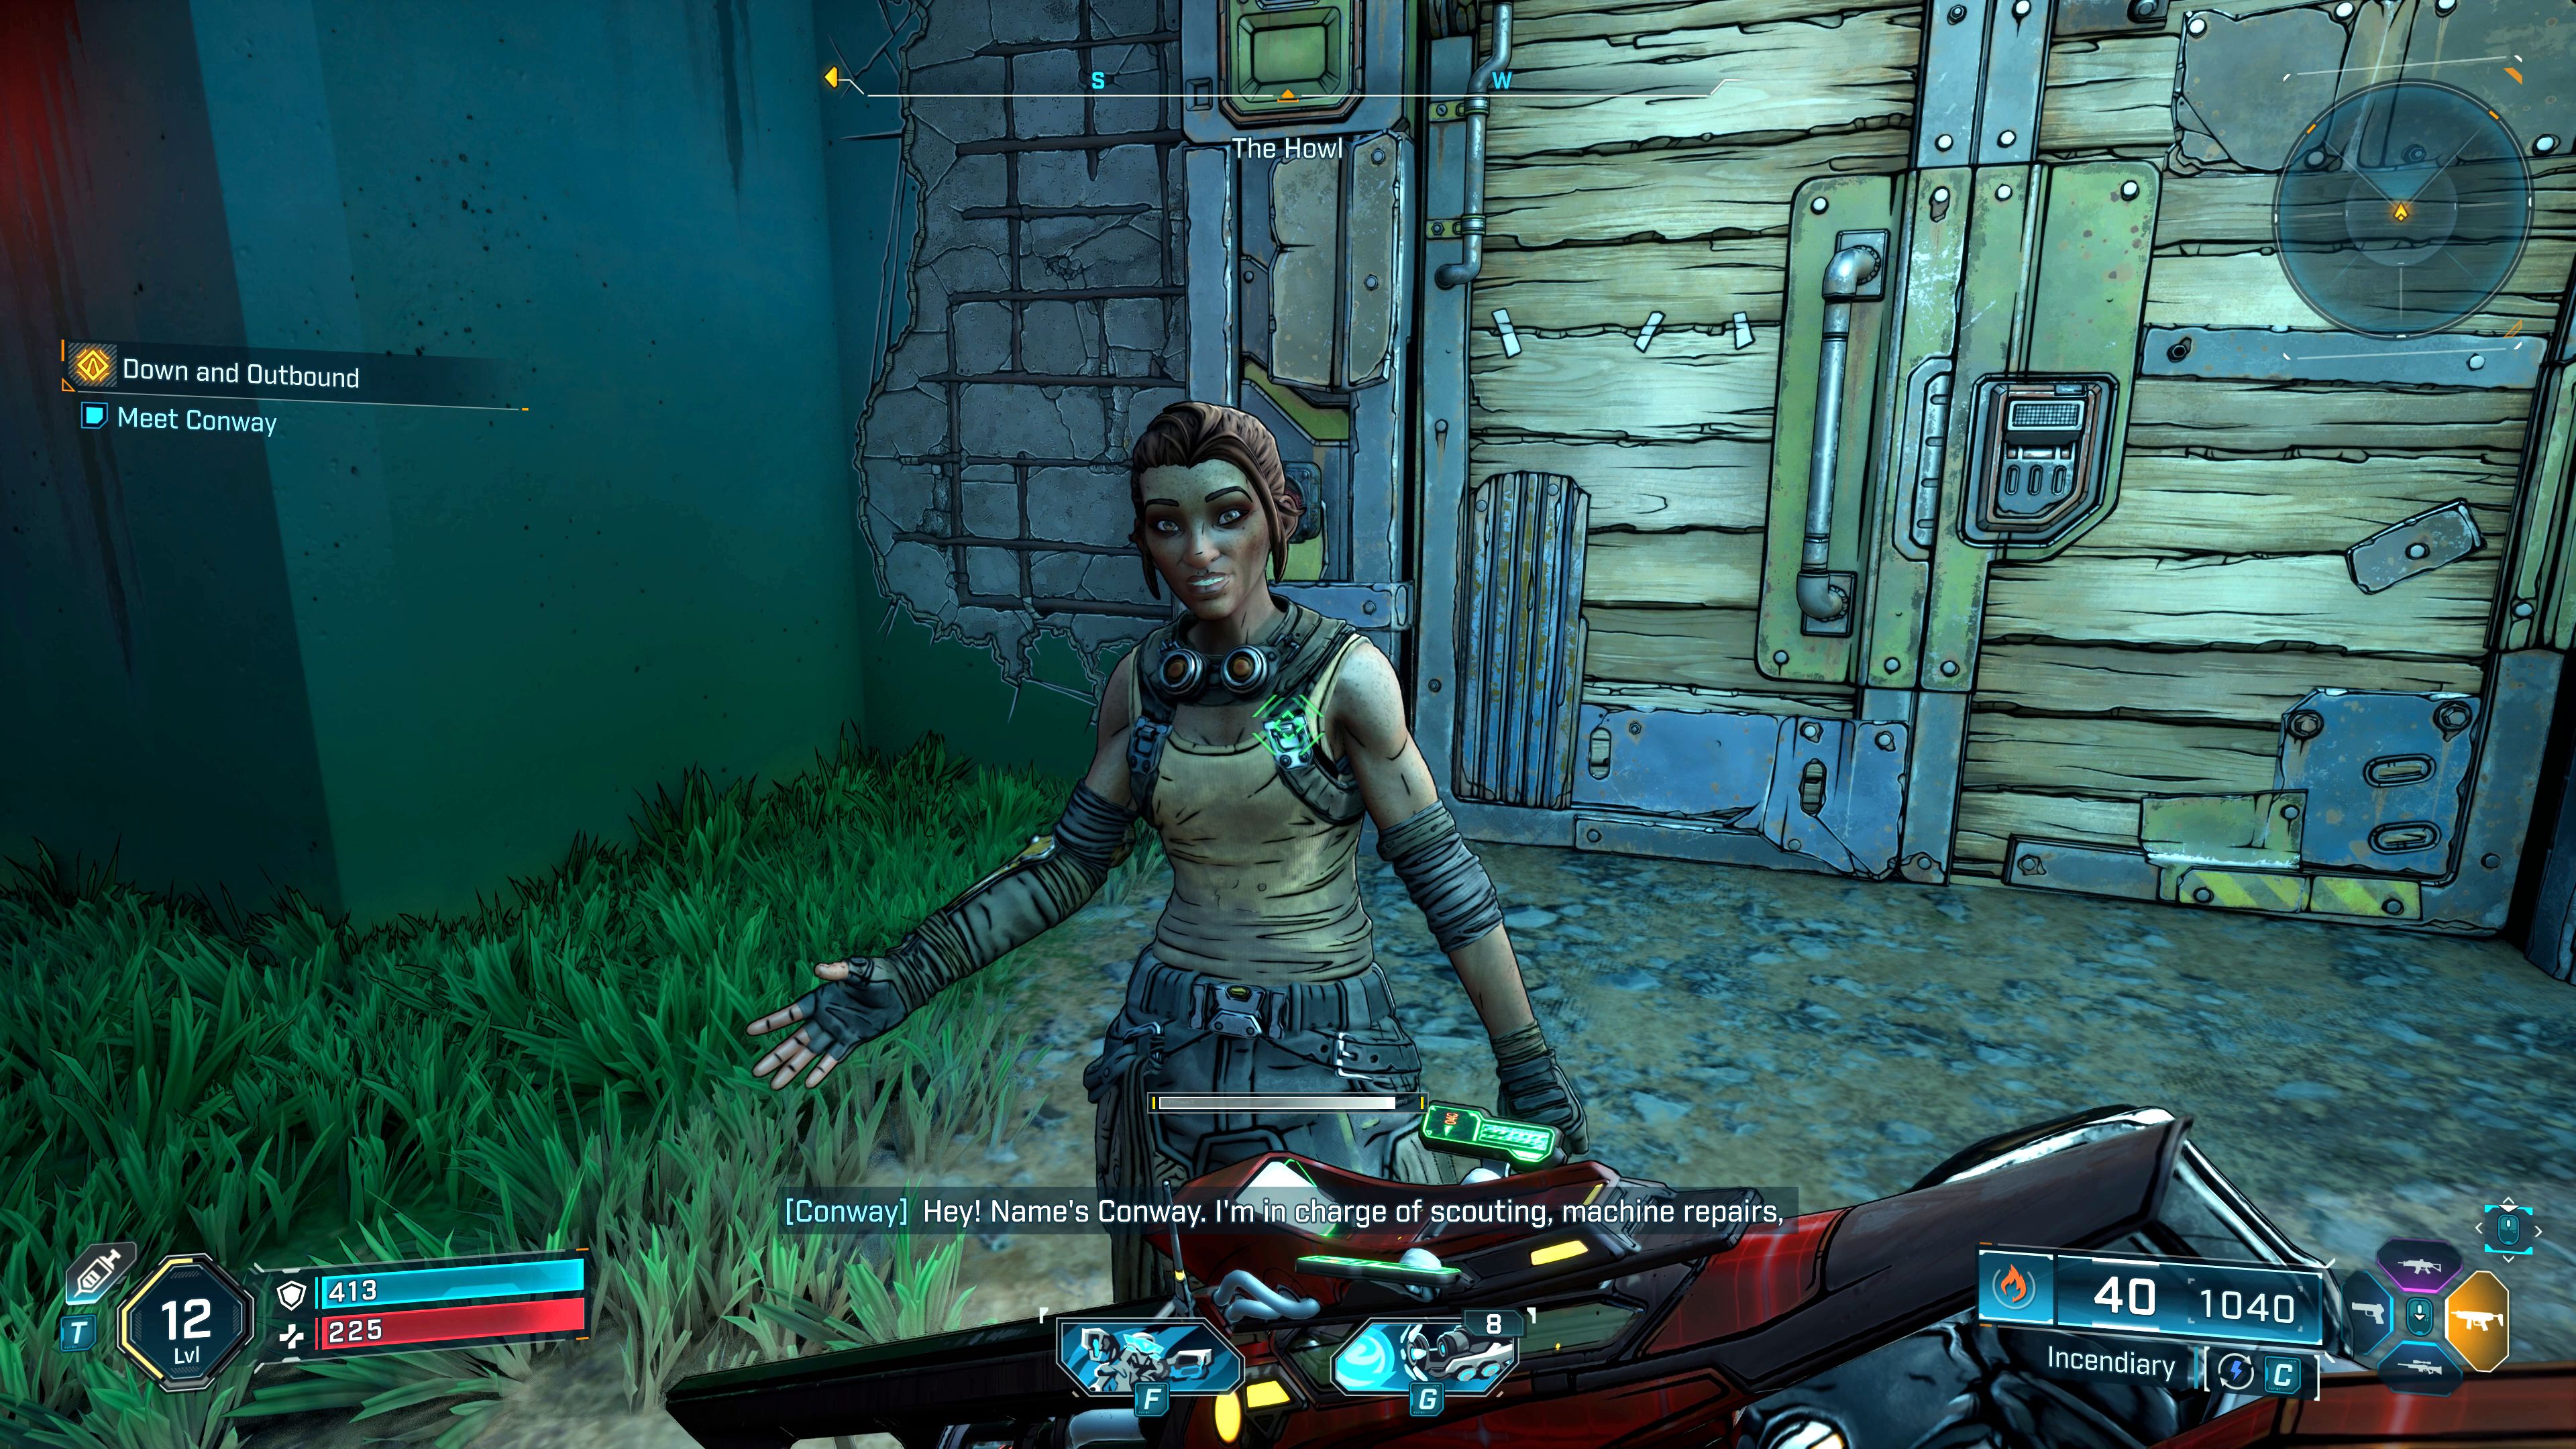
ZadraOrder scientist. |
|
|
|
MortTresher breeder Will give you Side Mission 05: Breeding Daisies. And after this Side Mission 06: Whack-A-Thresher. |
|

Borderlands 4 Map Legend
| Icon | Description | |
|---|---|---|
MissionsThere are Main Story Mission and Side Mission (including Faction Missions) in Borderlands 4. | ||
|
|
Main Mission (Story)The location where you complete the previous one and receive the next Borderlands 4 Story Mission. There are 25 Main Story Missions in Borderlands 4. After completing all Main Missions, i.e. completing the Borderlands 4 storyline, you will be able to return to previous locations to complete all previously unfinished activities. Story Missions guide you through the story of your adventure in the world of Kairos. You don't have to complete them first, you can pursue other activities between Story Missions. |
|
|
|
Side Mission GiverThere are about 100 Side Missions in Borderlands 4, including Faction Missions. It's worth doing them as soon as we find them, during breaks in Main Story Missions. Side Missions are unrelated to the main story, each has its own plot. They often form a series of missions, with completing one unlocking another. Each Side Mission starts in a specific location, there may be more than one of these locations, and offers a set of rewards for completing them. |
|
ActivitiesThere are 6 types of Activity Locations in Borderlands 4: Safehouse, Order Silo, Ancient Crawler, Ripper Drill Site, Order Bunker and Abandoned Auger Mine. Each Map in Borderlands 4 has its own set of Activities required to "complete" a given zone, but it may happen that not all Activities will be available from the moment you find them, some will open as you progress through the story. | ||
|
|
SafehouseTo take over the Safehouse, you have to find the Datapad with the key that opens it and use it on the Command Console. Once you take control of the Safehouse, it will serve as a Fast Travel Point and grant you access to the Vending Machines, Contract Board and Decrypt Station. There are 14 Safehouses in Borderlands 4. |
|
|
|
Contracts BoardContract Boards can be found inside captured Safehouses and in Faction Towns. Contract Boards can be used to acquire Bounty Contracts, simple tasks unrelated to Missions and Story that grant rewards and experience. |
|
|
|
Order SiloTo take control of the Order Silo, you must defeat the enemies guarding it and activate the console, which releases a communications balloon that detects the locations of Vault Fragments in the area. Once you acquire the Order Silo, it will serve as a Fast Travel Point and grant you access to the Vending Machines. There are 9 Order Silos in Borderlands 4. |
|
|
|
Communications BalloonThe Communications Balloon is released into the air from the nearby Order Silo. Besides discovering nearby Vault Fragments, it allows you to fly at high altitudes and reach previously inaccessible locations. To use the Balloon, approach it, attach to the engine on the rope, and you will be pulled upwards. How to fly far: It's important that when you're released from the rope at the top, don't start gliding. First, use the force that launched you into the air and use only the directional keys to head towards your desired destination. Only at the final moment of the flight, when you feel like you're falling too quickly, begin gliding. |
|
|
|
Ancient CrawlerTo complete Ancient Crawler you must kill enemies in this area, find the battery, deposit it in the station and climb to the top of the tower to collect the item. There are 11 Ancient Crawlers in Borderlands 4. |
|
|
|
Ripper Drill SiteTo complete the Ripper Drill Site, you must survive the growing waves of enemies and hold out until the Boss appears, which you must kill. There are 6 Ripper Drill Sites in Borderlands 4. |
|
|
|
Order BunkerEnter Order Bunker, explore it and kill boss. You can enter Order Bunkers after Main Mission 5: One Fell Swoop. Visiting the Order Bunkers is available later in the story, after completing Main Mission 5: One Fell Swoop. There are 6 Order Bunkers in Borderlands 4. |
|
|
|
Abandoned Auger MineTo finish the Abandoned Auger Mine, enter the cave, find and kill its boss. Visiting the Abandoned Auger Mines is available later in the story, after completing Main Mission 11: Shadow of the Mountain. There are 7 Abandoned Auger Mines in Borderlands 4. |
|
CollectiblesThere are over 300 Collectibles in Borderlands 4 and the are: Vault Fragments, ECHO Logs, Dead Bolts, Vault Hunter’s Guides to Kairos, Vault Symbols, Evocatoriums, Survivalist Caches, Auger Shrines, Electi Safes, Propaganda Speakers, Lost Capsules and Marcus Bobblehead. Not all Collectibles in Borderlands 4 are available when you first visit a given location; some of them are available later in the game's story, e.g. while completing specific Missions or in locations locked at the beginning. | ||
|
|
Vault Key FragmentVault Fragments are used to open Primordial Vaults. You need three fragments for one key. The location of the Vault Fragments is shown by a released Communications Balloon. There are 9 Vault Key Fragment Collectibles in Borderlands 4. |
|
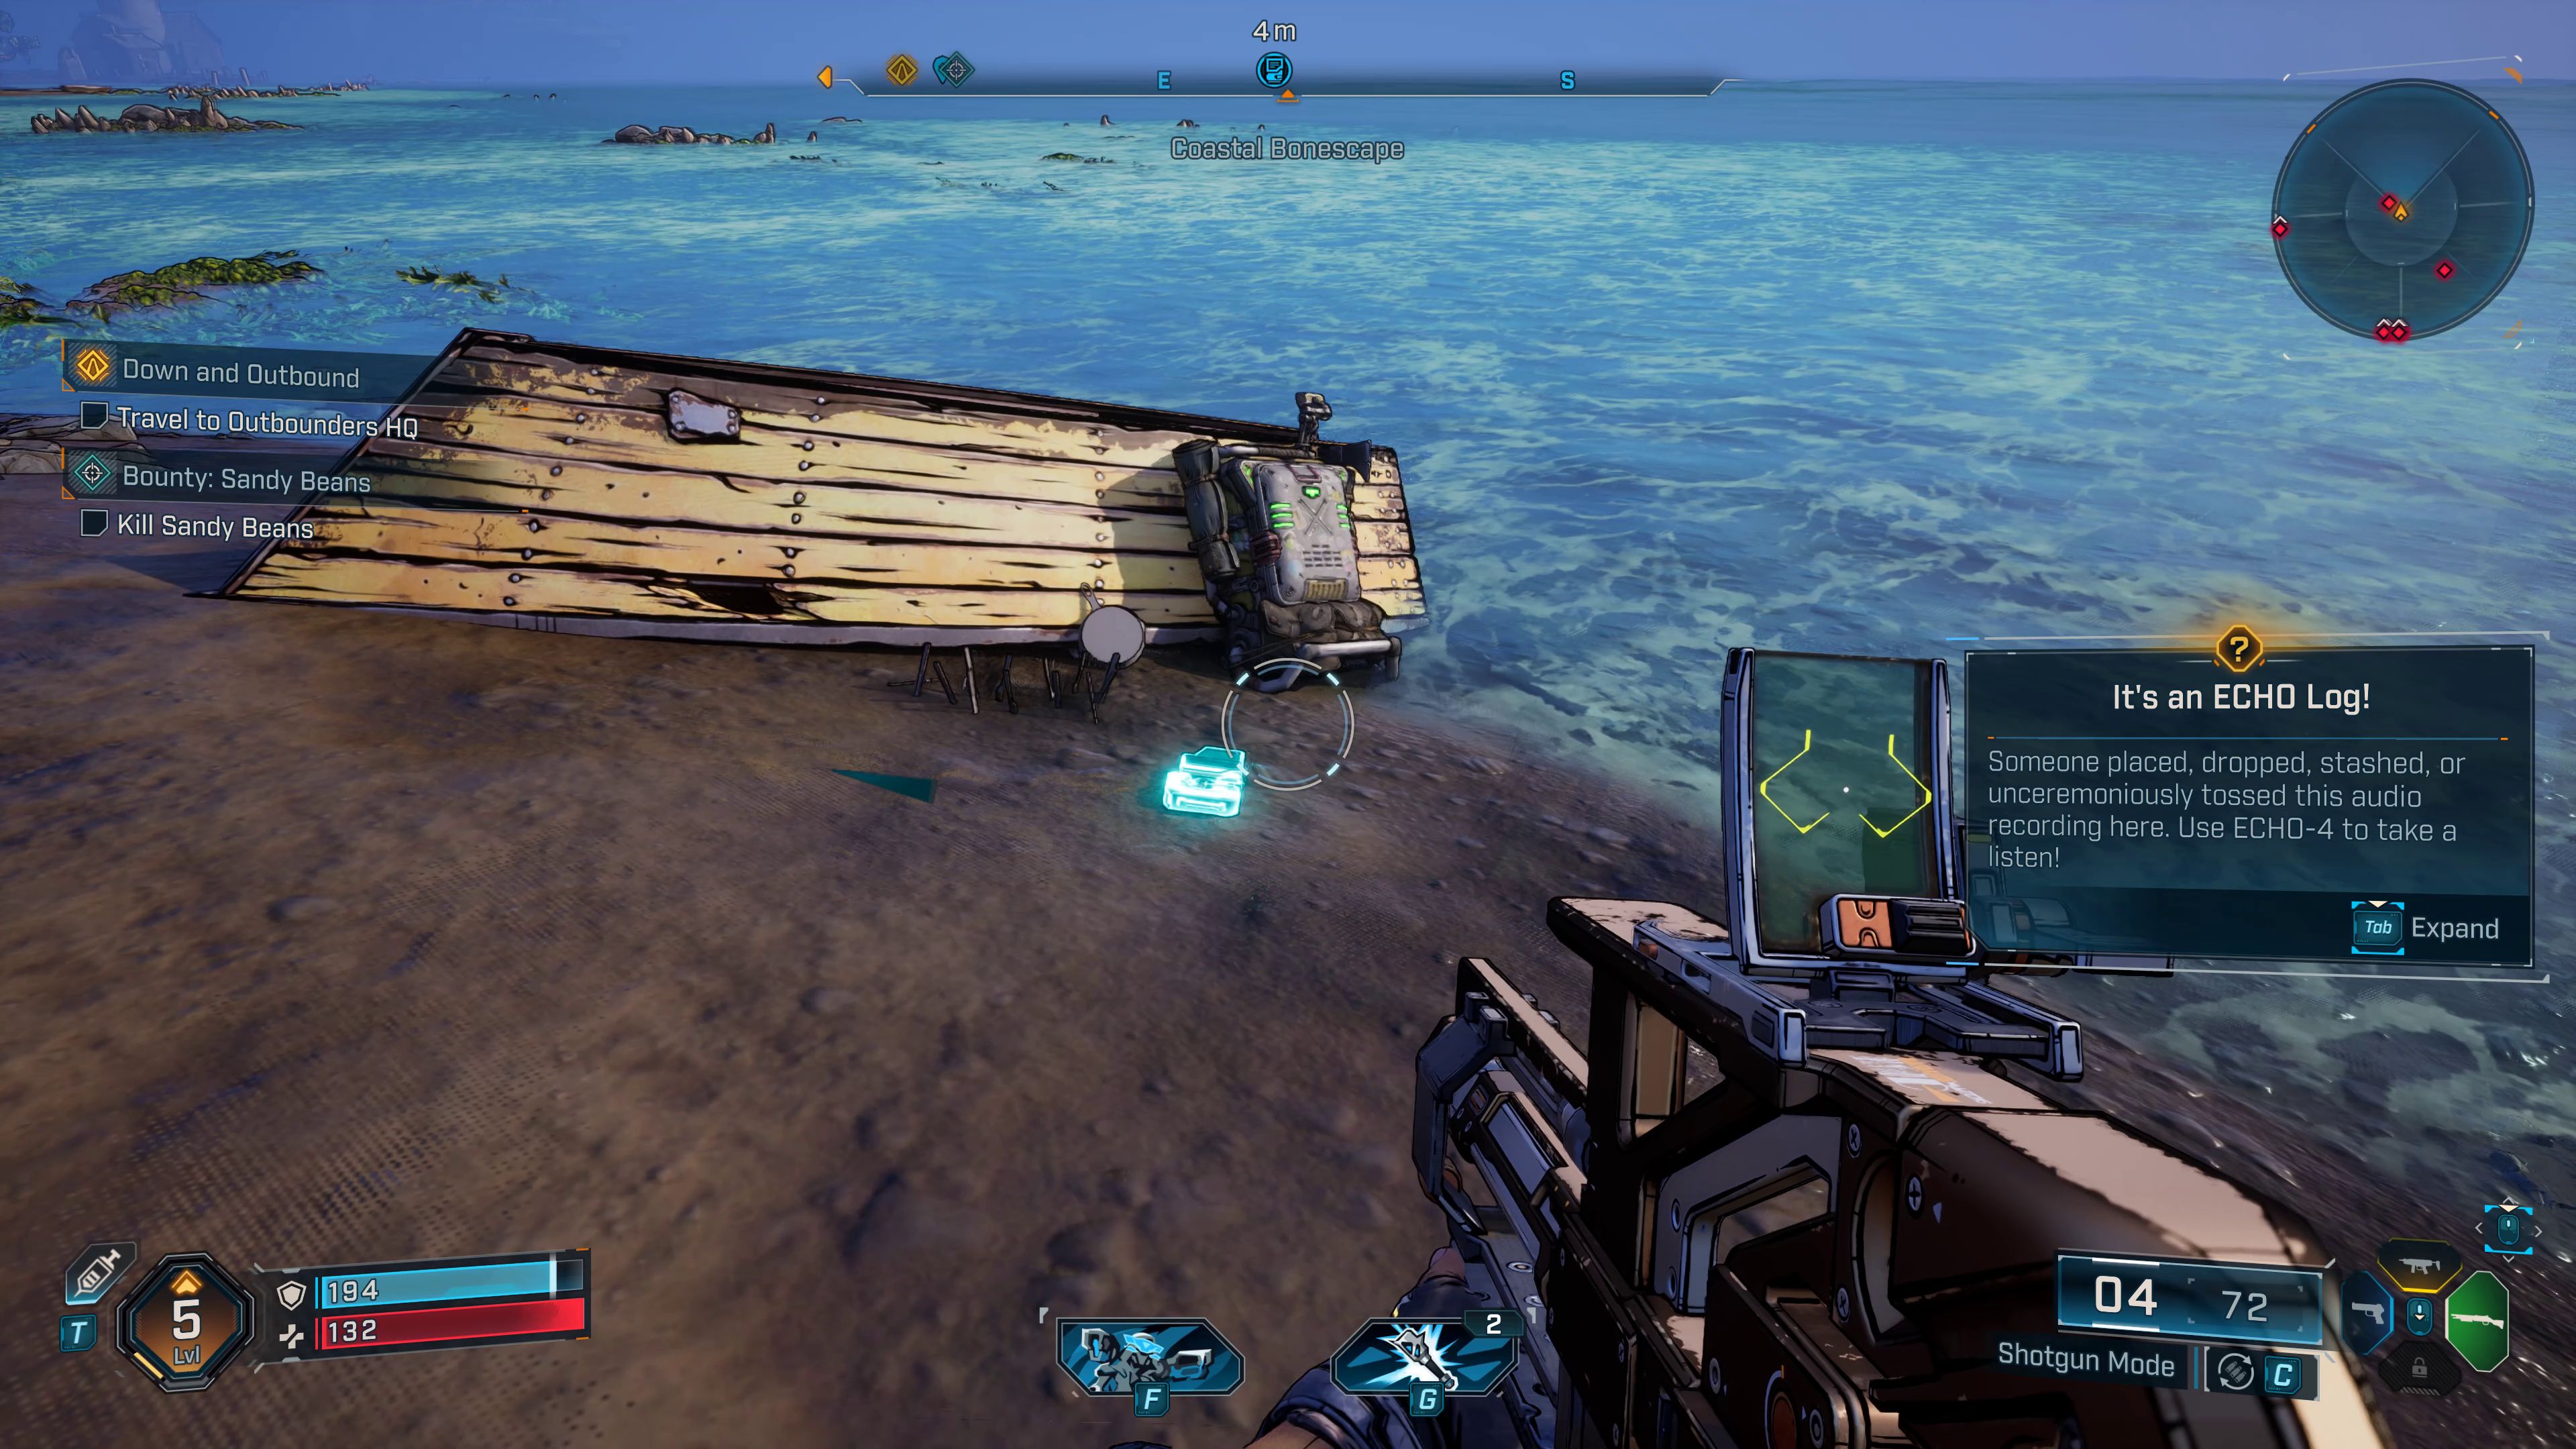
|
|
ECHO LogECHO Logs are lost audio recordings you find while exploring Kairos, introducing you to the lore of the world and supplementing other content you encounter in the story. There are about 150 ECHO Log Collectibles in Borderlands 4. |
|
|
|
Dead BoltDeadbolts are fragments of information contained in small metal objects. There are 39 Dead Bolt Collectibles in Borderlands 4. |
|
|
|
Vault Hunter’s Guide to KairosVault Hunter’s Guides to Kairos are necklaces containing audio recordings about the game world. There are 12 Vault Hunter’s Guide to Kairos Collectibles in Borderlands 4. |
|
|
|
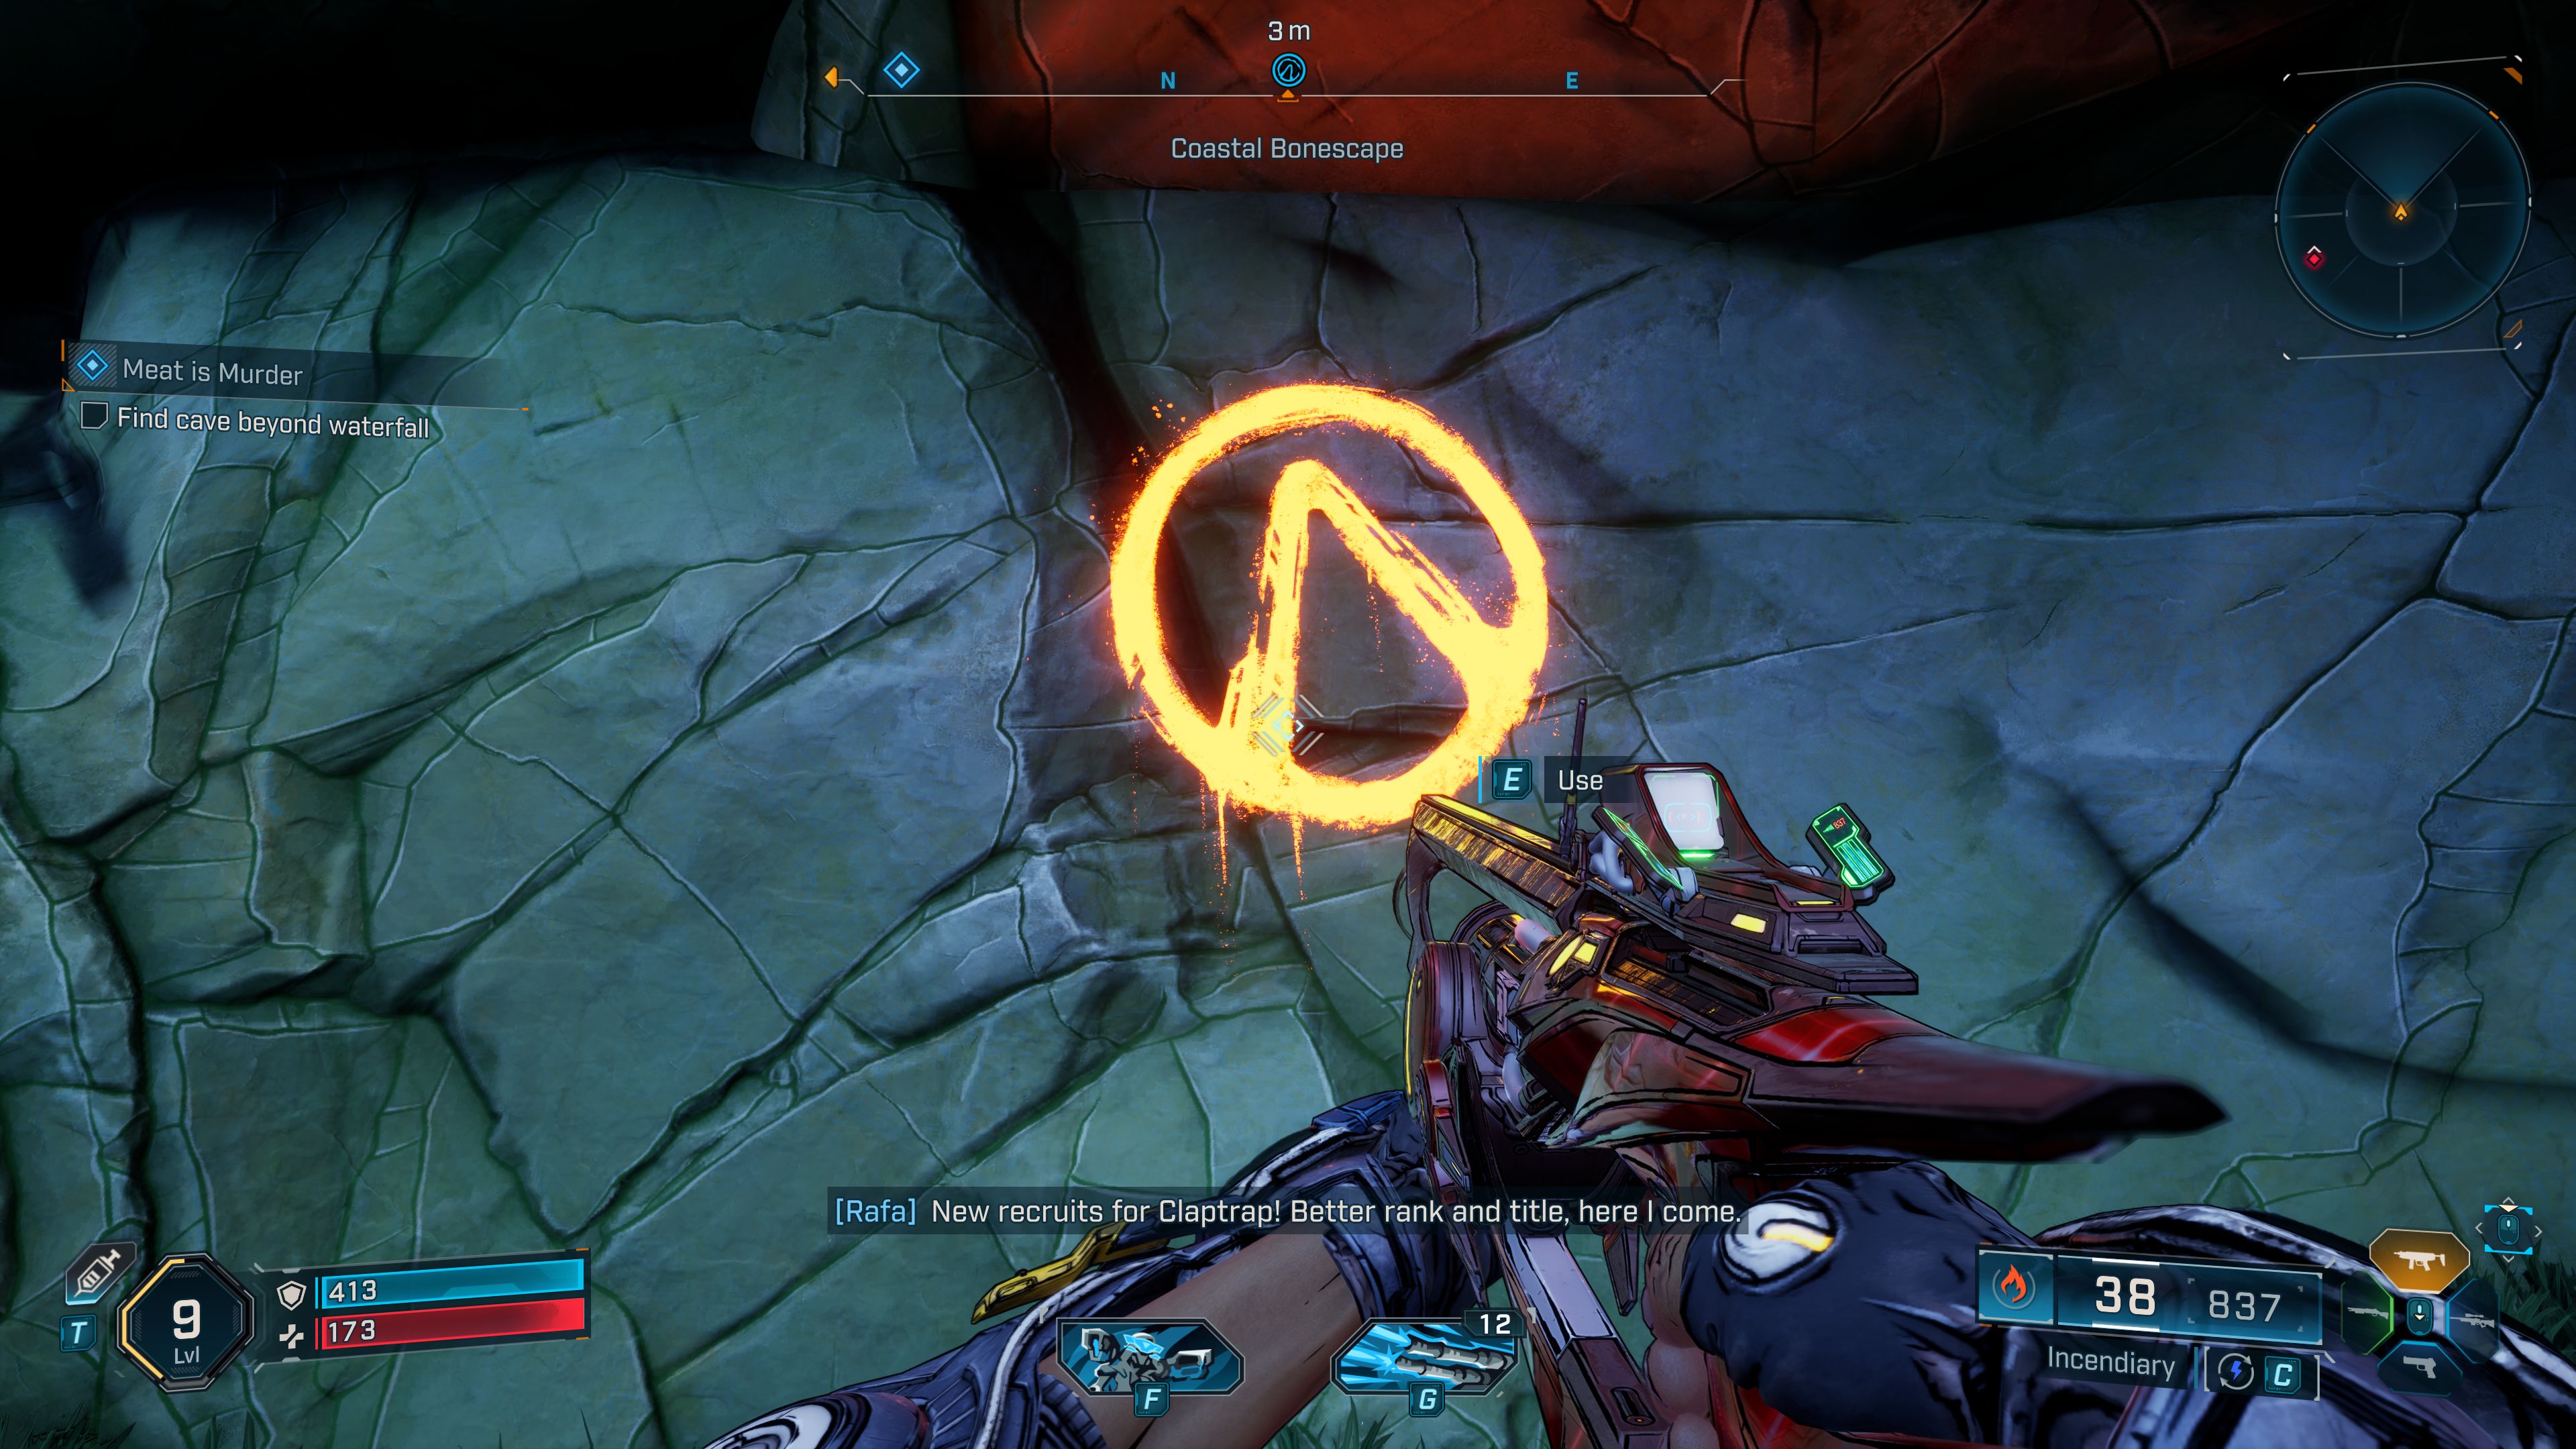
Vault SymbolVault Symbols are Vault Hunters symbols painted on the walls with yellow paint. There are 46 Vault Symbol Collectibles in Borderlands 4. |
|
|
|
EvocariumEvocariums are simple puzzles you must solve. Solving an Evocarium involves interacting with the central object and tracking down and finding the three glowing orbs that the beams will guide you to. At the end, you will receive a message. There are 18 Evocarium Collectibles in Borderlands 4. |
|
|
|
Survivalist CacheSurvivalist Caches can only be found on maps in The Fadefields region, they are large crates with weapons and equipment. There are 10 Survivalist Cache Collectibles in Borderlands 4. |
|
|
|
Auger ShrineYou can pray at the Auger Shrines, they are only found in the Terminus Range Region. There are 10 Auger Shrine Collectibles in Borderlands 4. |
|
|
|
Electi SafeLittle Electi Safes, hit to open, they are only found in Carcadia Burn and Dominion City Regions. There are 13 Electi Safe Collectibles in Borderlands 4. |
|
|
|
Propaganda SpeakerECHO-4 will hack the Propaganda Speaker while you defend it from incoming waves of enemies. You cannot leave the Propaganda Speaker area until ECHO-4 completes the task. There are 27 Propaganda Speaker Collectibles in Borderlands 4. |
|
|
|
Lost CapsuleThe Lost Capsule Collectible is an encrypted code to the Crimson Resistance Supply Cache. Once you find it, you must take it to the Safehouse and use the Decrypt Station to decode it. You must return the Lost Capsule to the Safehouse on foot, holding it in your hand at all times. You'll receive a reward for doing so. There are 20 Lost Capsule Collectibles in Borderlands 4. |
|
|
|
Marcus BobbleheadMarcus Bobbleheads are a special type of hidden collectible in Borderlands 4. They are not marked on the map and are located in less frequented areas during normal gameplay. These are small figurines that you must find and click. Randy Pitchford, founder of Gearbox Software, the creator of Borderlands 4, has announced that finding all the Marcus Bobbleheads will be the ultimate challenge in Borderlands 4, one that only a select few players will be able to complete. Finding all the Marcus Bobbleheads does not affect the game's story or completion. There are over 200 Marcus Bobblehead Collectibles in Borderlands 4. |
|
Other Locations | ||
|
|
Point of InterestVisit all Points of Interest on the map. |
|
|
|
Faction Town |
|
|
|
Fast Travel Station |
|
|
|
Level Travel Station |
|
|
|
Active CheckpointThe location where you respawn after death. The Active Checkpoint location is selected automatically and will be the last checkpoint near which you died. |
|
|
|
Boss |
|
|
|
Fortress |
|
|
|
Vault EntranceEntrance to Primordial Vault, A special location, a labyrinth ending with a fight with the Vault Guardian Boss. There are 3 Primordial Vaults (one for each region except Dominion) in Borderlands 4. You need 3 Vault Key Fragments per key to enter. |
|
Vending | ||
|
|
Bank of Kairos |
|
|
|
Zed's Meds Vending Machine |
|
|
|
Zed's Munitions Vending Machine |
|
|
|
Ammo Vending Machine |
|
|
|
Lost Loot MachineThe Lost Loot Machine collects equipment inadvertently left behind but not dropped on the ground. Items can be recovered, inspected and trashed within the machine. When at capacity, equipment of lower quality and level are automatically replaced. |
|
|
|
Respec Machine |
|
|
|
Firmware Transfer Machine |
|
Weekly ActivitiesWeekly Activities will be available after completing the Borderlands 4 storyline. | ||
|
|
Maurice's Black MarketHidden Vending Machine with Legendary Item every week. |
|
|
|
Moxxi's Big EncoreYou can replay the fight with the selected Boss in a more difficult version. |
|
|
|
Wildcard Mission GiverYou can replay selected Mission in a more difficult version and get Legendary Item reward. |
|
User Comments
All your comments, suggestions and corrections are very welcome. Your experience in the game will help other players. I will read each of your comments and try to add to the content on this page based on them. Thank You.